
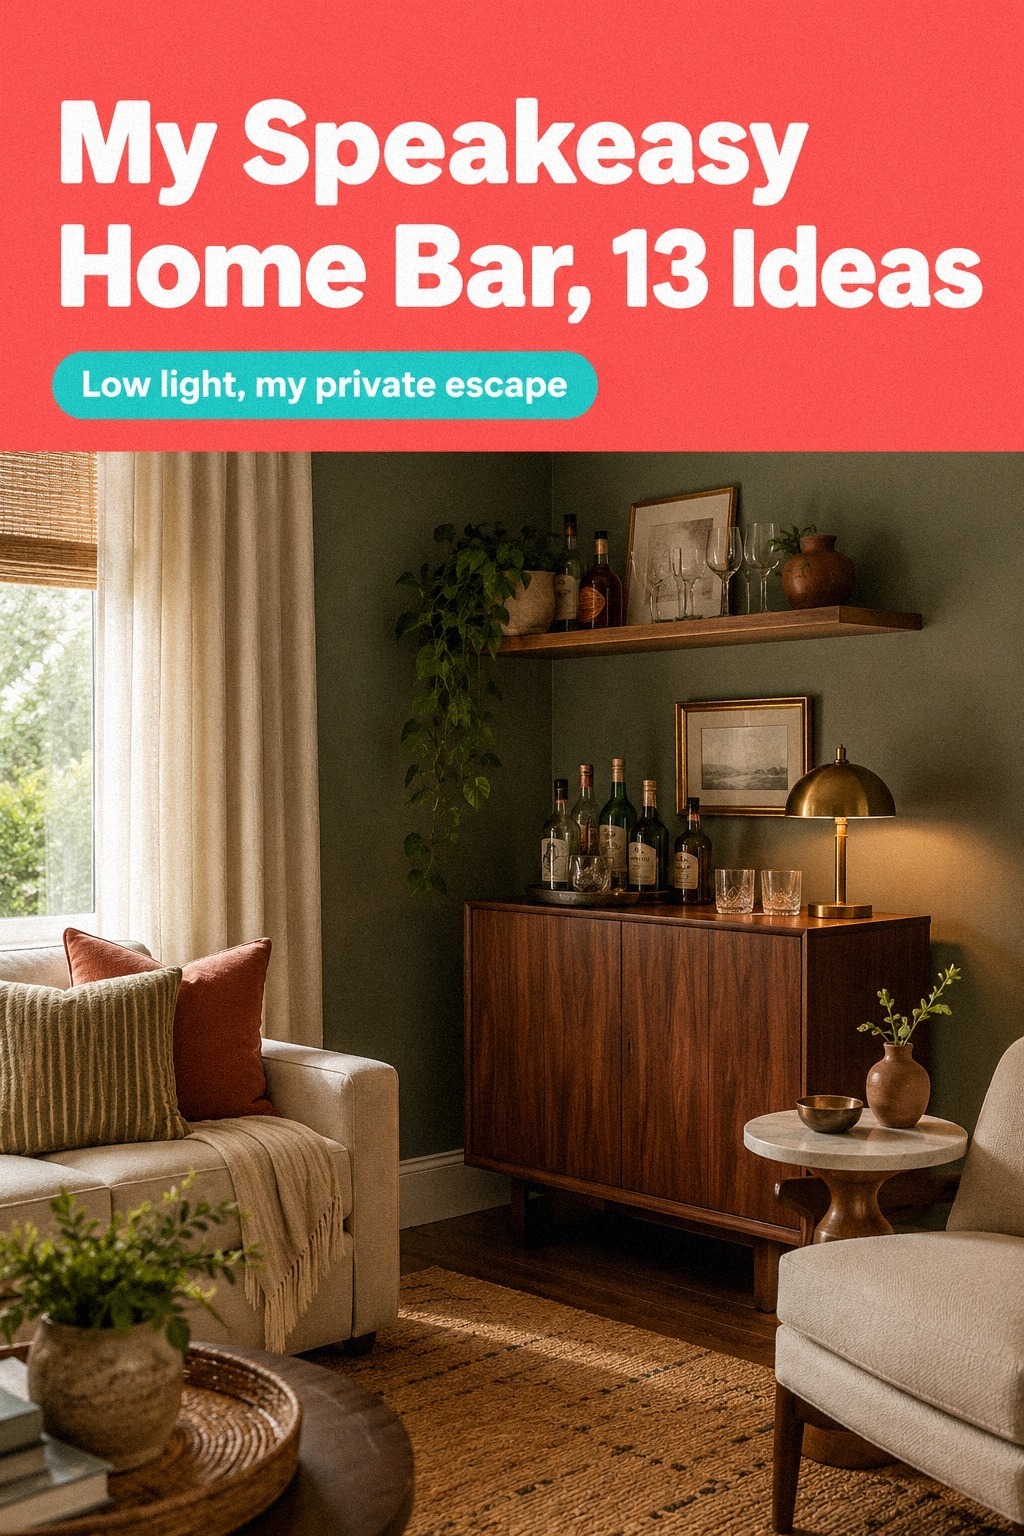
Speakeasy home bar design ideas for the ultimate hangout worked because I stopped treating this living room corner like dead space and built it around a living room corner you would want to linger in. I did it in a room that already had a sofa, a traffic path, and exactly zero extra square footage. And somehow it is where everyone ends up now!
- ✓ Clear the living room corner for a detail bar
- ✓ Darken the walls with tobacco brown paint
- ✓ Choose a cabinet that hides the bottles
Here’s what it looked like before
Before I started, this side of the living room had the full awkward-corner package: one undersized plant stand, a cold floor lamp, and a blank patch of wall that made the seating area feel unfinished. You could walk past it ten times and still not see a reason to stop there.
That was the problem. The room had seating, but it didn’t have gravity.
I also knew I did not want a loud built-in bar cart moment. You know the kind.
Bottles out, labels everywhere, shiny hardware doing all the talking. I wanted the opposite: something tucked in, darker, quieter, and a little theatrical.
If you love that mood too, my favorite roundup of dark moody speakeasy decor ideas for ultimate cozy drama is the closest thing to the original rabbit hole that sent me down this path.
- Clear the living room corner for a detail bar
- Darken the walls with tobacco brown paint
- Choose a cabinet that hides the bottles
- Add brass rails across the lower shelves
- Hang smoked mirrors behind the glassware
- Set leather stools beside the cabinet
- Use amber sconces instead of overhead light
- Style decanters on a marble tray
- Frame vintage portraits around the bar
- Tuck cocktail tools inside a drawer
- Layer a dark rug under the stools
- Add velvet curtains behind the seating
- Finish with one tiny table lamp
1Clear the living room corner for a detail bar
First, I pulled everything out of the corner and measured the footprint I could steal without wrecking the room flow. In a small living room, you do not need a huge bar.
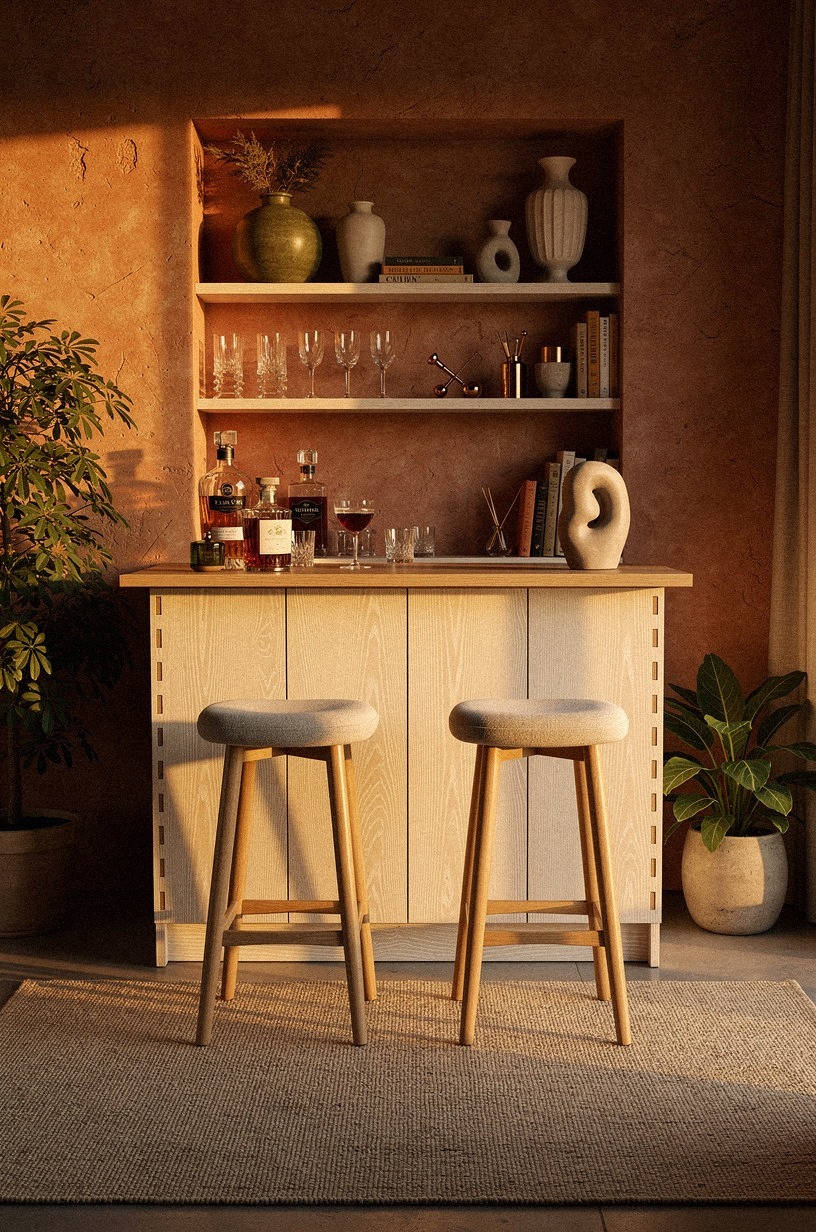
You need a clean rectangle that still lets your body move naturally from sofa to chair to doorway. Mine landed at just over 48 inches wide, which was enough for a cerused white oak cabinet and two low stools without making the corner feel pinched.
Then I forced myself not to overfill the bar nook. That part matters more than people think. A speakeasy bar idea for home falls apart fast when you crowd every inch with trays, bottles, and extra seating you won’t use.
I left open floor around the base so your eye could register the cabinet as a destination, not storage overflow.
And yes, I checked the room layout from every angle before committing. From the sofa, from the entry, from the hallway. That one boring step saved me.
If you’re carving out a hidden hangout in a shared room, the goal isn’t more stuff. It’s better placement.
2Darken the walls with tobacco brown paint
Paint changed the mood faster than anything else, and I knew pale beige wasn’t going to carry a speakeasy bar design.
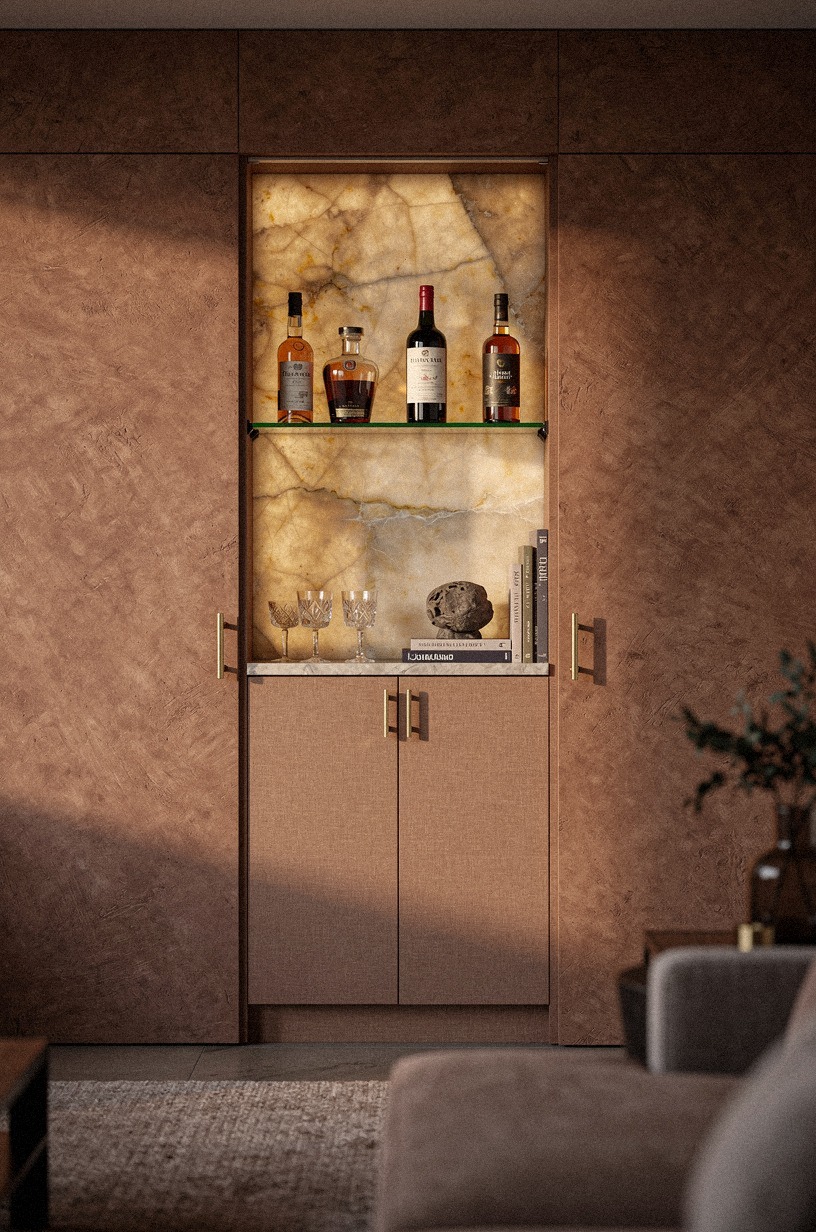
3Choose a cabinet that hides the bottles
The cabinet was the make-or-break choice because I did not want the bar visible all day. I wanted the room to read like a grown-up living room first, then reveal itself when someone opened the doors. That’s why I skipped open shelving and chose a book-matched walnut cabinet with deep doors, concealed hinges, and enough interior height for full-size bottles.
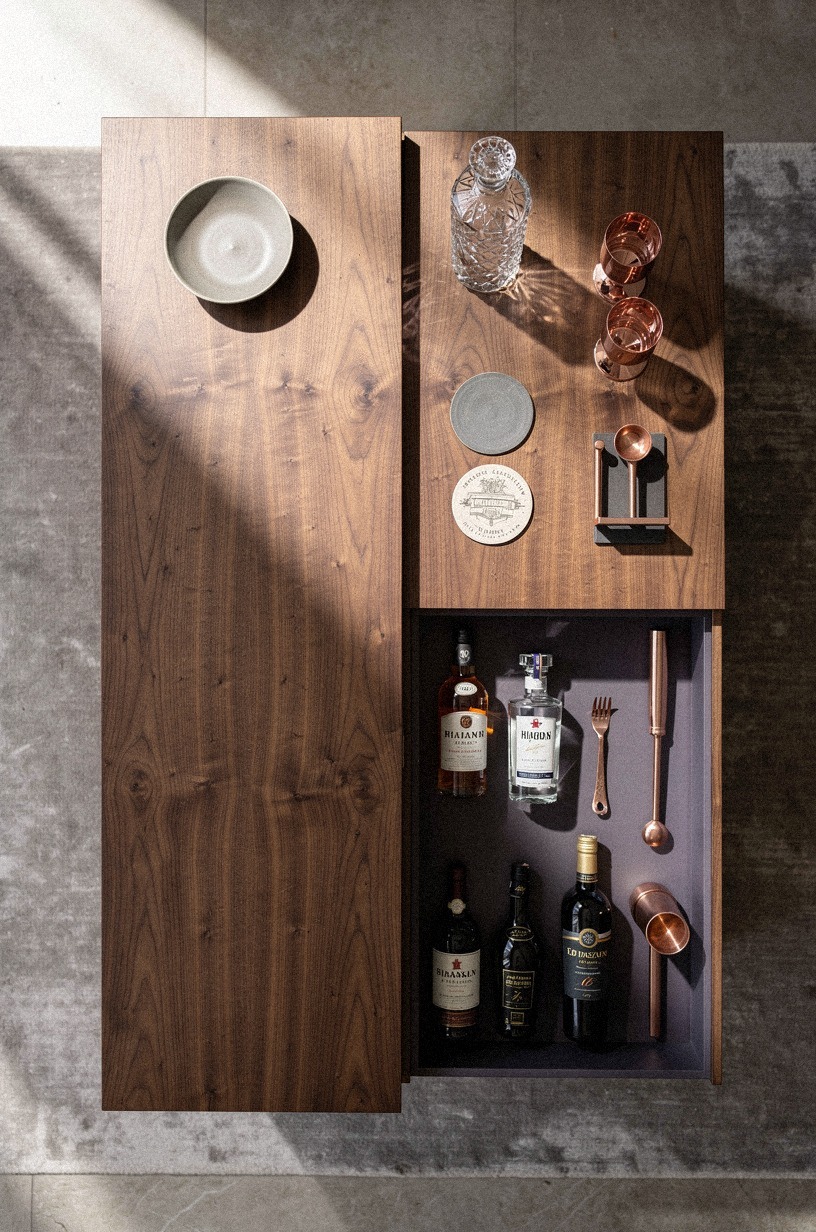
Inside, I organized the bottles so the short mixers stayed up front and the taller bourbon bottles sat at the back. It sounds obvious, but if you’re designing a bar, that layout keeps you from digging around every time you make a drink.
One side for spirits. One side for glassware. One drawer for tools.
Your future self will thank you.
I also cared about the dovetail joinery. Exposed dovetails made it feel like furniture, not office storage pretending to be chic.
And because the bottles disappear when the doors close, the whole corner stays calmer during the day. If hidden access is your thing, you’ll like these hidden speakeasy door entrance ideas detail bar goals.
4Add brass rails across the lower shelves

Brass rails were one of those details I almost skipped because they seemed decorative. I was wrong.
Once I added unlacquered brass rails across the lower shelves, the cabinet started reading like a proper bar instead of a handsome media piece. They kept the glassware in place, yes, but they also gave the shelves a little discipline.
That order matters when you are working with symmetrical shelving. Bottles grouped by height.
Coups on one side. Tumblers on the other.
A stack of linen napkins in the middle. Small things, but they make the whole setup look intentional from across the room.
You do not need many. You need them placed where your eye expects structure.
And I like the way unlacquered brass relaxes over time. Bright brass can feel too eager here.
Patina takes the edge off and makes the bar look like it’s belonged in the room for years. If you want the old-money mood without actual millwork, rails are a cheap shortcut.
Worth it!
5Hang smoked mirrors behind the glassware
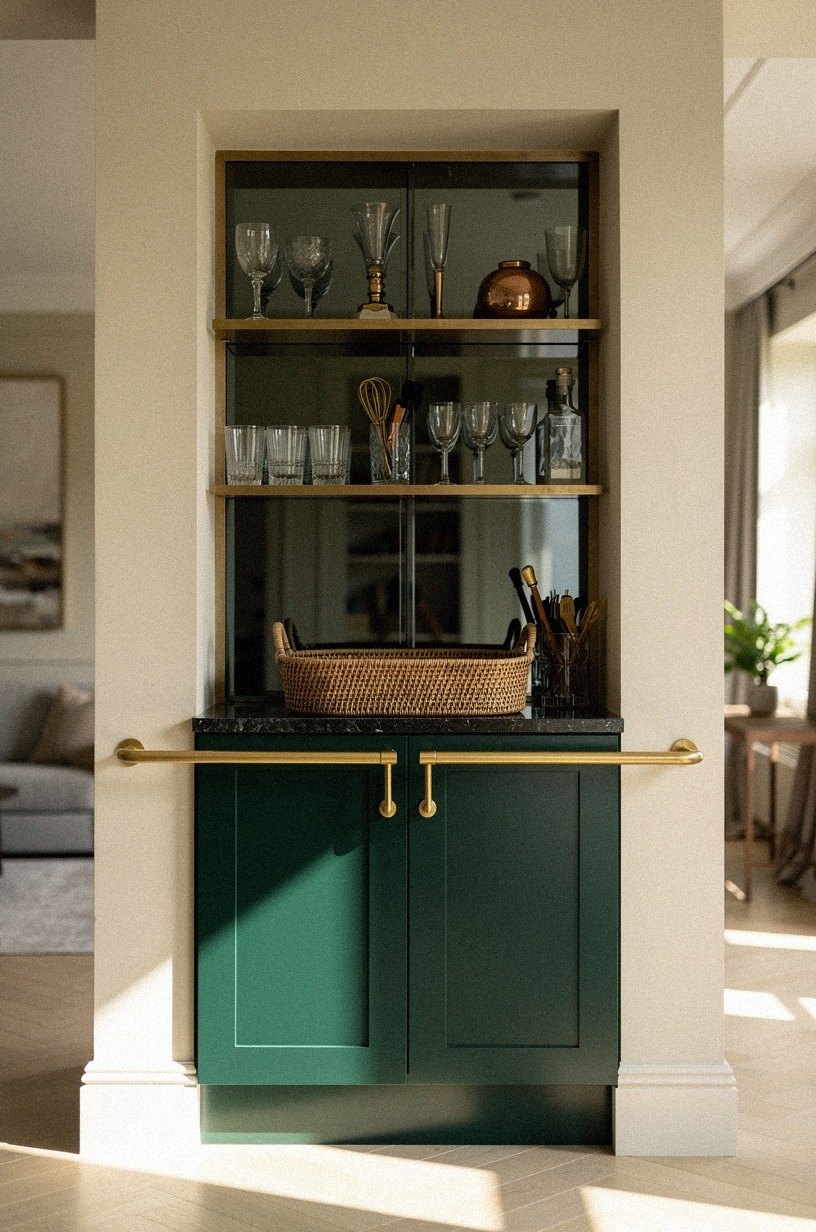
This was the first move that made guests stop and stare. I mounted smoked mirror panels behind the glassware, and suddenly the cabinet had depth even when the shelves held only a few pieces.
Clear mirror would’ve been too flashy for the tobacco wall. Smoked mirror gave me reflection without that hotel-lobby glare.
It also helped the night lighting in the room. The amber lamp light and the little flame-colored reflections bouncing off the mirrors made the corner feel layered, not bright. That is the sweet spot.
If you want a hidden-bar vibe, you do not want the shelves shouting from across the room. You want them glinting just enough.
I kept the palette tight too: emerald glass, cream walls beyond the nook, and brass warming up the edges. When you’re searching for speakeasy bar ideas for home, this is the move that gives you drama without adding clutter. I used the same logic after reading 21 stylish speakeasy room ideas for your home, then edited it down harder.
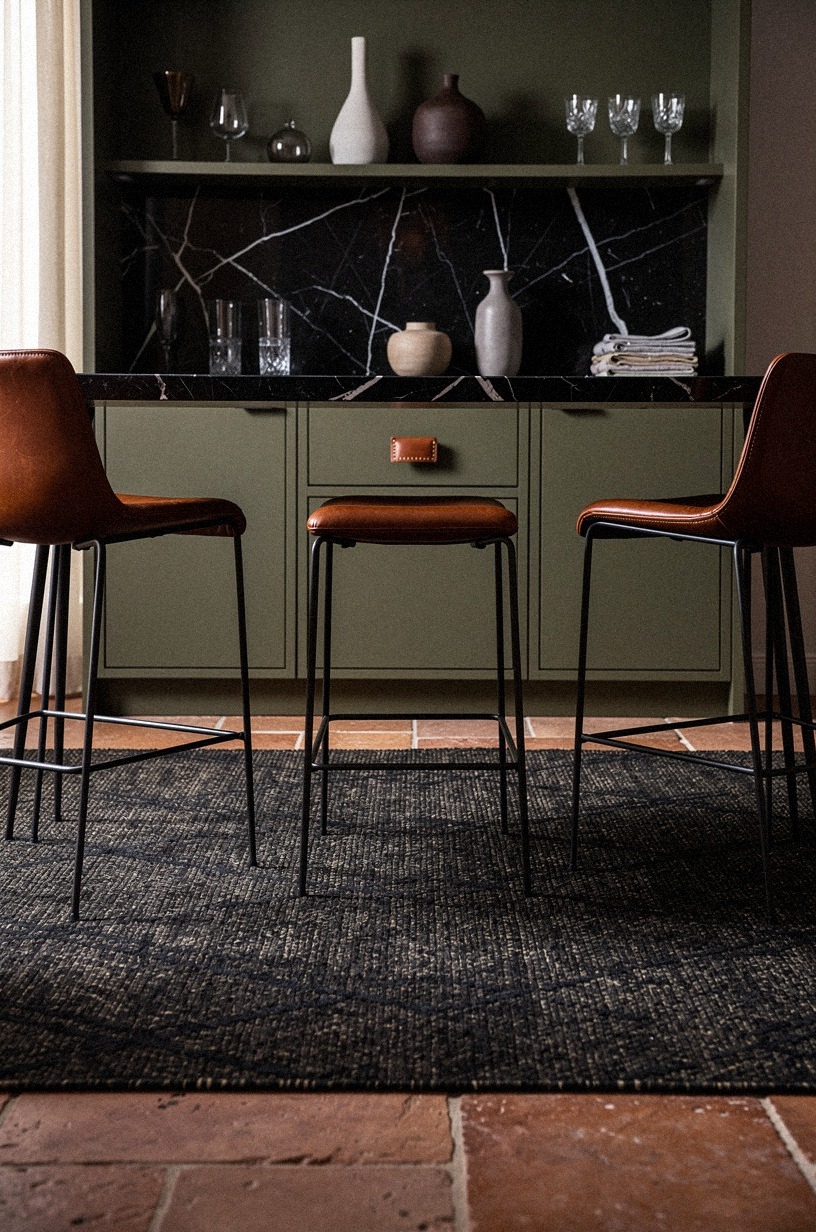
6Set leather stools beside the cabinet

Seating is where a lot of home bars go wrong because people buy tall stools that belong at a kitchen island.
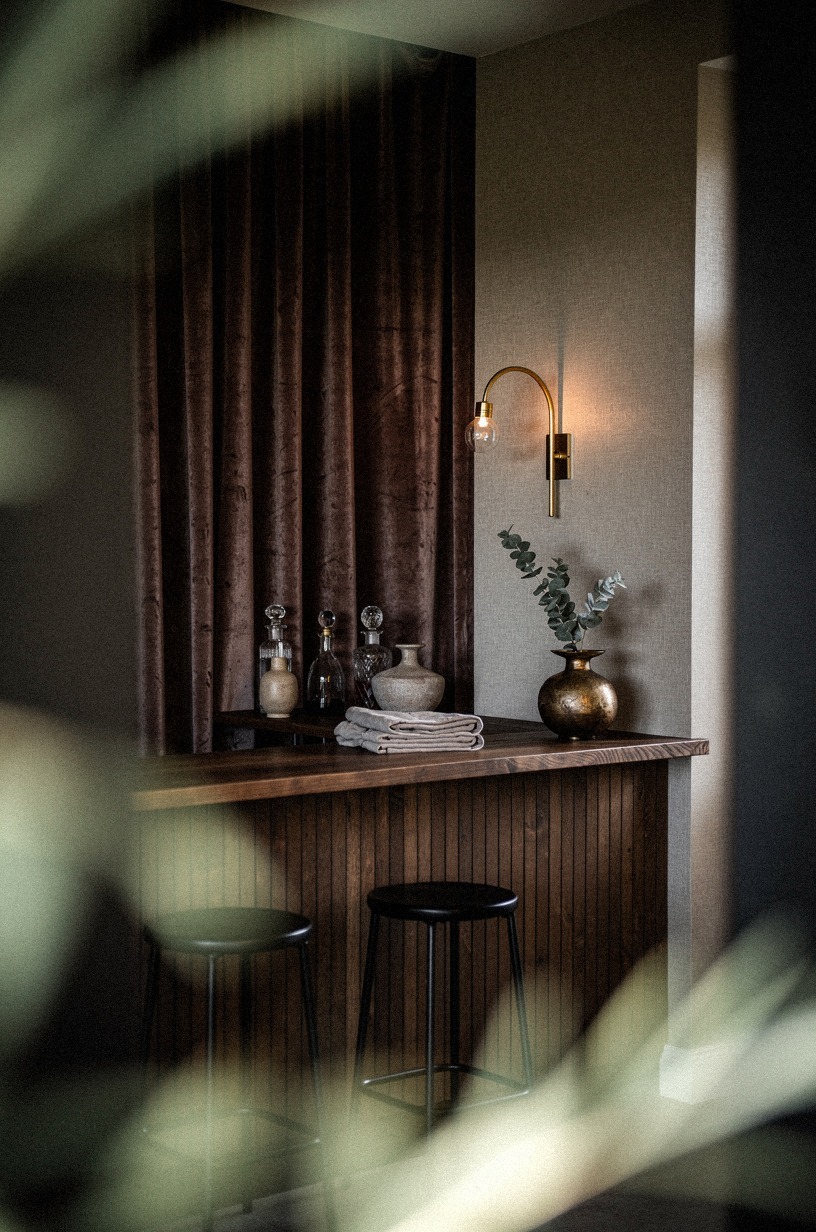
7Use amber sconces instead of overhead light
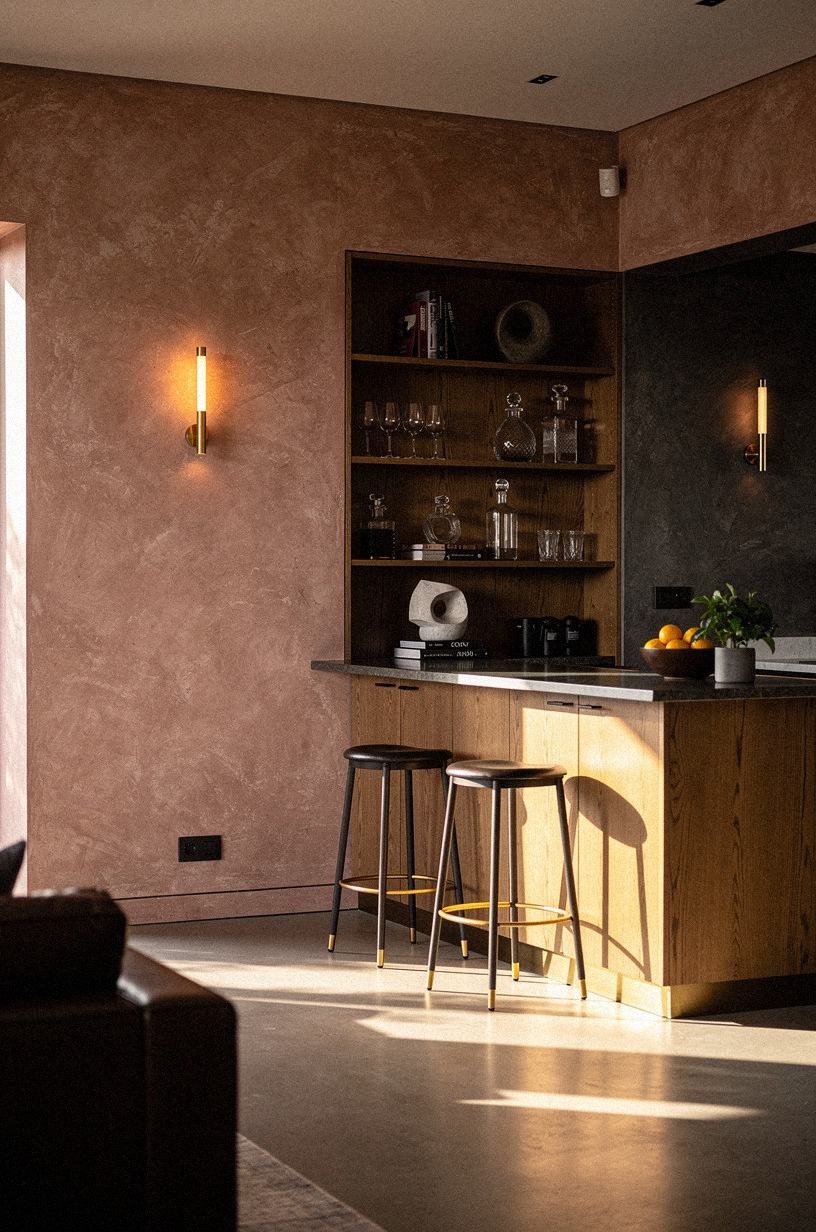
I didn’t wire an overhead fixture because overhead light kills this mood on contact. Really. I mounted a pair of amber-glass sconces at eye level so the glow spread sideways across the wall, shelves, and cabinet top instead of dropping straight down like interrogation-room lighting.
A speakeasy bar design wants shadow, not exposure.
The lighting shift showed up instantly. Dust in the air looked softer. The plaster wall started glowing instead of sitting there.
The brass rails picked up just enough warmth to feel alive. That’s why I keep telling people to light the room in layers. Your ceiling light is not evil, but it isn’t helping this corner.
And if you already have a smart TV nearby, keep the bar glow separate from the screen glow. Mixing them muddies the whole effect.
This is one of the few times I’d rather add sconces than another gadget, even after reading about how your Google TV just got smarter and turns your screen into a central hub for all your home devices. The room needed atmosphere, not more tech. That glow is everything!
8Style decanters on a marble tray
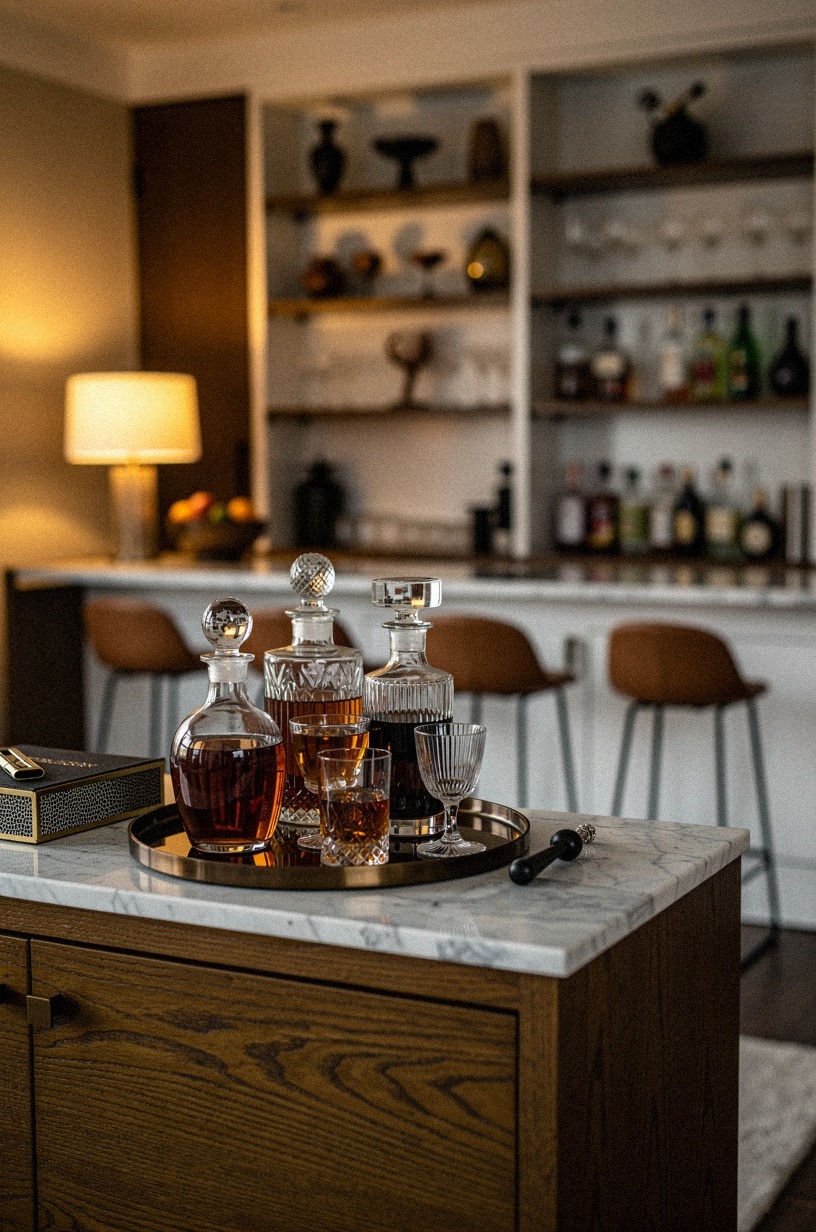
Once the cabinet and lighting were in, the top surface still looked bare, so I treated it like a small stage. A Calacatta Gold marble tray anchored two decanters, one short stack of cocktail napkins, and a single low bowl for citrus.
That’s it. You don’t need a parade of objects to make a bar feel collected.
The marble tray helped because it cooled down all the wood and leather around it. Warm room, cool surface.
That is the balance. I tried a dark wood tray first and it disappeared into the cabinet top. Pretty, but useless.
The pale veining on the marble caught the lamp light and gave the eye a place to land.
If you are thinking about how to decorate a speakeasy bar, remember this: the cabinet top should look ready, not crowded. One pour-ready setup.
One obvious spot for a drink. One easy wipe-down surface.
The difference was clarity, and clarity is what makes even a tiny bar feel expensive. If you want more room-within-a-room ideas, I liked 21 stylish speakeasy room ideas for your home for restraint, not just drama.
9Frame vintage portraits around the bar
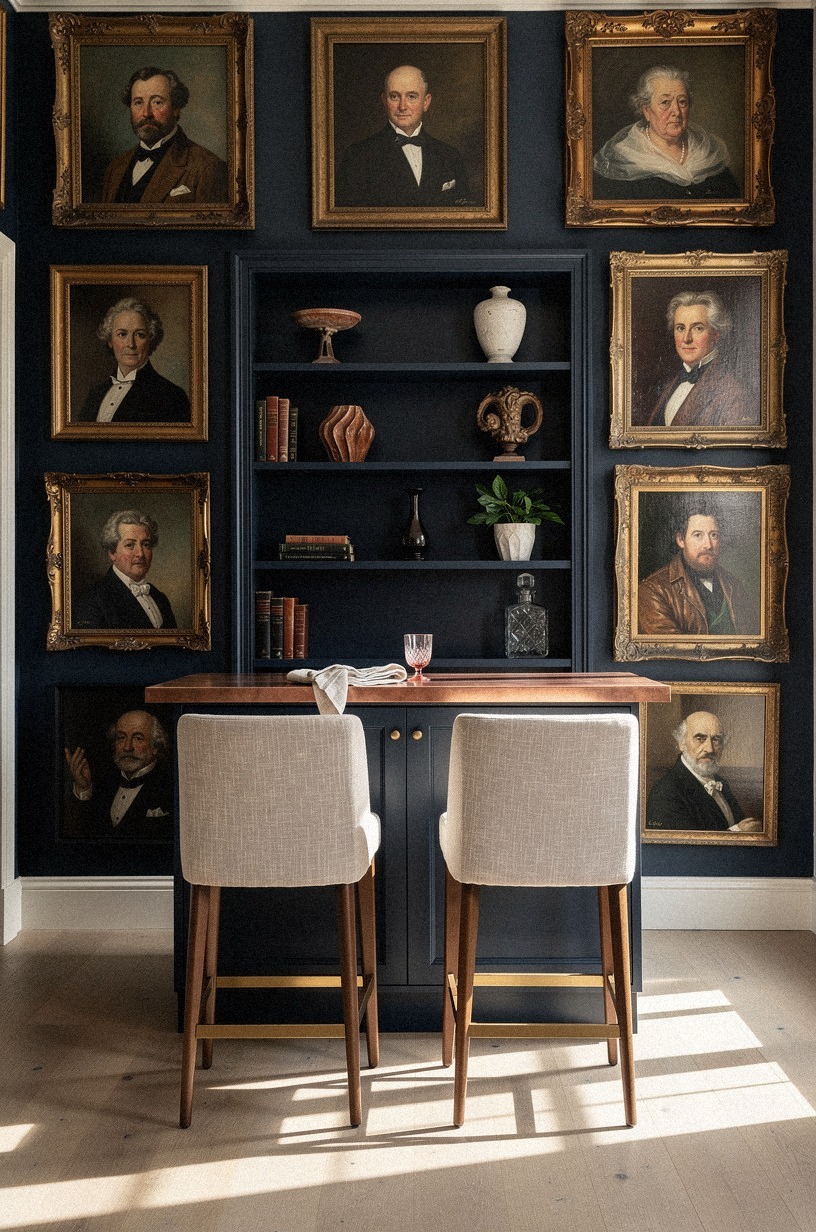
Art is what pushed the bar from stylish storage into full character. I hung a tight grid of vintage portrait prints around the cabinet wall, each in dark frames with old brass-toned edges so the grouping felt symmetrical from the floor up. You could have gone abstract here, but portraits brought the right amount of mystery.
I kept the portrait arrangement disciplined. Two columns.
Even spacing. Enough blank wall between frames that the plaster could still breathe.
That’s important if your room already has a sofa, drapery, and rug pattern fighting for attention. You want tension, not noise.
And honestly, this is where the portrait wall made the whole corner feel like a story instead of a project. What makes someone stay for one more drink?
Usually it isn’t the bottle selection. It’s a room with a point of view. For more of that hushed drama, I still send people to dark moody speakeasy decor ideas for ultimate cozy drama.
10Tuck cocktail tools inside a drawer
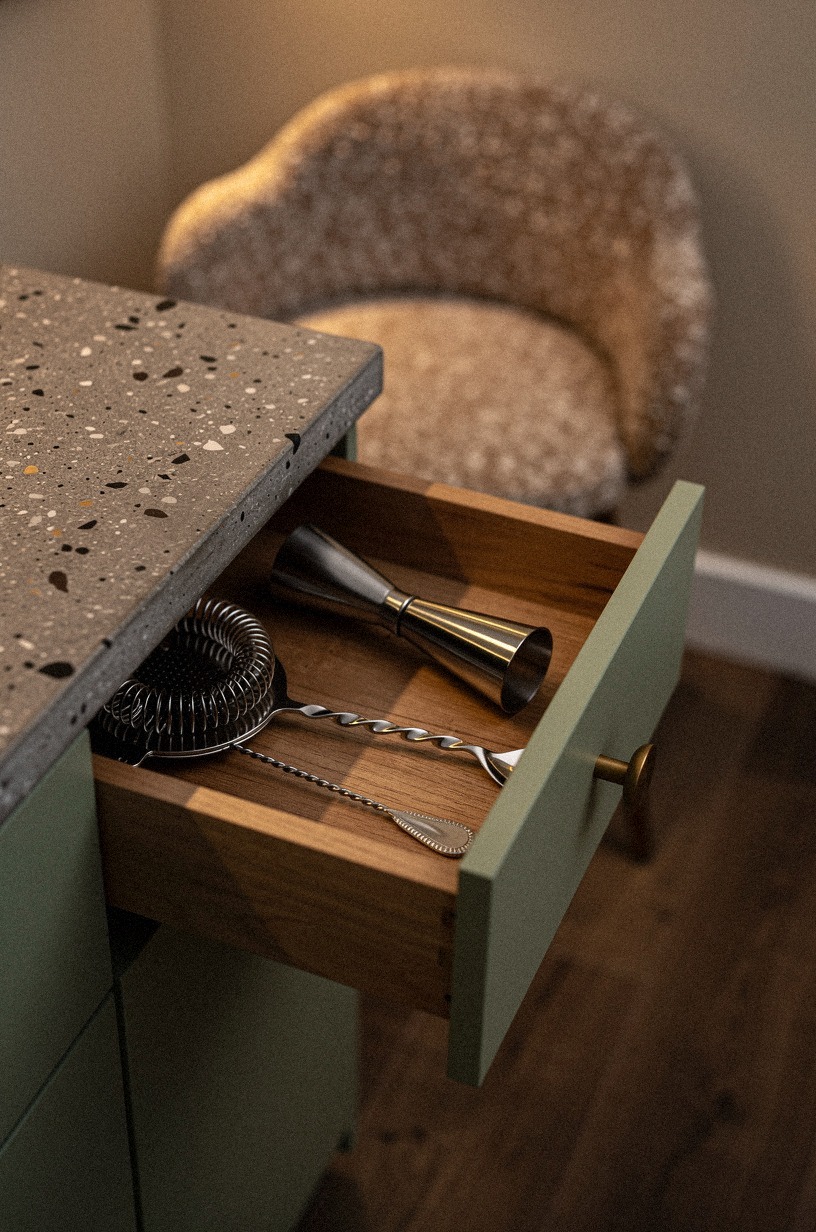
Open display looks nice until you’re staring at a jigger, a strainer, and six loose corks every single day. I gave the tools a home inside a shallow drawer and lined it with walnut tray dividers so the bar spoon, peeler, and opener each had their own slot. You can feel the order the second you pull it open.
The tool drawer also sped everything up. No hunting for the strainer.
No clatter. No visual mess when the cabinet is closed and the living room is doing its daytime job.
If you’re designing a bar for a shared space, hidden function is the whole game.
I learned that after leaving the bar tools out for a week and getting annoyed every time I sat on the sofa. Pretty tools are still tools. Put them away.
The same principle is why hidden zones feel calmer than exposed ones, which is exactly what I loved in these hidden speakeasy door entrance ideas detail bar goals.
11Layer a dark rug under the stools
The stools needed something to sit on, visually and literally, so I slid a terracotta-and-charcoal rug under the whole zone. Not wall to wall.
Just large enough that the front stool legs and cabinet edge felt connected. In most living rooms, that means an 8×10 or 9×12 works for the seating area, with the front legs of the main chairs touching it too.
The dark rug mattered for sound as much as style. The corner got quieter. Glasses set down more softly.
Stool legs did not scrape. And the dark ground plane made the brass, leather, and oak feel richer without asking the wall color to do all the work.
But I would skip any busy rug pattern. A loud pattern makes the bar look smaller because your eye stops at the floor. A lower-contrast pattern with terracotta, tobacco, and charcoal lets the corner deepen instead.
If your room still feels chilly, this warm-up move pairs well with the complete fall 2025 home decor checklist.
12Add velvet curtains behind the seating
Curtains behind the stools sounded excessive until I hung the velvet drapery, and then I got it.
13Finish with one tiny table lamp
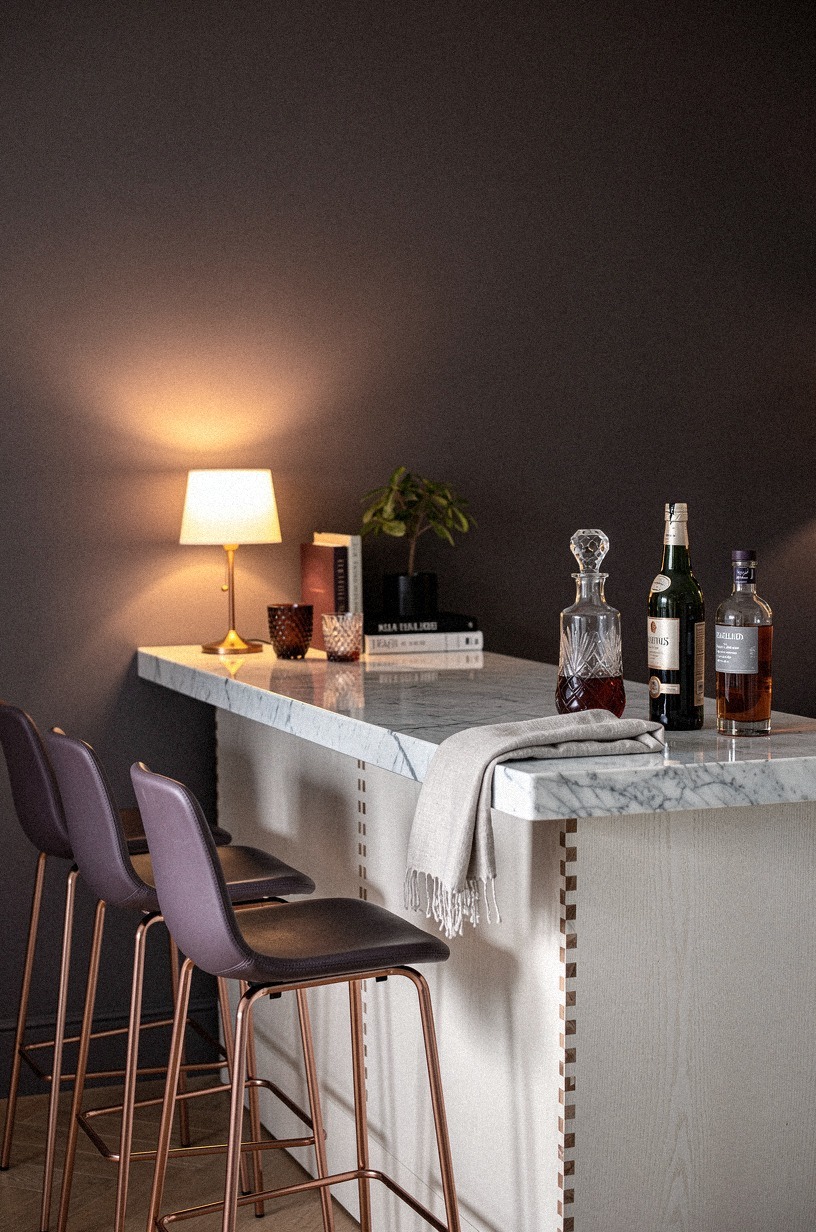
The last layer was the smallest one, and of course the tiny table lamp ended up being the thing everyone mentioned. I set one petite alabaster table lamp on the far side of the cabinet top, right beside the marble tray, and kept the shade low enough that the bulb disappeared from sight when you walked in. A hidden glow always feels better than a visible bulb.
That single lamp finished the diagonal view of the room. Sofa in one direction, bar corner in the other, and a warm point of light pulling you across the space.
I tried two lamps for a minute. Too much.
I tried none. Too flat.
One was the answer.
Would I do the table lamp step first if the budget were tight? No.
But I’d do it before buying more décor. Light changes behavior.
People sit longer when the room feels softer, and this little lamp made the whole bar feel less like a setup and more like an invitation. Chef’s kiss.
The Hidden-Hangout Rule
What surprised me most about this makeover was not that the bar corner looked better. Of course it did.
Paint, fabric, better lighting, a proper cabinet, all of that helps. What surprised me was how much behavior changed once the bar felt sheltered.
People didn’t perch, pour, and leave. They leaned in. They lowered their voices a little.
They stayed for another conversation because the room finally gave them a reason to.
I think that is the part a lot of home bar makeovers miss. They focus on equipment when they should be building a mood.
You don’t need to own rare whiskey. You don’t need a giant island. You don’t even need a dedicated room.
You need a pocket of the house that feels distinct from the rest of the evening, like you’ve stepped half a beat away from regular life. That’s why the darker wall, the velvet, the mirror, and the amber light mattered more than any bottle I put on the shelf.
I have made the opposite styling mistake before. I treated a bar area like display space, loaded it up with objects, and called it done.
It photographed fine. It lived badly.
There was nowhere for your eye to rest, nowhere for your hand to land, and nowhere for a guest to settle in without feeling like they were interrupting the room. This time, I kept asking one question: would you want to stay here after the first drink, or would you wander back to the sofa?
That is the standard I use now for any speakeasy bar idea for home. Not pricier. More magnetic.
If a move doesn’t make the corner easier to use or nicer to linger in, I skip it. The cabinet had to hide the mess.
The stools had to be comfortable. The rug had to soften the scrape. The lamp had to pull you in. I kept thinking about this one design choice that increases home value by 15 while market prices fall because the best rooms usually have one move that organizes everything else.
And honestly, the whole warmth question made me stricter about what warmth means. Warmth is control.
It is knowing where the light stops, where the glass catches, and where your guest sets an elbow without thinking. Get that right, and the room hosts better.
The Three-Buy Rule: How much it cost
I kept this makeover disciplined by spending in three places that changed the room immediately: the bar cabinet, the lighting, and the textiles. The tobacco wall finish and styling details mattered, but the bones did most of the heavy lifting. My exact spend came in at $1,186, and it took two weekends because I spread the painting and hardware install out instead of rushing it.
My actual line items were straightforward: book-matched walnut cabinet for $540, amber-glass sconces for $168, forest-green leather stools for $220, terracotta-and-charcoal rug for $138, moss velvet curtains for $74, and the petite alabaster table lamp for $46. Paint and plaster supplies added the last $70.
If you’re doing this in a tighter range, start with the wall color, one cabinet, and one warm light source. That’s the part that changes the room fastest. For broader living-room budget benchmarks, the sizing advice in this fall decor checklist is useful because it keeps you from buying underscaled pieces you’ll replace later.
What People Always Want to Know
What is the best Speakeasy Home Bar Design Ideas for the Ultimate Hangout for a small living room?
A hidden cabinet plus two compact stools is the best setup for a small living room because it gives you function without visual sprawl. Think IKEA TONSTAD-scale storage, dark wall paint, and one lamp.
One cabinet. One rug zone. One seat per side.
If you want more layout references, 21 stylish speakeasy room ideas for your home has a few compact versions worth studying.
Where can I buy Speakeasy Home Bar Design Ideas for the Ultimate Hangout pieces on a budget?
Start with IKEA, Target Threshold, and Wayfair because they cover cabinets, stools, and lamps without forcing a full custom build. Then check Facebook Marketplace for mirrors or framed portraits. Brass hardware secondhand.
Old wood casegoods. Velvet drapery panels.
How much does a Speakeasy Home Bar Design Ideas for the Ultimate Hangout makeover cost?
Most of them cost about $300 to $1,200 if you are painting, styling, and adding a cabinet instead of building millwork, and that is enough to change the feel of the room. Free moves count too.
Better editing. Better placement. Better lighting order.
Can I create a Speakeasy Home Bar Design Ideas for the Ultimate Hangout on a budget?
Yes, and you really can if you focus on the moves that read expensive first, because paint and lighting punch above their price! Darker wall color.
One thrifted cabinet. One tray for bottles.
If you need more mood help, these warm swaps fixing cold rooms in 2026 are useful.
Is a Speakeasy Home Bar Design Ideas for the Ultimate Hangout worth it in a small space?
Yes, it is worth it because small rooms get cozy faster when you give one corner a clear identity. Keep the depth of nearby seating around 35 to 40 inches, leave a clean path, and let the bar corner live on its own rug edge.
Is Speakeasy Home Bar Design Ideas for the Ultimate Hangout a good idea for a rental?
Yes, if you swap permanent moves for low-risk changes that still create atmosphere. Removable sconces.
Tension-rod velvet panels. Peel-and-stick dark backing inside the cabinet.
Framed art on hooks. For hidden-room inspiration, I still love these detail bar entrance ideas.
The One-Lamp Rule: Where I’d Start First
If I had to pick one, I would start with the wall color. A dark, tobacco-leaning backdrop does the job cheap accessories cannot do, because it makes every brass, leather, and glass surface look deeper. Pin that move first, then build the rest around it.