I know the temptation: you look at a soggy corner of grass, picture tomatoes there, and then realize you do not actually want to wreck the yard. That tension is real when the lawn still works for kids, dogs, or just the view from the kitchen window.
The good news is raised beds do not have to mean digging up half the backyard. The safest versions in 2026 are the ones that sit on top of the grass, stay clearly separate from the turf, and can be lifted out without a demolition project.
Start With a Bed That Sits on the Grass
I only trust raised beds that act like outdoor furniture. A free-standing metal kit, a simple cedar box, or a fabric bed is the whole point if you want your lawn back later.
The least risky setup is also the simplest: no digging, no buried edging, no concrete footings. Once you treat the bed like something placed on top of the yard, not built into it, the whole project gets easier to reverse.
Lay a Barrier Before You Add a Single Scoop of Soil
This is the step people skip, then wonder why the grass pushes up into the bed. I like 1 to 2 layers of cardboard under the footprint because it is cheap, easy to trim, and keeps the soil from mixing into the turf.
If you want a cleaner install, landscape fabric works too. Let it run slightly wider than the bed so the edges stay covered once the frame settles.
The grass underneath will die, yes, but that is very different from destroying the lawn. Dead turf under a removable bed is easy to reseed or patch later, and that is the whole strategy here.
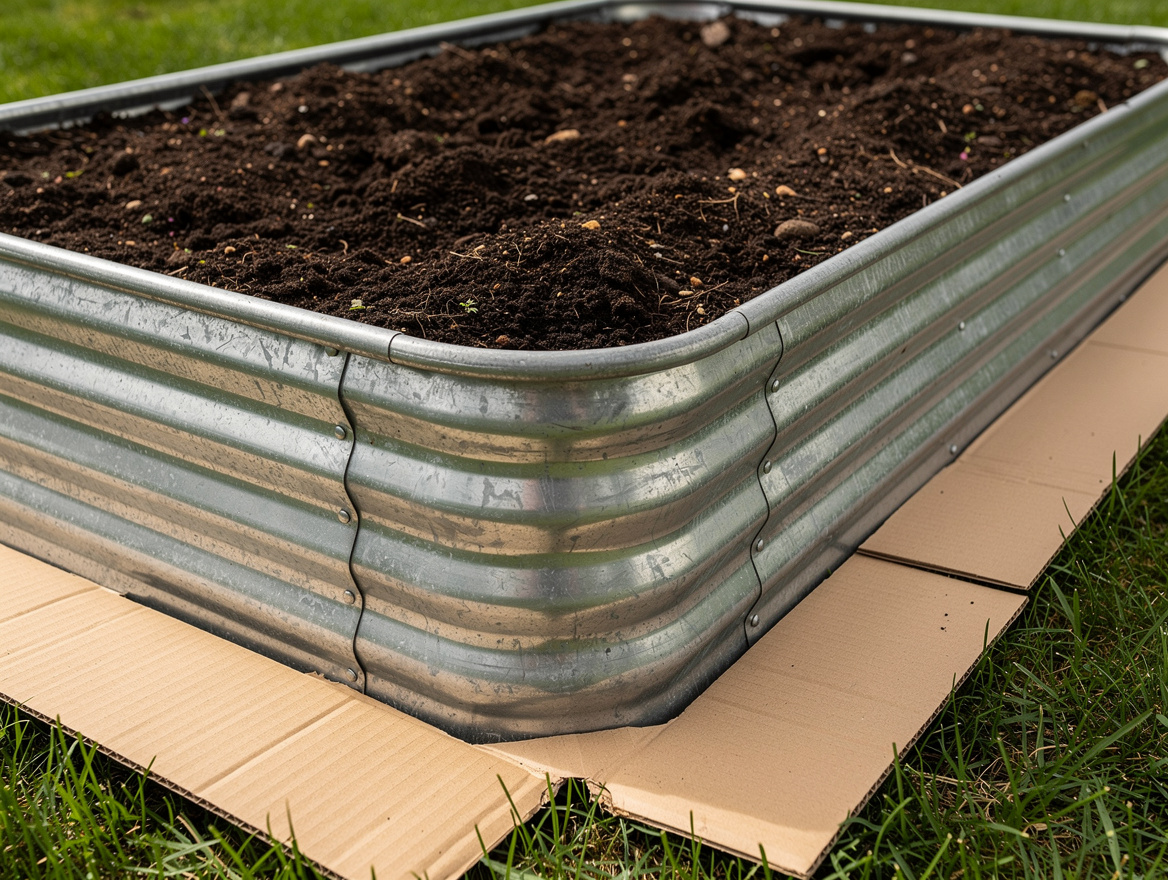
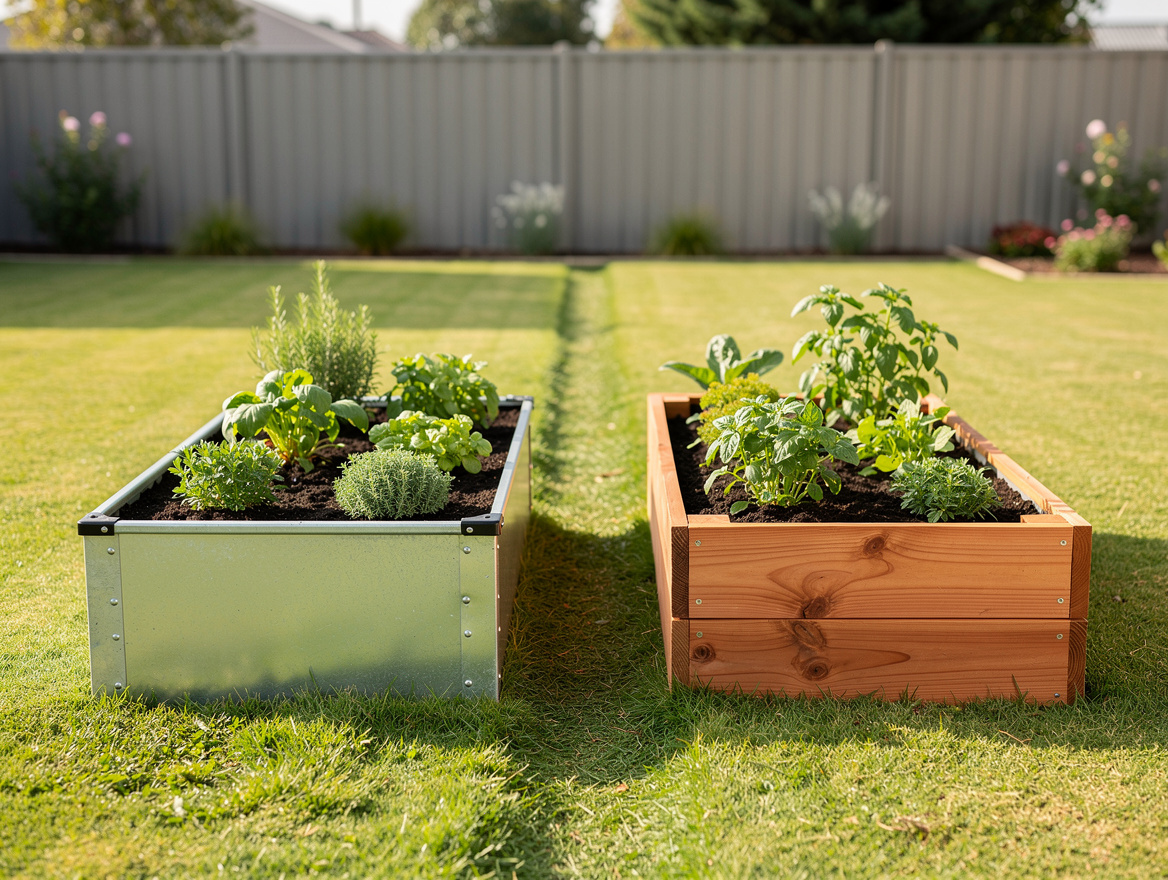
Choose Galvanized Steel for the Cleanest Reversible Setup
A 4 by 8 foot galvanized steel bed at about 17 inches deep is one of the smartest lawn-safe choices right now. Typical 2026 pricing for the frame alone is about $150 to $300, and the full setup with soil usually lands around $280 to $560.
I like metal here because the shell itself is relatively light and the footprint stays crisp. The weight comes from the soil, not from thick masonry pressing into your grass for years.
For a smaller yard, you can find a 3 by 6 foot Amazon kit in the roughly $60 to $150 range. That size feels more realistic for people who are trying this for the first time and do not want a giant rectangle taking over the yard.
If you want a layout that still looks tidy from the patio, two 4 by 8 beds with a 24 to 32 inch path between them works well. It reads organized, and it gives you a clear route for mowing or walking without turning the middle into a muddy strip.
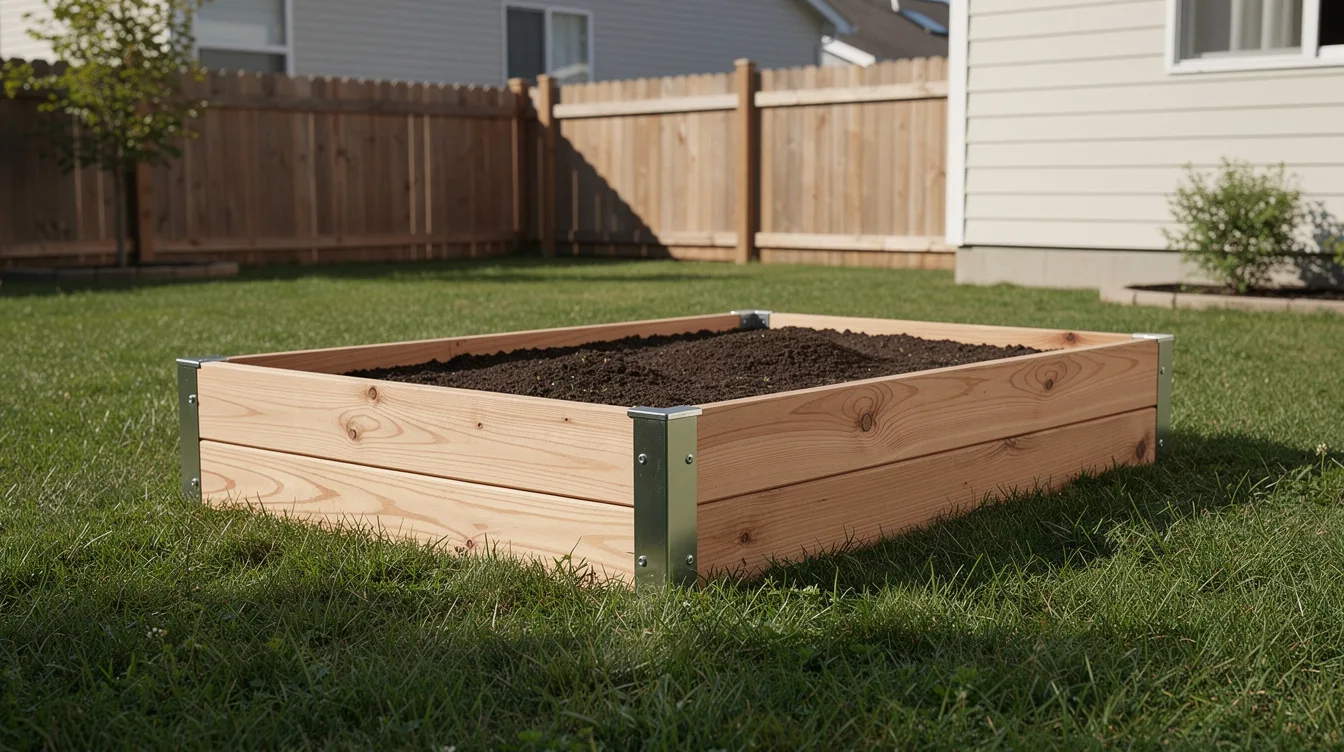
Use Cedar if You Want a Warmer Look Than Metal
Wood still wins on looks. A basic 4 by 8 foot cedar frame, usually 10 to 12 inches high, typically runs about $80 to $200 for the frame, with a realistic total budget of about $230 to $450 once you add soil.
I would only do wood if you actually like the softer, more natural look against grass. Cedar feels less harsh in a backyard than corrugated steel, especially near a deck, but it needs a little more visual discipline so it does not start reading as a DIY afterthought.
Keep the build shallow and removable. Short stakes to hold the corners square are fine, but I would not sink long posts deep into the ground if the whole mission is preserving the lawn.
A plain Lowe’s cedar bed with straight boards and no decorative trim usually looks better than fussy designs. The cleaner the shape, the easier it is to reinstall sod later without dealing with weird curves or buried hardware.
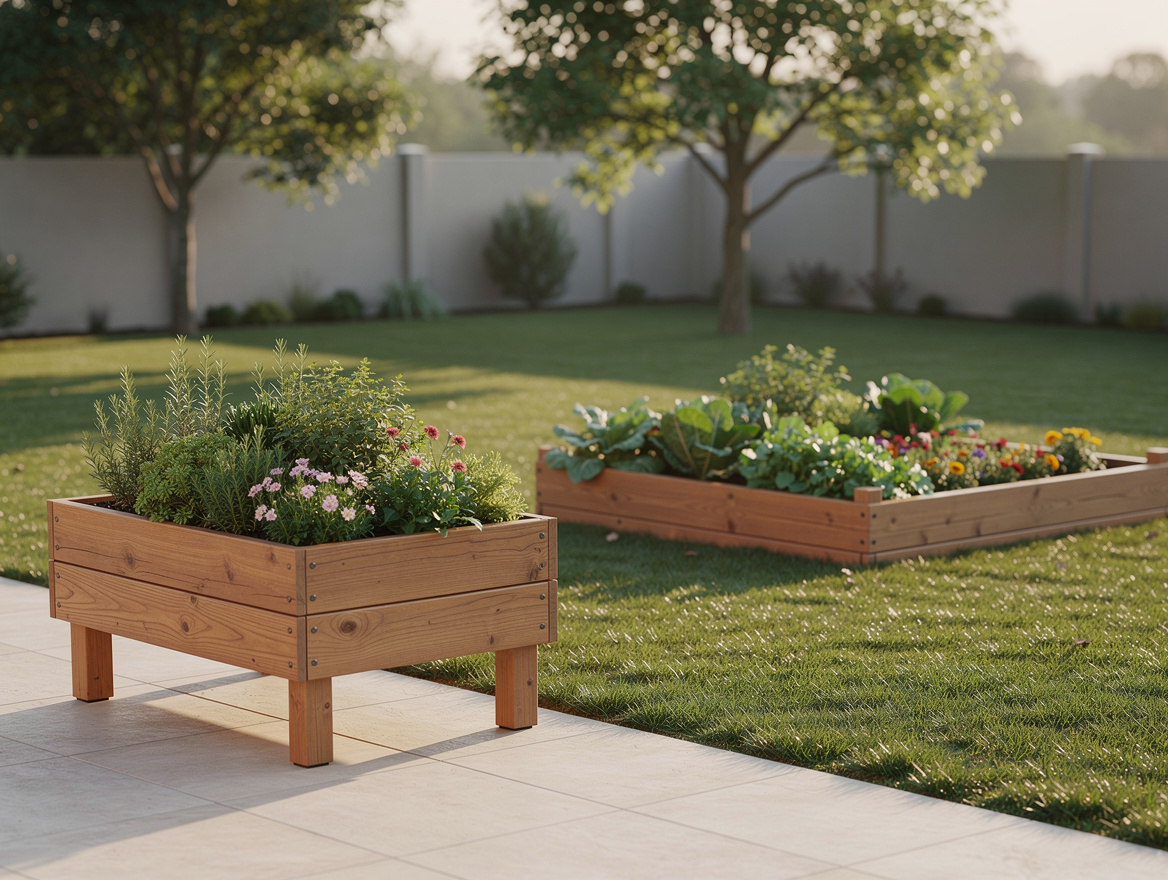
Pick Elevated Planters for the Smallest Lawn Footprint
If your yard is tight or you are nervous about killing even one patch of grass, go with an elevated planter on legs. It touches less turf, drains neatly, and feels much more temporary than a full bed loaded with a yard of soil.
This is also the best option for renters or anyone testing whether they actually enjoy growing herbs and lettuce. I do not think every backyard needs a giant raised-bed grid, and a legged planter proves that quickly.
Look for powder-coated metal or cedar versions at Target, Wayfair, or Home Depot. The exact prices vary by size, but the design advantage stays the same: less contact with the lawn and a much easier reset if you change your mind.
Skip Stone and Concrete if You Might Ever Move Things Around
Heavy stone block beds look permanent because they are. Typical 4 by 8 installations with stone or concrete materials can run about $380 to $1,060, and that weight will flatten and discolor the lawn far more aggressively than wood or metal.
I think masonry beds make sense only when you have already decided the grass is gone for good. If you are even half-serious about keeping the yard flexible, this is the wrong category.
The same caution applies to thick composite beds. They can cost about $330 to $700 with soil in a standard 4 by 8 setup, and while they are not as punishing as block, they still feel less nimble than a simple metal frame.
Leave Yourself a Smart Exit Plan From Day One
The easiest lawn-saving move is planning for removal before you build anything. Keep the bed dimensions standard, usually 4 by 8 feet, so reseeding, patching, or laying new sod later does not turn into custom repair work.
I also like leaving a narrow buffer of visible grass around each bed instead of packing the whole yard with rectangles. A little breathing room keeps the backyard from looking overbuilt, and it gives you an obvious place to blend repairs if you ever pull one bed out.
If you are filling a deeper 17 inch bed, be honest about the soil cost. A pair of 4 by 8 metal beds may need another $200 to $400 in garden soil, and that extra weight is exactly why you want a reversible shell and a barrier underneath.
Begin with one 4 by 8 metal or cedar bed on top of cardboard, not a full backyard plan. You will learn more from one removable setup in a month than from overbuilding a layout you have to undo later.
Mia Carter writes about small-space living and budget home makeovers. She has restyled three rentals and tests most ideas in her own 45 sqm flat.