I got tired of balancing a cutting board on a wobbly patio side table every time I grilled. The worst part was the constant back-and-forth into the house, with raw food, paper towels, and tongs scattered across two rooms.
I wanted an outdoor kitchen feel without a contractor, trenching, or anything that would trigger permits. So I built a simple setup in one weekend, using freestanding pieces, plug-in gear, and basic hand tools I already had.
Start with a movable layout
The whole no-permit idea depends on keeping the kitchen freestanding. I treated mine like patio furniture, not a built-in structure, which meant no permanent footings, no hard plumbing, and no fixed gas line to worry about.
I mapped out a working zone about 6 to 8 feet long, which is a typical sweet spot for a small patio or deck. That gives you room for prep, cooking, and a landing spot for trays without making the whole yard feel like a construction site.
A tight line works better than an L-shape for a weekend build. It uses fewer pieces, costs less, and leaves walking space clear, which matters more than trying to copy a showroom setup.
Use utility cabinets instead of building a base
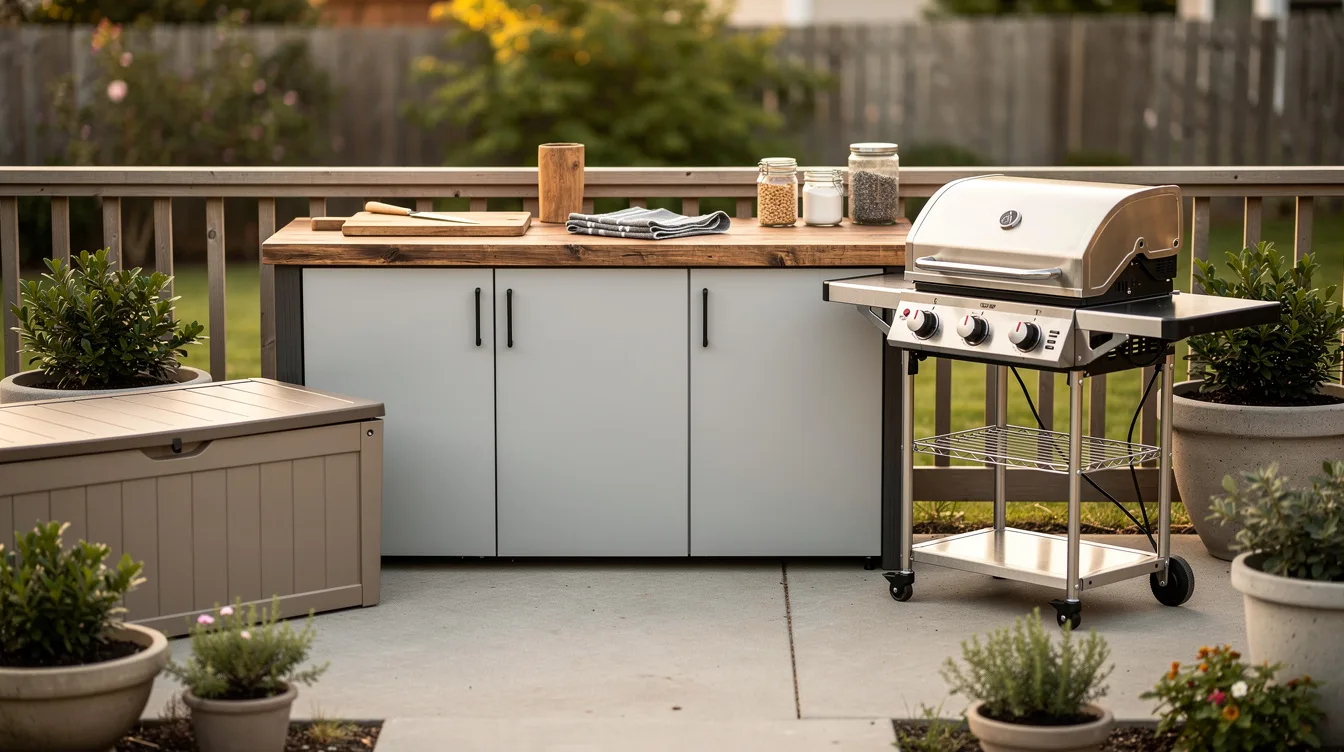
I skipped framing lumber and cement board completely. Two freestanding storage units do the heavy lifting, and they are faster, cleaner, and much more realistic if you are working with zero pro tools.
A Keter Unity XL style prep table from Walmart or Amazon usually lands around the average mid-$100 range, and it already gives you work surface plus enclosed storage. I paired that idea with a simple metal utility cabinet from Home Depot, the kind people normally use in garages.
This is the part that makes the project feel smart instead of homemade. Outdoor kitchens look expensive because they hide the clutter, and cabinets with doors do that immediately.
Choose pieces that sit roughly 34 to 36 inches high, which is standard counter height. Anything much lower starts to feel like you are cooking on patio furniture, and that gets old fast.

Top it with a work surface you can cut on-site
I did not want stone, tile, or anything that needed a wet saw. A ready-made acacia butcher block top from Lowe’s or Home Depot is the easiest upgrade here because it looks warm, cuts with a basic circular saw, and makes the whole setup feel intentional.
A typical 6-foot butcher block slab often runs in the average $150 to $250 range, depending on thickness and wood species. That is still cheaper than chasing a masonry look you cannot finish in one weekend.
I sealed mine for outdoor exposure and accepted one hard truth: wood needs maintenance. I still think it is the better call for a fast build, because a slightly weathered wood top looks honest, while bad faux stone looks cheap right away.
If you want even less work, a stainless steel prep table from Costco, Amazon, or Ace Hardware is a solid backup. It is not as cozy, but it handles heat, spills, and rain with far less babysitting.
Pick one plug-in appliance and stop there
The easiest way to avoid permit territory is to resist the full fantasy kitchen. I built mine around one cooking piece, then let the counter do the rest.
A Blackstone-style griddle cart from Walmart or Lowe’s, or a compact electric grill from Target, keeps the setup portable and simple. A small electric grill is usually in the average $200 to $350 range, and a propane cart griddle often starts around the low to mid-$200s.
I like a griddle more than a fancy grill for this kind of project because it doubles as breakfast station, burger station, and weeknight dinner zone. One appliance that actually gets used beats three shiny units that eat up half the patio.
If your outlet access is bad, use a heavy-duty outdoor-rated extension cord only for temporary sessions and follow the appliance manual exactly. I would not build any outdoor cooking plan around a sketchy cord run, because convenience stops being fun the second it feels unsafe.
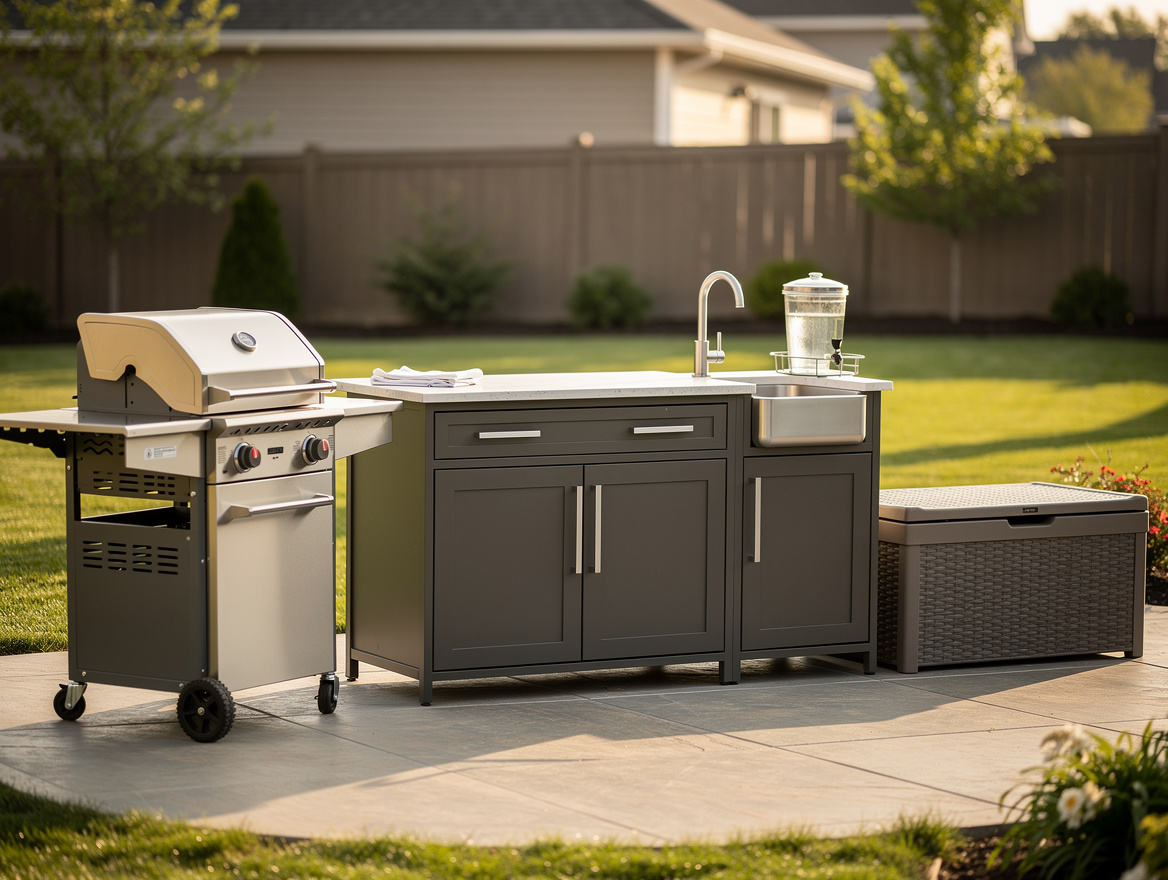
Add water the easy way
I did not touch plumbing. A real sink sounds nice until you remember it means drain lines, supply lines, winterizing, and a much better chance that local rules change the whole project.
Instead, I used a lidded beverage dispenser for hand washing and produce rinsing, plus a slim dish tub underneath. It is basic, but for grilling, skewers, corn, and drink prep, it covers more than most people think.
A 2 to 3 gallon water dispenser from Target, Walmart, or IKEA is usually inexpensive, and a plastic utility tub costs even less. That setup is not glamorous, but it is exactly the kind of low-drama move that keeps a weekend project from turning into a three-week mess.
Set the water station at one end and keep a roll of paper towels in a closed resin cabinet. Once the cleanup tools have a home, the whole area starts working like a kitchen instead of a grill parked beside random stuff.
Finish it with weather-proof storage and task light
The details are what stop this from looking temporary. I added two storage bins for fuel, towels, and serving pieces, then clipped on light so I could actually prep after sunset.
A small deck box from Wayfair, Costco, or Home Depot usually falls in the average $50 to $120 range, depending on size. Even a narrow one holds grill tools, placemats, foil pans, and the ugly but necessary things you do not want inside the house.
For lighting, I like a plug-in or solar LED clamp light more than string lights over the counter. String lights are fine for mood, but task light is what lets you slice, season, and see whether the chicken is actually done.
I kept the styling spare on purpose: a black tray, one outdoor runner, a neutral planter. Too many decorative pieces around a working cook zone just collect grease, pollen, and regret.

Start with the counter and storage first, then add the cooking appliance once the layout feels natural. If the setup lets you prep, cook, and clean up without running inside every five minutes, you built the right version.
Mia Carter writes about small-space living and budget home makeovers. She has restyled three rentals and tests most ideas in her own 45 sqm flat.