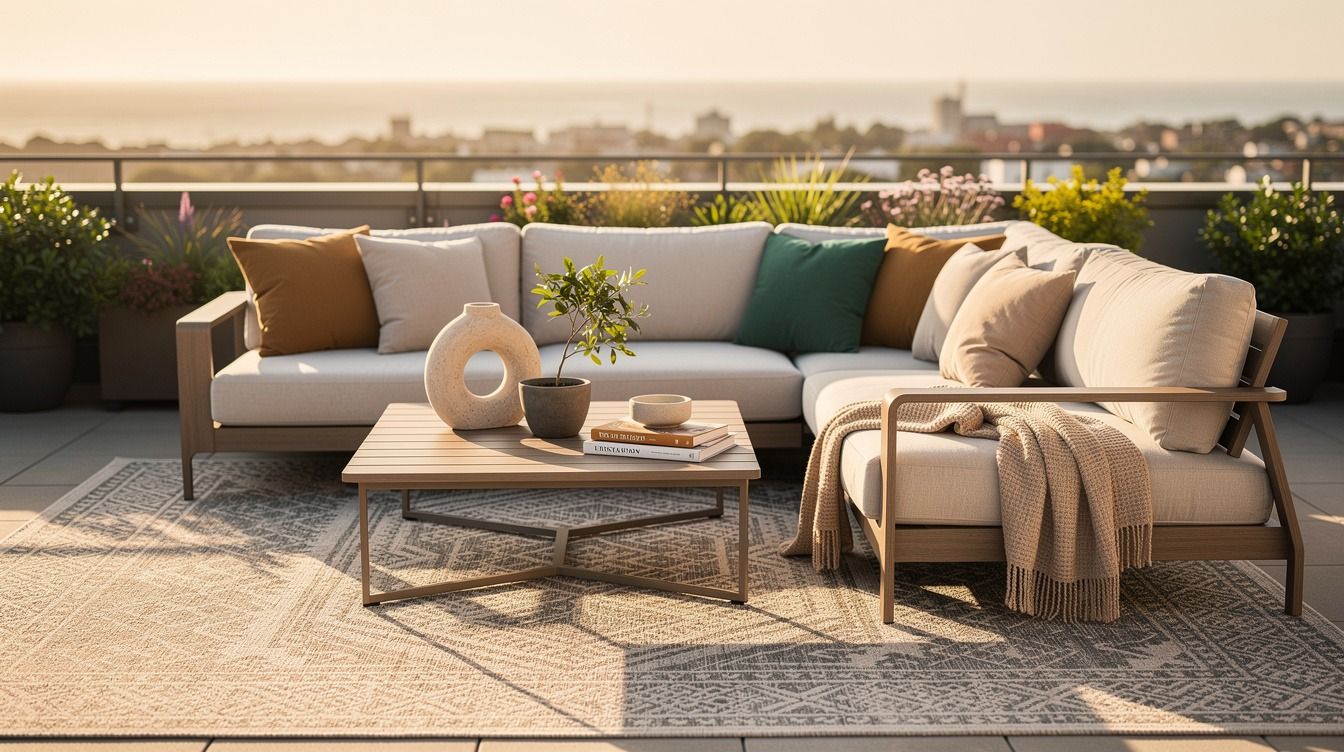
How to turn your roof into the best lounge in the house comes down to order, not luck. I learned that after styling one roof where I bought the lanterns first, skipped the rug, and watched every chair drift around like lost luggage. Start underfoot, build shade, then give every seat a job. That’s when your rooftop home stops feeling temporary, and the whole space starts reading like a quiet outdoor living room you actually use.
- Start with a weatherproof outdoor rug
- Map zones with low modular seating
- Anchor the lounge with a sectional sofa
- Layer floor cushions around a coffee table
- Build a pergola over the main seating
- Hang woven pendants from the pergola beams
- Install planters as soft privacy walls
- Add a slim console for rooftop serving
- Style side tables beside every seat
- Mount sconces along the parapet wall
- Frame the view with tall grasses
- Finish with throws in a lidded basket
1Start with a weatherproof outdoor rug
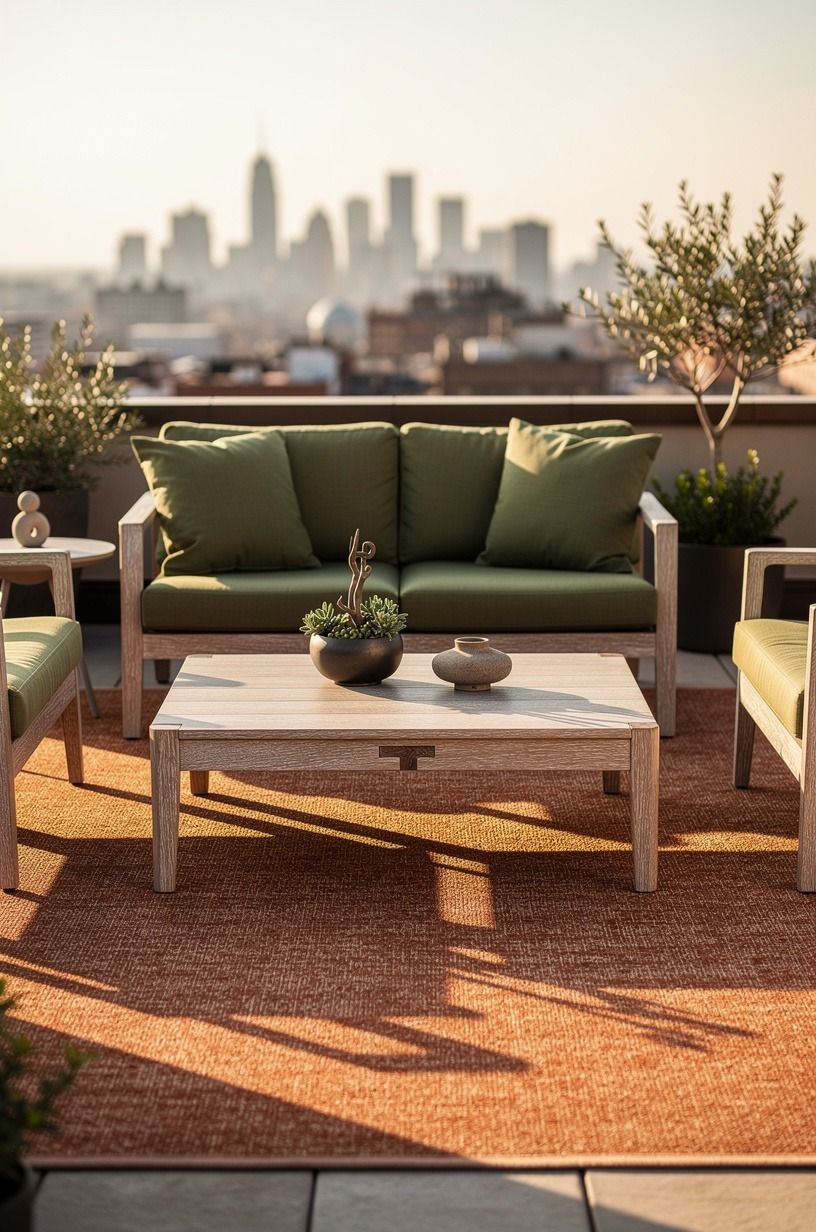
Start with the rug because it tells you where the room begins, and your house rooftop will feel scattered without that border. An 8×10 or 9×12 outdoor rug is the right call for most lounge groupings because you want the front legs of your seating on it, not floating just outside it. I like a woven base in sandstone, chalky stone, or faded oat so the warm wood and clay tones above it don’t fight for attention.
If you’re working with cerused wood, lean into it. The exposed dovetail detail on cerused white oak seating reads thoughtful when the rug underneath is quiet and broad, not busy and high-contrast. I made the mistake of starting with a striped rug once, and every tray, cushion, and planter looked like it was trying to shout over it.
You don’t want that on a roof where the sky is already doing a lot. For more small-space layout thinking, I keep coming back to this rental balcony lounge guide.
2Map zones with low modular seating
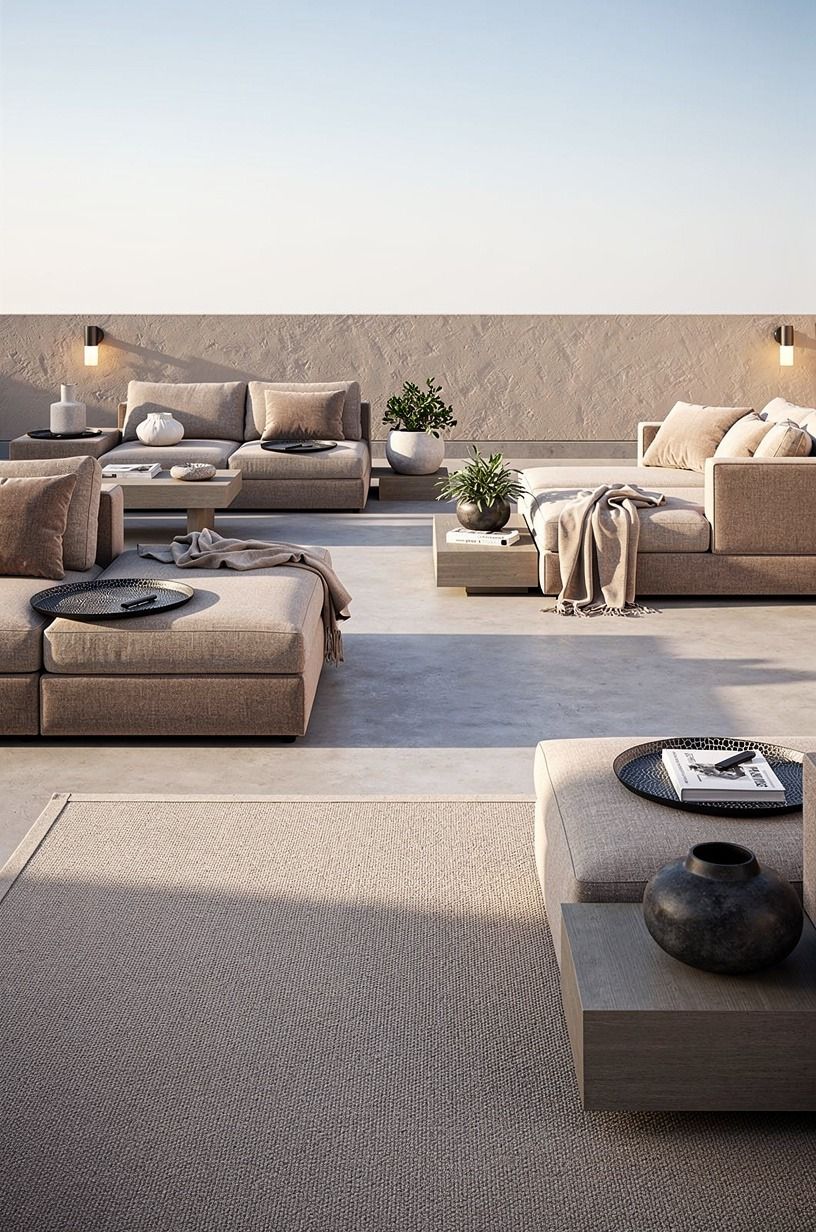
Next, map the lounge with low seating that can slide into two or three clear zones. You want one main conversation edge, one stretch-out corner, and one open lane so you don’t step straight into a sofa arm the second you hit the rug.
Low profiles help your rooftop home feel calm because you keep the horizon line open, and that’s the whole luxury move here. An IKEA KUNGSÖ Sunstad Sun Lounger or an Article Braven modular corner chair are quiet, low-arming pieces that won’t tower over the view.
A modular setup in clay linen or performance canvas works better than a row of matching club chairs, especially if you’re entering the roof from one side. From that first-person walk-in angle, the trays and cushions should look placed, not crowded. Shagreen trays, one at each cluster.
A couple of floor-level accents. Enough room for your feet.
But don’t over-seat the roof just because you can. I would rather give six people breathing room than cram in eight and lose the easy feel you were after.
If you like spaces that glow after dark, these solar path lights ideas are worth borrowing.
3Anchor the lounge with a sectional sofa
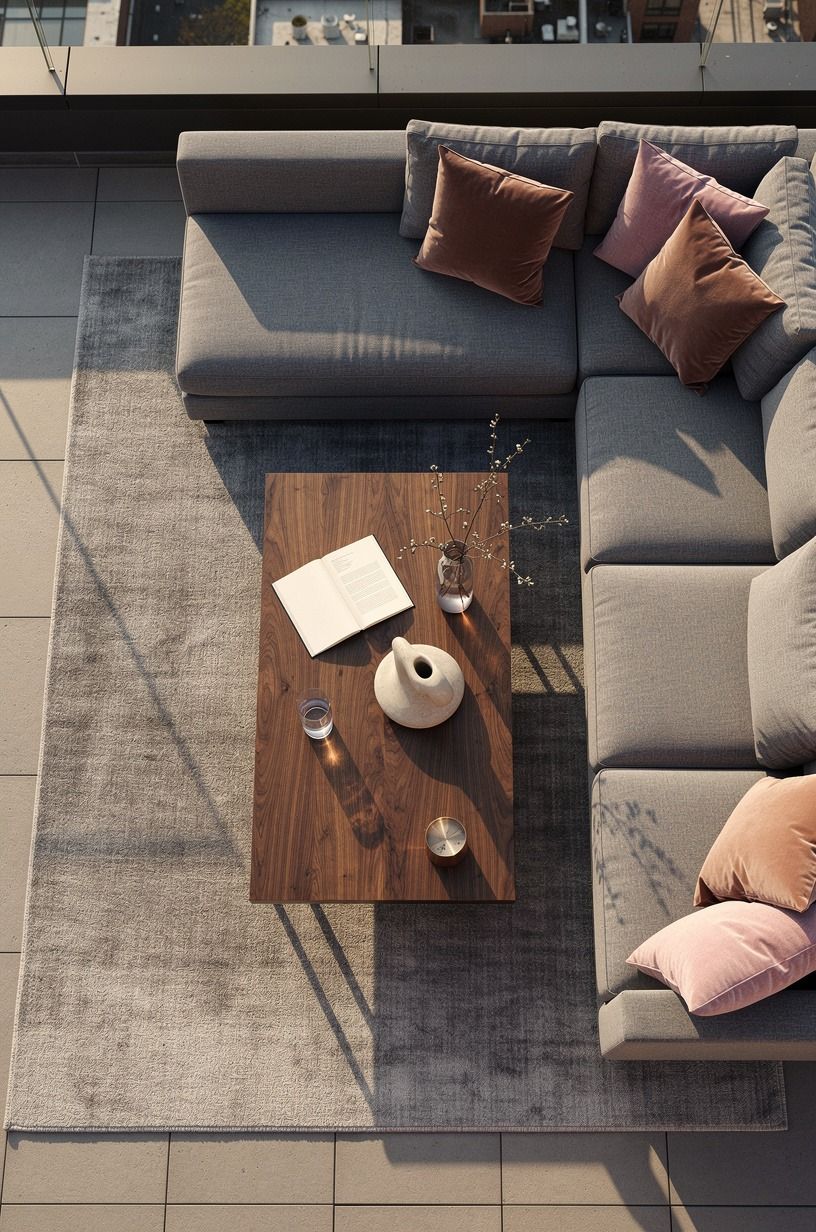
Then anchor the whole layout with a sectional pushed to one edge, not dead center. This is the part most people get wrong.
They center the biggest piece and accidentally kill the air around it. On a roof, you need that breathing room across the rug because open floor is what lets the lounge feel expensive.
A sunken seating area reads as the most generous move, but a single-sided layout against the parapet works just as well in a tighter footprint.
A sectional with a 35 to 40 in depth usually lands well because you get comfort without the hulking footprint of an extra-deep indoor sofa. I like one long side facing the view and the return facing inward so you create a soft corner for conversation.
A book-matched teak platform base looks especially sharp from above, and it keeps the silhouette grounded when the wind picks up the throws. The RH Cloud Modular Sectional in performance boucle is the splurge; a Target Threshold Briann 4-Piece is the budget move that still photographs warm.
If you’re deciding between two oversized sofas, pick the simpler arms. The roof already gives you drama for free.
This rooftop-friendly balcony lounge layout shows the same restraint in a tighter footprint.
4Layer floor cushions around a coffee table
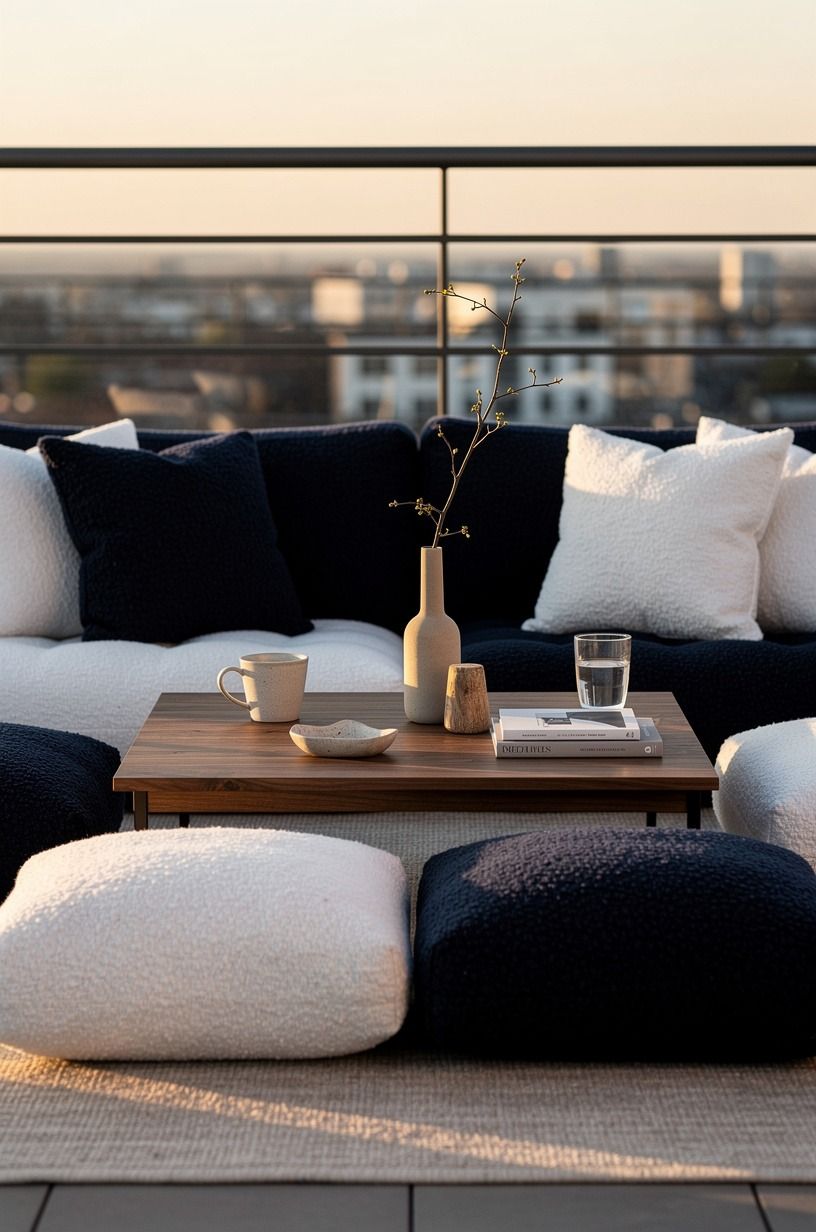
Layer floor cushions around the coffee table once the main seating is locked in.

5Build a pergola over the main seating
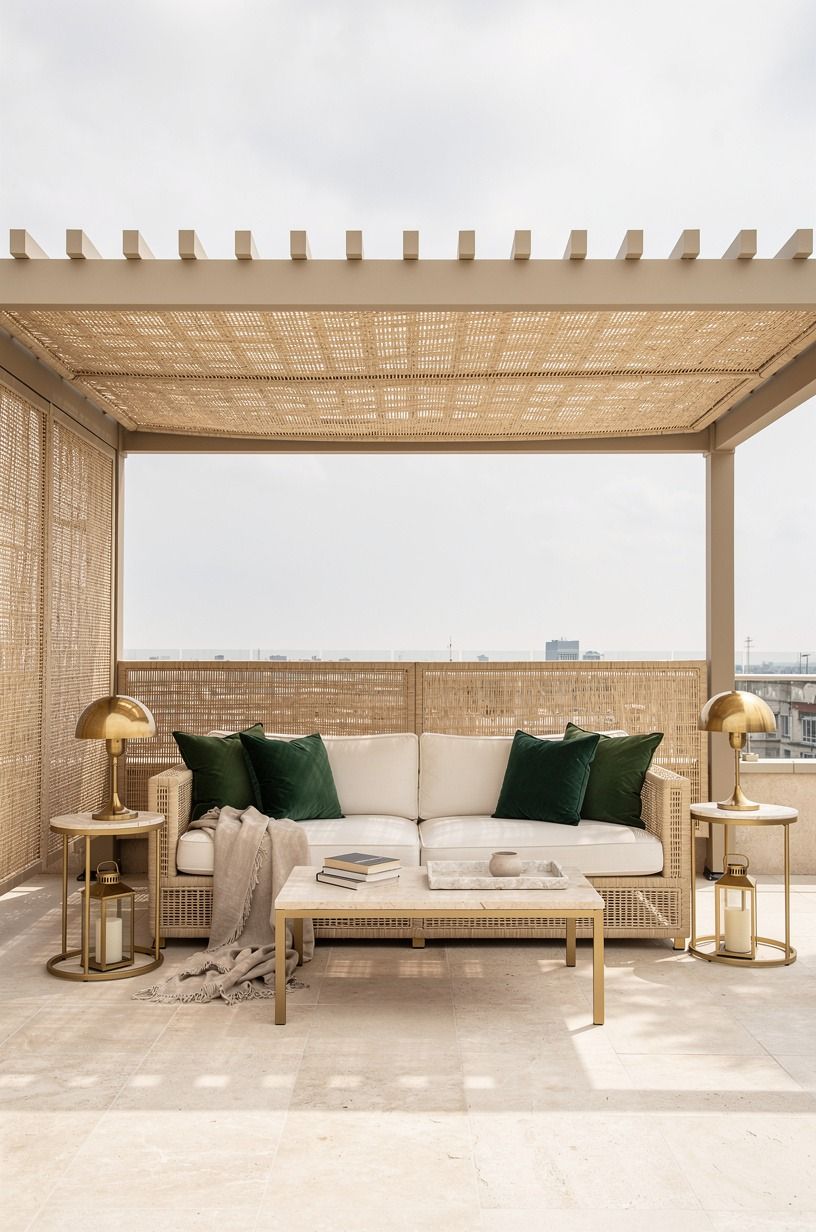
Build the pergola after the seating plan is set, not before. Your roof isn’t a blank box. It’s a windy, sun-blasted plane, and shade has to line up with where people will really sit at 5 p.m. and again at 8.
That’s why I like marking the sofa footprint with tape first, then placing the posts so the covered zone feels centered over the conversation area.
But a light structure in natural oak (or powder-coated aluminum with oak-tone beams) keeps the frame airy. Cream seating beneath it will look brighter, and the negative space around it does more work than people think.
Emerald cushions, aged gold accents, one slim side table. Done.
A Backyard Discovery 12×10 cedar pergola kit lands in the $1,800 to $3,500 range; a custom Western Red Cedar build runs $6,000 to $14,000. I would not make the pergola oversized unless your roof is huge, because a massive top can make the lounge feel shorter and gloomier than it is.
But when the scale is right, you’ll feel the room click into place the second the shadows soften. For another way to build atmosphere from above, this stargazing platform story is surprisingly useful.
6Hang woven pendants from the pergola beams
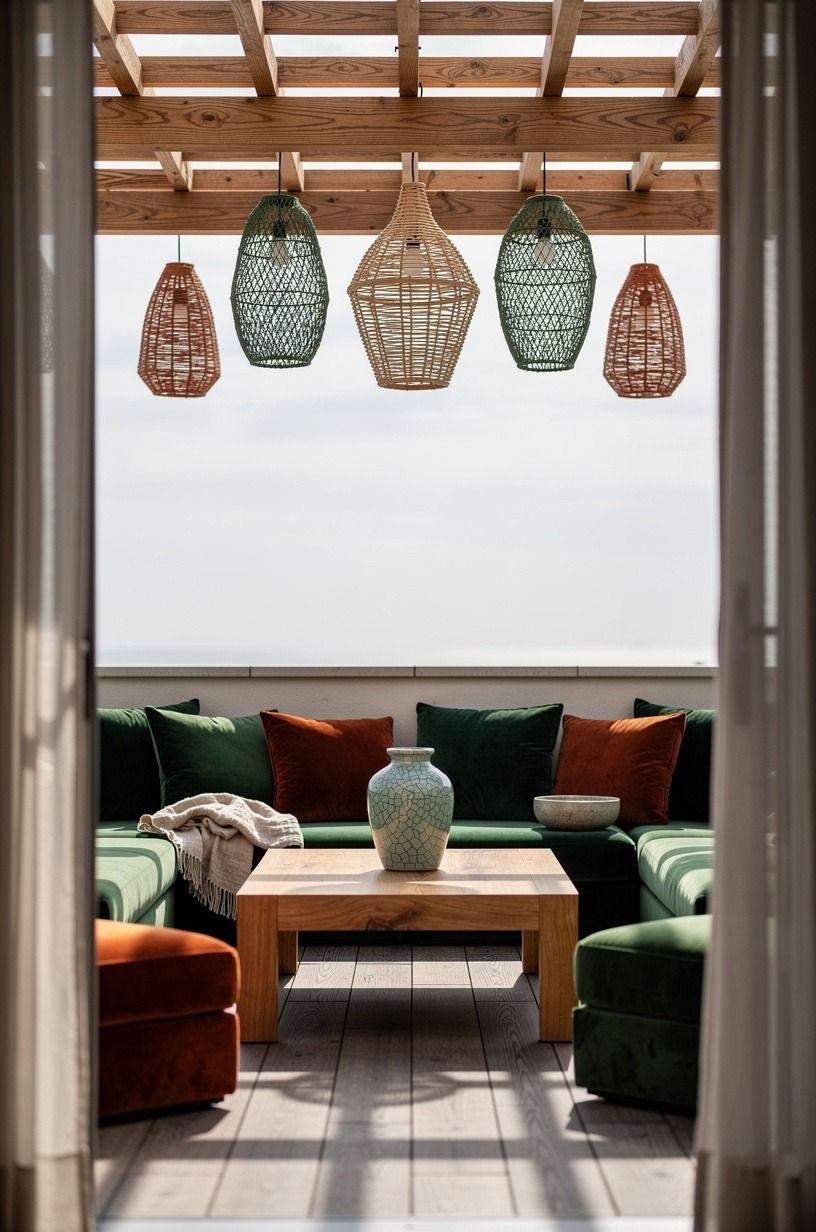
Hang pendants only after the pergola is up and your seating centerline is fixed.
7Install planters as soft privacy walls
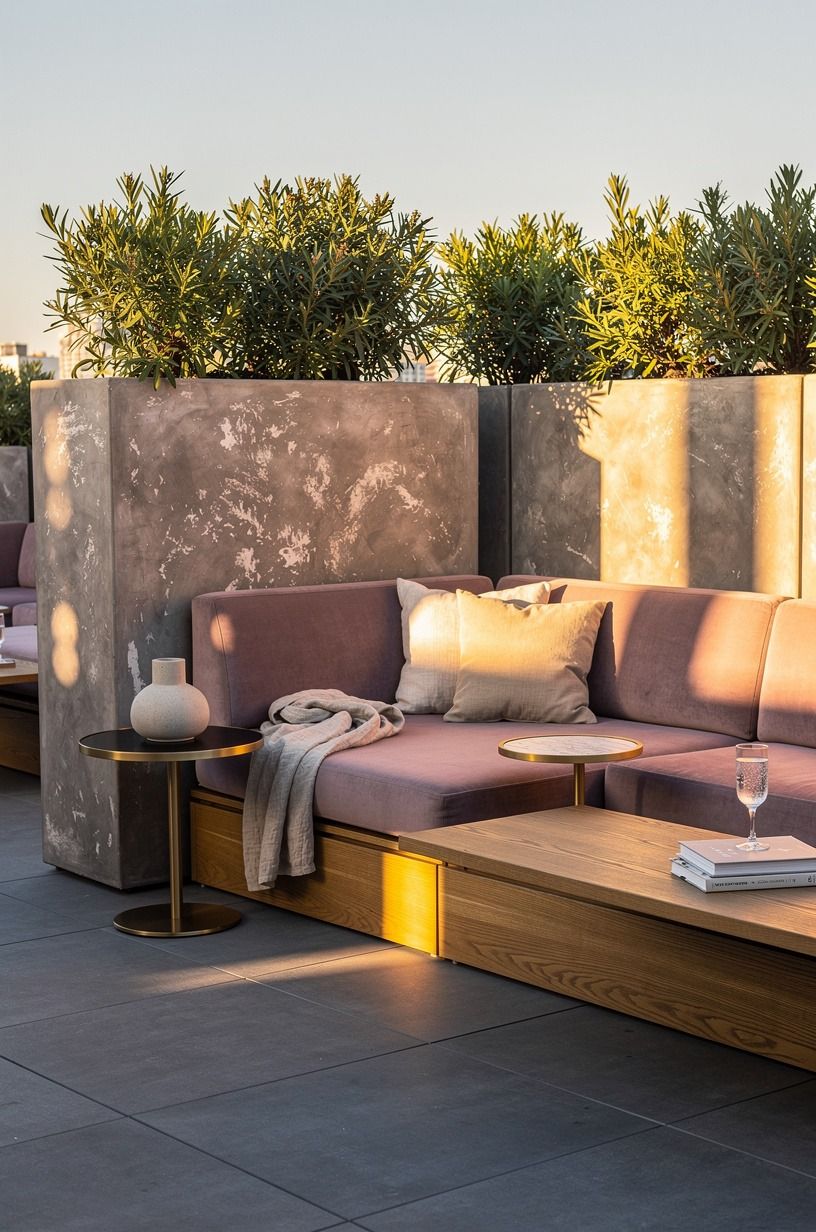
Install privacy planters before you add the little decorative extras, because the background controls the whole mood. On an exposed roof, you need softness at the edges or every seat feels a bit too public. Tall planters are better than solid screens for most house rooftop ideas because they break wind, give height, and still let the sky show through.
I like rectangular planters in charcoal fiberstone or chalky stone with layered fountain grasses, upright rosemary, and a few trailing greens so the edges feel loose instead of stiff. Place them by rule of thirds, not in one hard military line.
That off-center balance keeps the terrace expansive. If your parapet wall is painted Sherwin-Williams Evergreen Fog SW 9130, the green reads deeper against foliage and pale upholstery, which is exactly what you want.
Benjamin Moore Black Forest Green is the bolder cousin if you want a deeper, moodier backdrop. A trio of 24-inch fiberstone planters runs about $240 to $420 total at West Elm or Crate & Barrel. This rental balcony guide handles the same privacy problem in a smaller footprint, and the logic carries over well.
8Add a slim console for rooftop serving
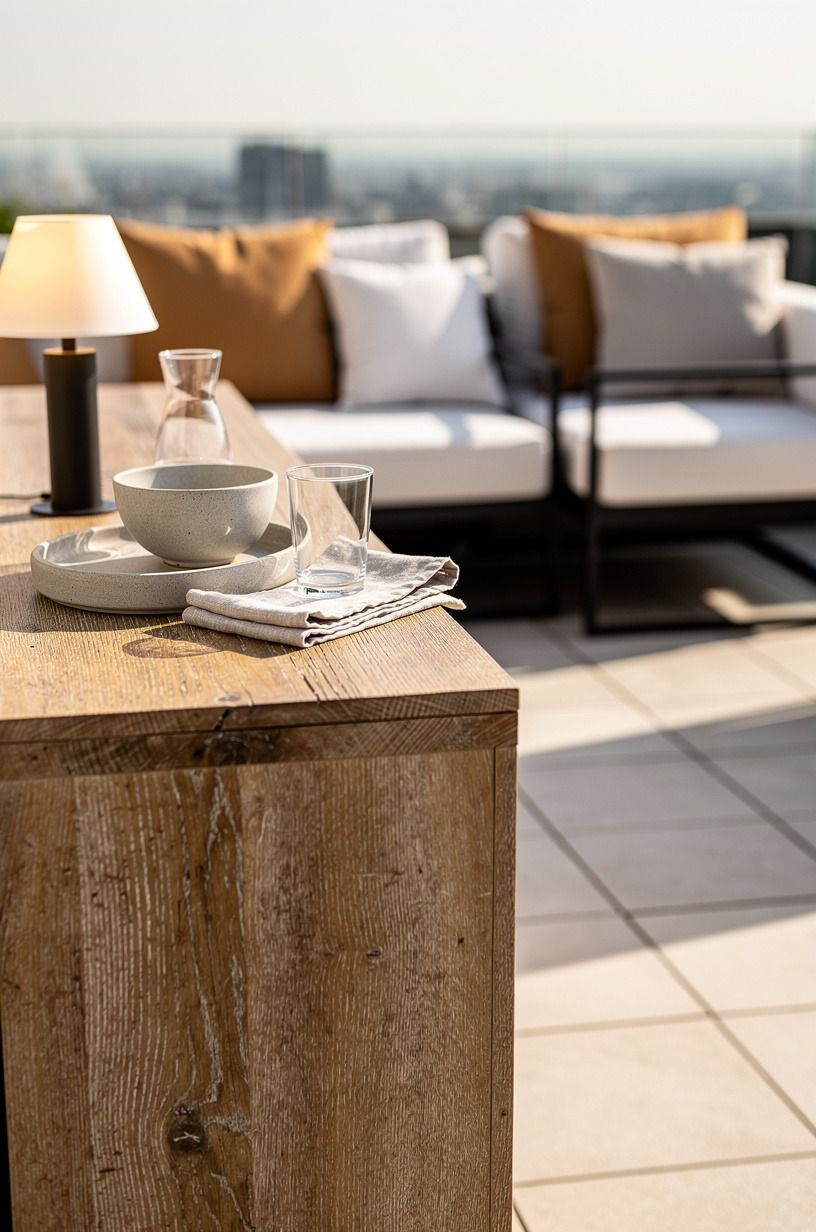
Add a slim console along one edge once your lounge can hold people comfortably. This step is underrated, and I’d never skip it now.
A console gives drinks, candles, and snack trays a landing zone so your coffee table doesn’t have to do every job at once. More important, it keeps guests from hovering awkwardly behind the sofa with a plate in hand.
Look for a narrow piece in reclaimed teak or another weathered wood with enough depth for a tray and a lamp, but not so much that it steals walking space. A CB2 Tempe Acacia Console or a Pottery Barn Benchwright is the look I’d build toward. Three-quarter views matter here. You want the console pushed to one side with breathing room around it, not stuck in the middle like a buffet line.
A small galvanized ice bucket. A stack of linen napkins.
One olive-wood bowl for citrus. If you love the idea of a serving station that feels a little theatrical, this speakeasy bar article nails that mood without getting fussy.
The balcony hotel-lounge guide is also good for narrow-edge furniture placement.
9Style side tables beside every seat
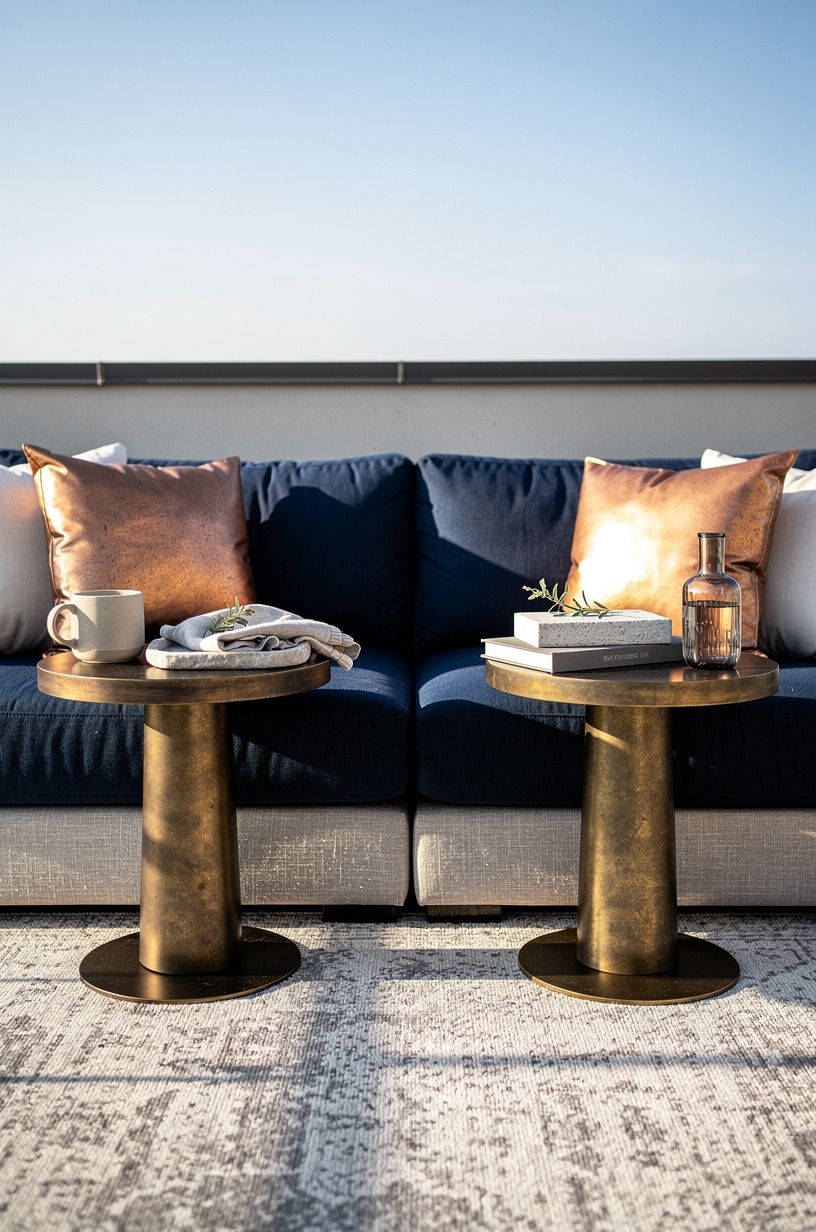
Style a side table beside every real seat, not just the sofa corners.
10Mount sconces along the parapet wall
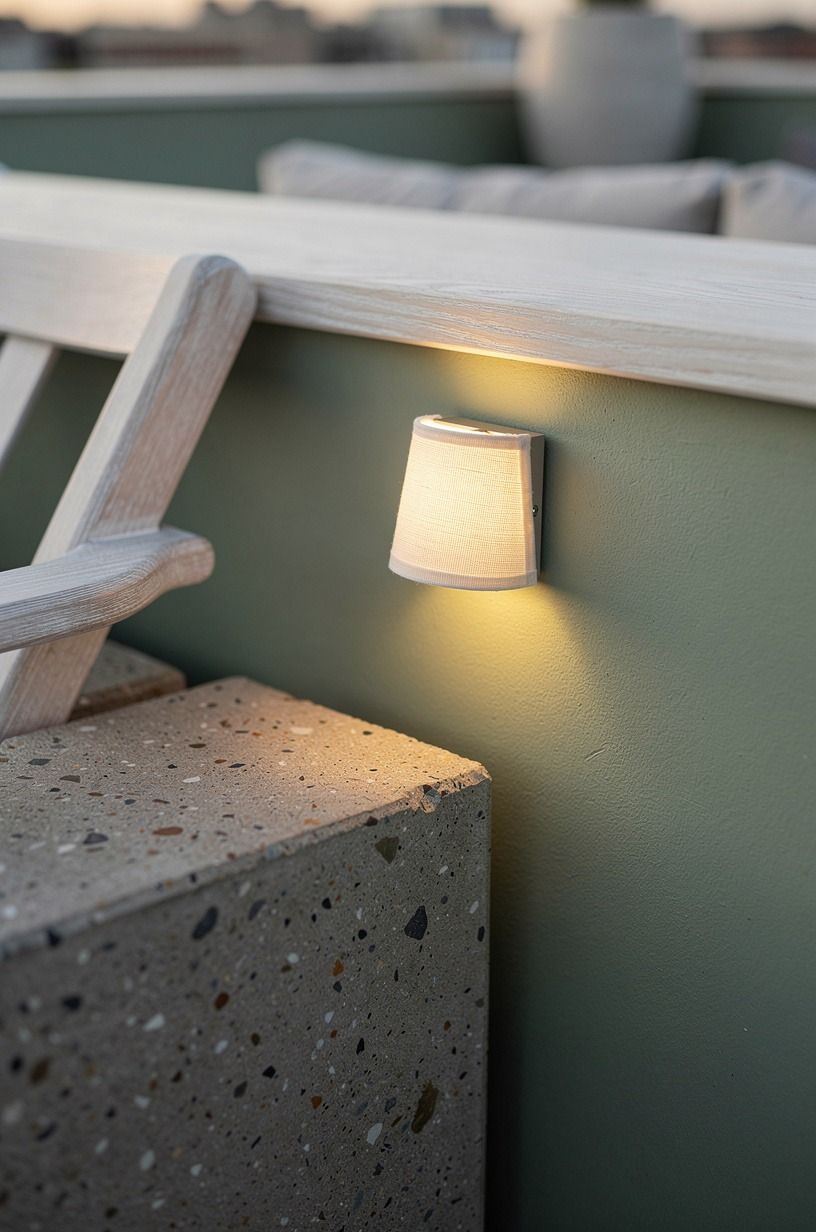
Mount sconces low enough to feel intimate, and line them up with how the lounge is really used. This is a detail shot in real life too.
You don’t need giant fixtures. You need the wall to feel warm at eye level so the edge of the roof stops reading like a boundary and starts reading like architecture.
A sage parapet finished in poured concrete or limey stucco looks fantastic with a cream linen shade and visible aggregate below it. I like the wall color under that light even more when it leans toward Farrow & Ball Hague Blue No. 30 or a softened green-gray, because the glow pulls the depth forward instead of flattening it.
The Schoolhouse Electric Hardwired Wall Sconce in unlacquered brass is the move if you want that patina to deepen over the seasons. If you mount sconces too high, the beam spreads everywhere and the room loses intimacy.
Why pay for mood lighting if it doesn’t hold the mood? For more evening-light layering, the balcony lounge piece and the path-light guide are both useful references.
11Frame the view with tall grasses
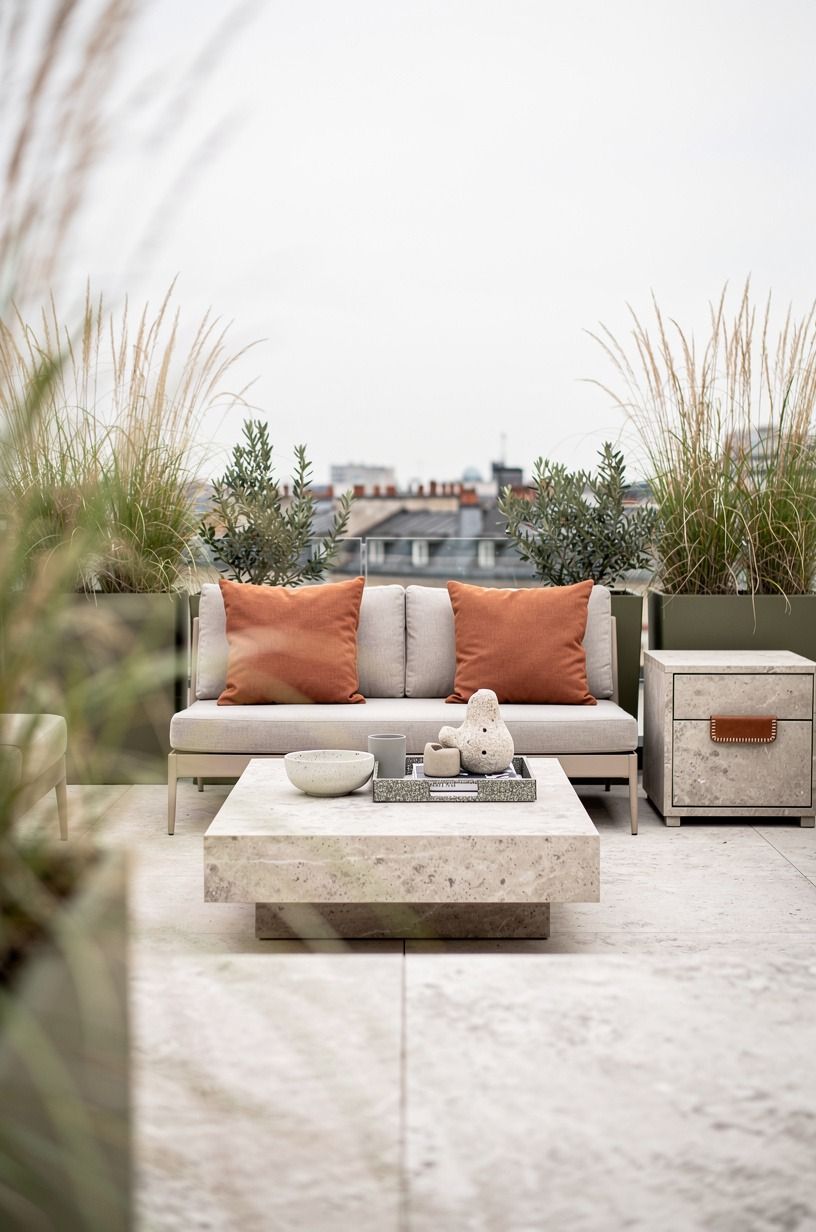
Frame the view instead of exposing every inch of it.
12Finish with throws in a lidded basket
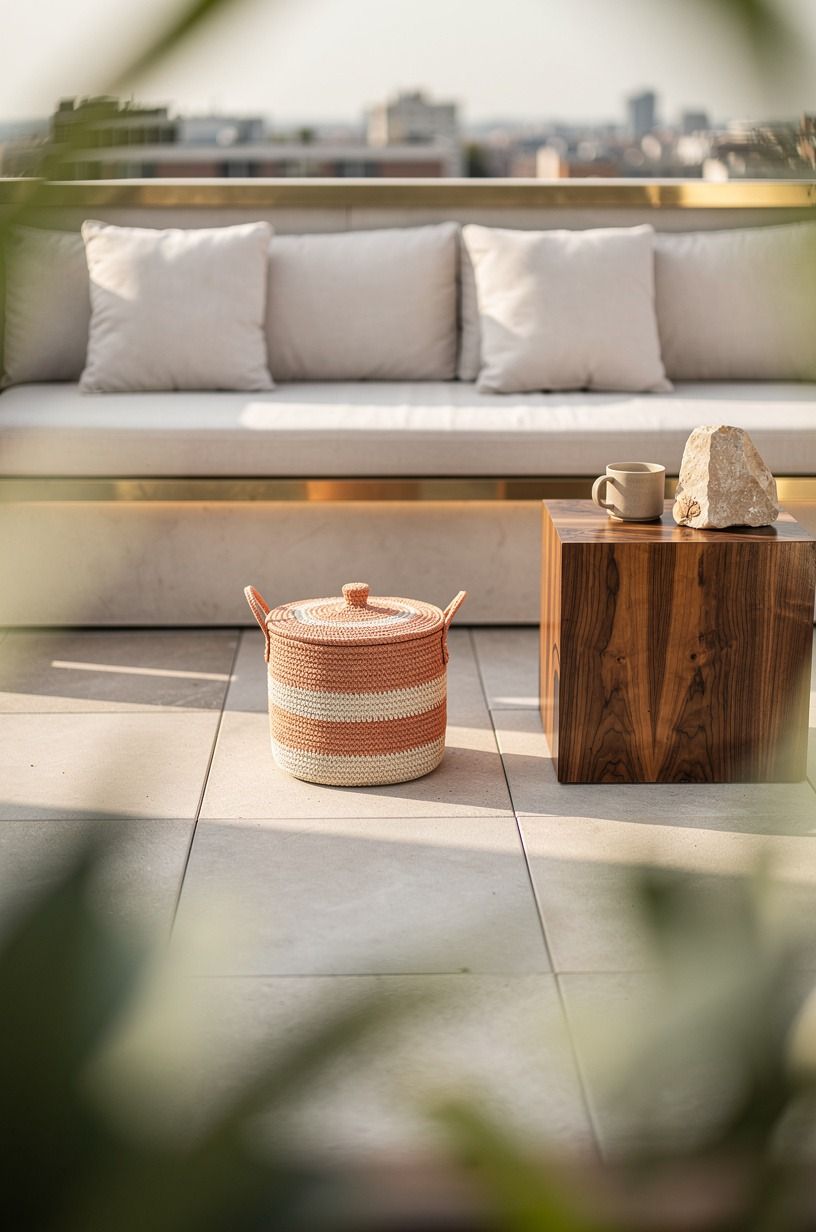
Finish with throws last because softness should be the final layer, not the foundation. Once the rug, seating, shade, lighting, and planters are doing their jobs, you only need a little extra warmth to make people linger. This is where the house rooftop starts feeling personal instead of staged.
A lidded basket in handwoven seagrass or brushed rattan placed slightly off-center works better than an open pile of blankets. It keeps the roof tidy, protects the fabric from dew, and gives you one easy gesture at sunset.
I like a couple of striped cotton throws plus one heavier merino wool piece so your guests can choose what feels right. The Boutique Rugs 24-inch Seagrass Storage Basket lands around $80 to $130; the Pottery Barn Capri Lidded Basket is the $180 to $260 upgrade.
Through foliage or a pergola opening, that basket is the small detail that tells the whole story. And yes, people notice it right away!
The Three-Tier Budget Reality
You can build a roof lounge in phases, and you should. Most people don’t need the high-end version on day one. What you need first is a usable floor plan, one strong seating move, and lighting that makes you want to go back outside after dinner.
And the part I’d spend on first is the rug and the main seating. A performance-fabric sofa typically lands around $1,200 to $4,000, while a wool rug in 9×12 can run $600 to $2,500, and that tells you where the visual weight usually lives.
A coffee table in oak often falls between $300 and $1,200. But if you already own decent seating, put the money into lighting and privacy instead.
Those two upgrades change the feel faster than a prettier table ever will. A Brightech Ambience Pro Solar String Lights is the $80 to $150 move that softens a roof for a fraction of a built-in lighting plan.
That’s the swap I’d make before I bought another cushion.
Comfort over capacity: The Breathing-Room Rule
If you want your rooftop lounge ideas to feel expensive, leave room empty on purpose. That’s the rule people fight, and it’s the one that works. More chairs sound generous, but a roof packed edge to edge reads anxious, especially when every object is competing with the skyline.
I use what I call the Breathing-Room Rule. After the sectional and coffee table are down, there should still be one clear lane where you can walk with a drink and not turn sideways. If that lane disappears, remove a chair before you buy a smaller table.
The open path is what makes the roof feel calm. A 30-inch walking lane sounds tight on paper but it reads generous in real life when the lighting is right and the textures are doing their job.
You’ll feel it the first time you walk out at dusk with a glass of something cold.
Why does the Sunset Gravity Rule work so well?
Because a roof lounge isn’t really about furniture. It’s about gravity, and I mean emotional gravity.
People stay where light, softness, and sightlines make them feel held. Indoors, walls do some of that for you.
On a roof, you have to build it on purpose. That’s why the sequence matters more than the shopping list.
I’ve seen expensive rooftops fail because the owners started with statement pieces and skipped the quiet structure underneath. A bold sofa, three sculptural lanterns, a polished bar cart, and somehow the whole thing still felt temporary.
The reason was simple. Nothing was pulling the room inward.
No rug wide enough to gather the feet. No planters shaping the edges.
No pendant light dropping the ceiling visually. The eye kept sliding away.
The Sunset Gravity Rule is my shorthand for fixing that. First, give the lounge a floor with the rug.
Second, give it a ceiling with the pergola and woven pendants. Third, soften the walls with grasses and planters so the edges don’t feel exposed. After that, your smaller layers start working harder for you.
The basket of throws matters more. The sconces look warmer.
The side tables stop feeling random. But here’s the part nobody respects until they’ve lived it: once the room has gravity, you don’t need much decor.
You need restraint.
I went back and forth on this the first time I styled a roof because I thought more objects would make the space feel finished. They didn’t. They made it feel windy and under-edited.
The roof that finally worked had fewer pieces, deeper seats, one better rug, and a lighting plan that turned on in stages. That’s the version people used.
That’s the version people remembered. And that’s why I’d rather help you edit a roof than fill one.
The Questions Worth Answering First
What is the best How to Turn Your Roof Into the Best Lounge in the House for a small living room?
A compact modular setup is the best move because flexible seating lets you scale the layout without blocking the view. Try an IKEA JUTHOLMEN-style footprint or a slim Article sectional feel.
Low arms. One rug.
One clear walking lane. You’ll save square footage without losing the lounge.
Where can I buy How to Turn Your Roof Into the Best Lounge in the House pieces on a budget?
Start with accessible basics from IKEA, Target Threshold, and Wayfair. Then check Facebook Marketplace for teak tables or outdoor planters.
Rug first. Lighting second.
Cushion covers after that. That’s usually the cleanest order if you’re watching every dollar.
How much does a How to Turn Your Roof Into the Best Lounge in the House makeover cost?
A simple version usually runs about $300 to $1,200, and that’s enough for the rug, throws, paint, and pillows. Mid-range setups often land between $2,500 and $8,000.
Free move: editing the layout you already have. Huge payoff!
Can I create a How to Turn Your Roof Into the Best Lounge in the House on a budget?
Yes, and cheap changes count more than people think. Start with a better furniture layout, add one outdoor rug, and group your lighting instead of scattering it. Marketplace table.
Budget planter. Reused basket.
That mix gets you far fast.
Is a How to Turn Your Roof Into the Best Lounge in the House worth it in a small space?
Yes, it’s worth it because a small roof often feels better edited than a big one. You need fewer pieces, and the view does part of the decorating for you. Keep seating low, push bulk to one side, and protect one open path.
Is How to Turn Your Roof Into the Best Lounge in the House a good idea for a rental?
Yes, because renter-friendly layers do most of the work here. Outdoor rug.
Plug-in pendants or rechargeable lamps. Freestanding planters for privacy.
Removable wall color only if your building allows it. This balcony lounge guide is a smart companion if you’re keeping everything reversible.
Start Here If You Only Do One Thing
If I had to pick one step, I’d start with the outdoor rug. Without that border, every seat keeps drifting and the roof never feels claimed. Lock the footprint first, then let everything else answer it.
You’ll spend less, and the whole lounge will land faster. This balcony lounge example proves the same point.