I like the idea of a backyard dip pool a lot more than I like a giant vinyl ring taking over the whole patio. In a small yard, a stock tank plunge pool makes more sense, especially when a typical installed above-ground pool package often lands around $2,000 to $4,000.
A simple DIY plunge setup can stay closer to about $400 to $700 if you keep the build basic. That price gap is exactly why this project keeps pulling people in.
Start With the Size You Will Actually Use
The cheapest mistake is buying too much pool. A basic cold-plunge setup with a 150-gallon structural-foam stock tank usually costs about $200 to $250, and that is enough for full-body immersion if you sit or crouch.
Typical dimensions for that size are roughly 5 to 6 feet long, 30 to 40 inches wide, and about 24 inches high. I think this is the smartest starting point for a narrow side yard, because it cools fast, drains fast, and does not bully the rest of the space.
If you want the classic round cowboy-pool look, a 100-gallon galvanized tank is usually around $150 to $250. It has a smaller footprint, but it is better for one adult sitting still than for any kind of mini-swim fantasy.
Pick the Material Before You Chase the Look
Structural foam is the practical choice if you care more about easy upkeep than farmhouse style. It is lighter, it does not rust, and it makes the whole project less fussy from day one.
Galvanized steel looks better in photos, and I get why people love it. But if you choose metal, you should expect more protection work, because that finish can eventually show rust and the water can pick up a metallic note.
For a low-maintenance build, I would skip the romance and buy the easier shell. A plunge pool should feel refreshing, not like a weekend relationship with sealant and touch-up paint.
Build a Base That Keeps the Tank Level
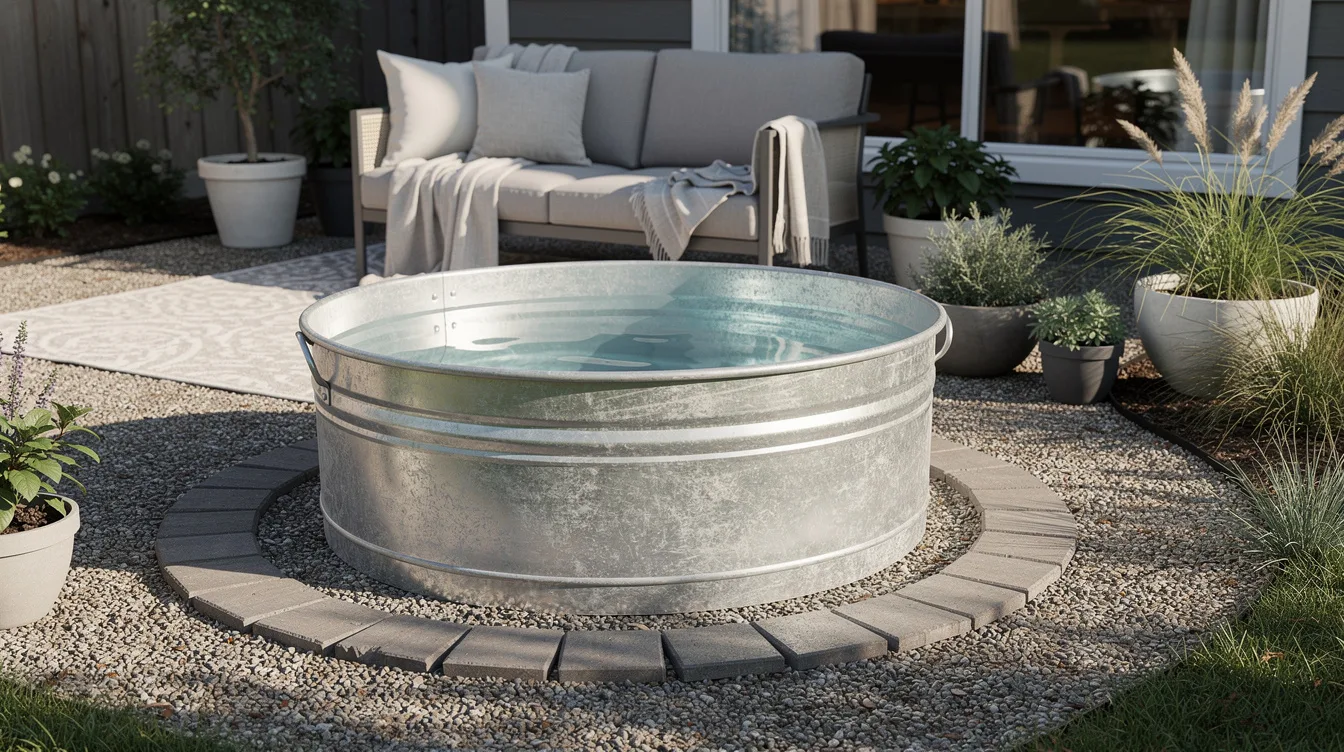
The pretty part can wait. What matters first is a compact, level pad made from gravel, sand, or a few pavers, and the material cost for a small base often falls around $100 to $200.
This is where budget projects either stay cheap or become annoying. A tank set on uneven ground looks off immediately, and it puts stress on the walls once it is filled.
If you have a 3 by 3 meter, roughly 10 by 10 foot, yard zone to work with, a round plunge pool plus a gravel border usually fits comfortably. That small footprint is a real advantage over a standard above-ground pool kit, which tends to ask for much more clear space.
Keep the Water System Simple at First
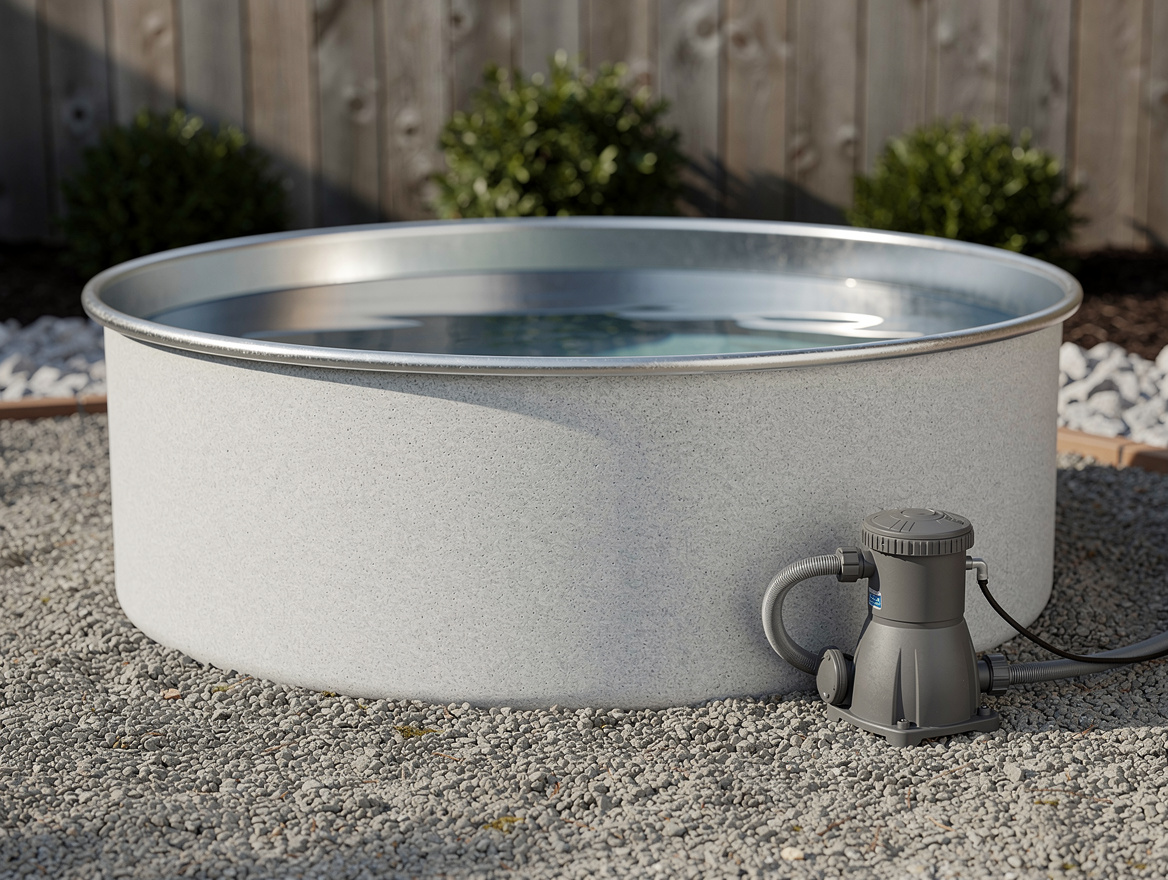
You do not need a full backyard-pool ecosystem to make this worthwhile. A basic cartridge filter pump from Amazon, Walmart, or Home Depot usually runs about $80 to $150, and that is enough for many entry-level setups.
If you are building a true cold plunge and using it for short sessions, frequent manual water changes can be cheaper than overbuilding on day one. I like that approach for a first season because it lets you test the habit before you spend more money.
Add a test strip kit, a floating dispenser, and a small skimmer later if you want cleaner water with less hassle. Those extras are useful, but they should come after the tank, the base, and a pump that actually works.
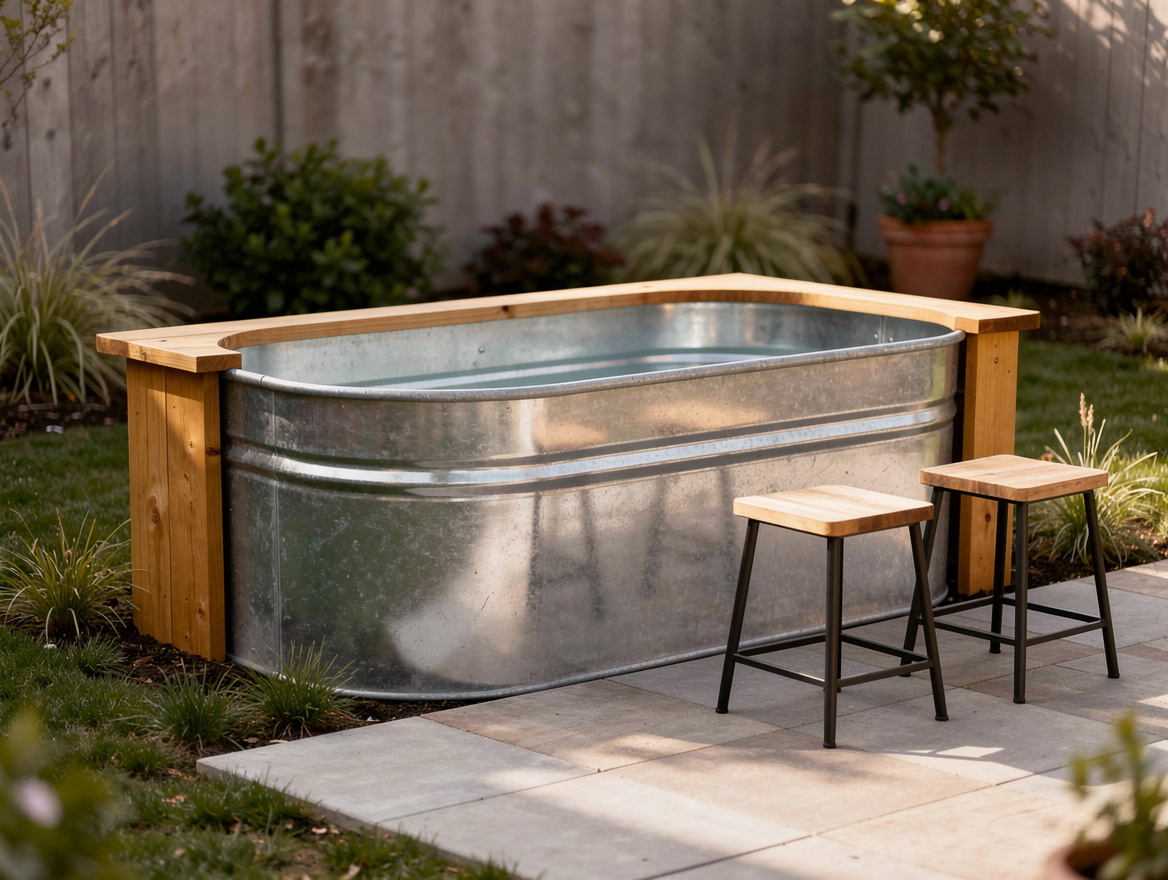
Protect Metal Tanks Before You Dress Them Up
If you go with galvanized steel, budget for a protective interior layer. A basic pool-safe epoxy or liner coating can cost around $150 to $300, and it is money better spent than a decorative surround you will barely notice from inside the water.
This is the point where some DIY builds stop being cheap in a good way and start being cheap in a risky way. I would rather look at plain metal for a month than skip the barrier and deal with early wear.
Once the inside is handled, then add the outer trim. Cedar boards, simple edging, or a narrow platform from Lowe’s or Ace Hardware can keep that cowboy-pool vibe without pushing the total into above-ground kit territory.
Fake a Custom Plunge Pool With Pavers
The best-looking budget version is usually a slightly recessed tank with a clean ring of pavers around it. For an 8 to 10 foot tank, pavers, gravel, and sand often total about $400 to $800, which is still realistic for a premium-looking DIY job.
An 8 foot round tank, about 2.4 meters across and around 24 inches deep, works well for seated soaking for two or three people. A 10 foot version feels closer to a mini pool, but it also pulls you toward higher water, filter, and finish costs.
That is why I think the 8 foot range is the sweet spot. It looks intentional, it fits more backyards, and it stays far below branded turnkey stock tank pools that can sell for roughly $1,775 to $2,385 before you even start dressing up the area.
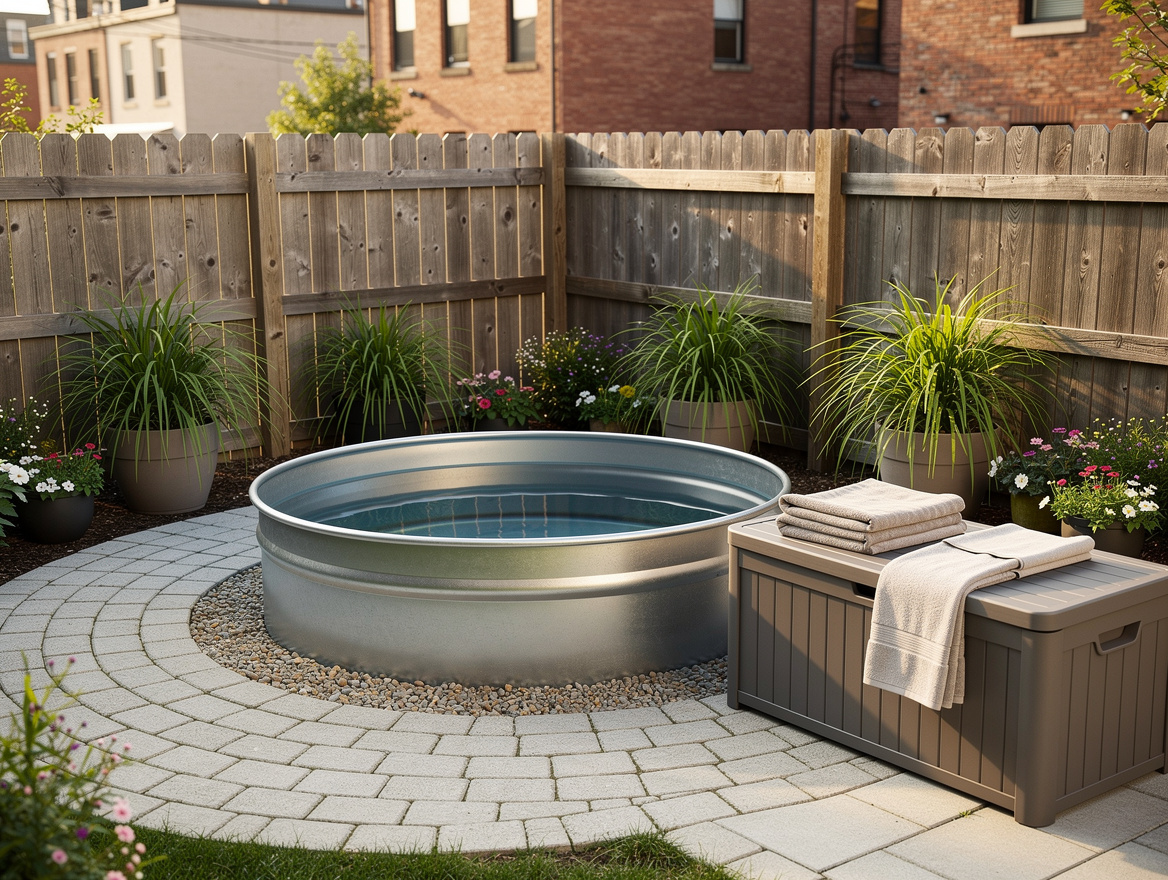
Spend on the Surround, Not on Extra Pool
A stock tank plunge pool looks expensive when the border looks finished. A few smart pieces, a rolling deck box from Costco, outdoor towels in one color, and a pair of weather-friendly stools from Target do more for the final look than upsizing the tank ever will.
I also like one visual material repeated twice. Concrete pavers on the ground, then a matching side table or planter nearby, makes the setup feel thought through without needing a full deck build.
For a basic foam-tank setup, the total often stays around $400 to $700. For a galvanized build with coating and a simple surround, about $600 to $1,000 is a believable target, and a semi-in-ground version with pavers often lands around $1,000 to $1,800.
All of those ranges can still undercut a traditional above-ground package. That is the whole point, spend where your eye goes, not where the water line already does the work for free.
Begin with the shell, the pad, and the pump, then live with it for a couple of weeks before adding trim or pavers. The smartest version is usually the one that stays small, level, and easy enough to use on a random Tuesday.
Mia Carter writes about small-space living and budget home makeovers. She has restyled three rentals and tests most ideas in her own 45 sqm flat.