By noon on a hot Saturday, the back corner near my raised beds was unusable. The sun bounced off the fence, the hose was always underfoot, and every plastic chair I dragged over there felt one storm away from the curb.
I wanted a small shelter that gave me shade, handled light rain, and did not turn into a permit fight. So I kept it open-sided, stayed under a typical small-shed size range that often avoids permits in many places, and capped the budget at about $200.
Keep the footprint small from the start
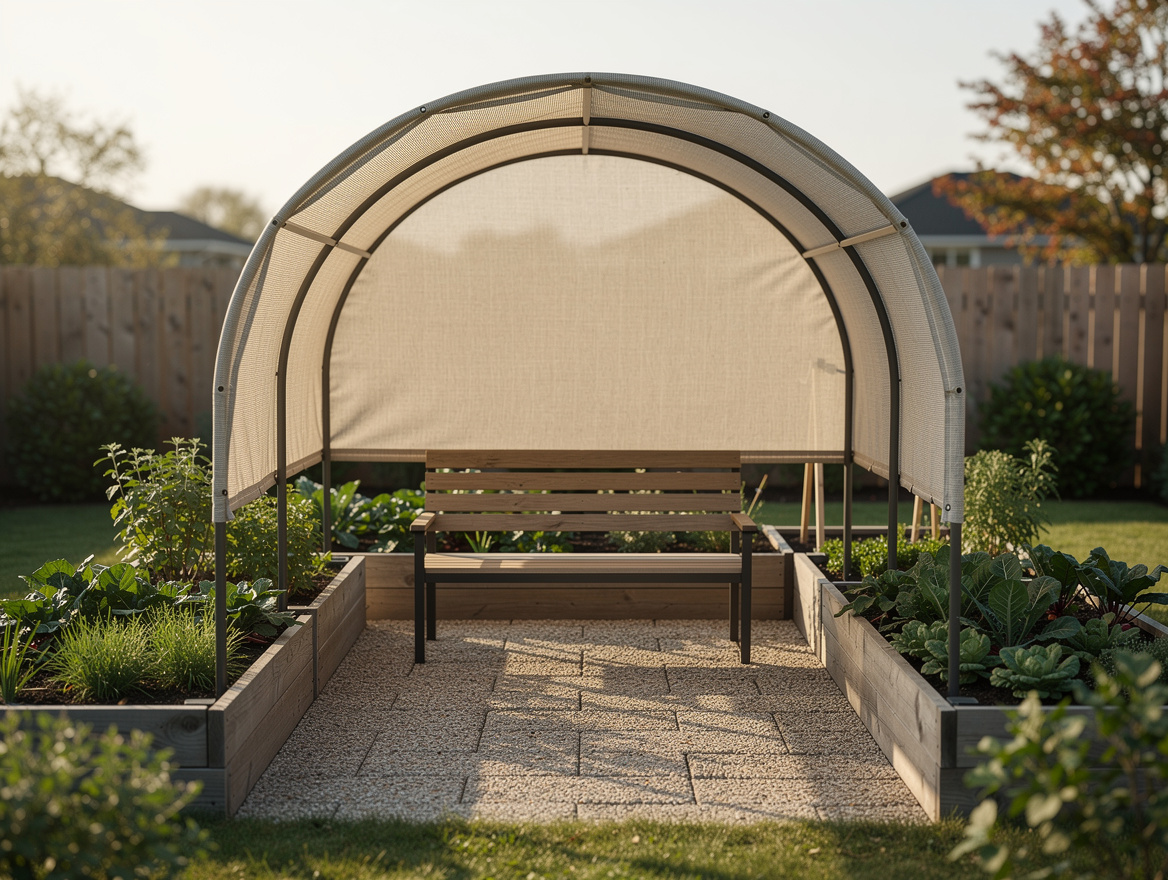
I did not start with lumber, I started with local rules. In many areas, permit thresholds often get tighter once a structure gets larger, taller, enclosed, or attached to a foundation, so I aimed for a simple open-sided shelter around 5 feet by 10 feet and roughly 7 feet at the highest point.
That size felt smart, not cramped. It covers a bench, a potting table, or two chairs, and it still reads like lightweight garden equipment instead of a backyard outbuilding.
I also avoided concrete completely. A portable structure with no slab, no walls on all four sides, and no electricity is usually the least annoying version of this idea.
Build the frame with cattle panels and T-posts
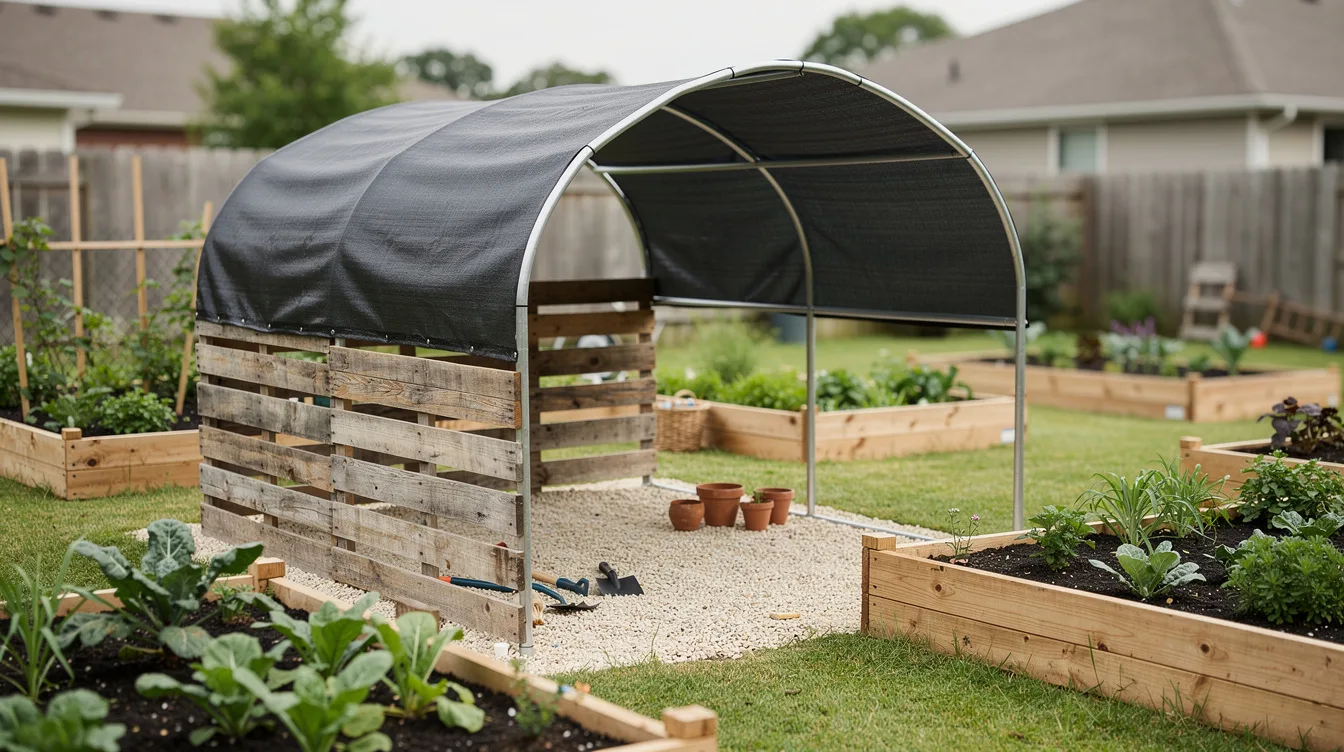
The frame is where I refused to get cute. I used Behlen-style cattle panels, the common 50-inch by 16-foot livestock panels you see at Tractor Supply, because they are cheap, rigid, and much better than thin decorative arches.
A typical price in 2026 is about $26 to $30 per panel, which is why this route still works on a tight budget. I used three panels for the arch and overlap, and that put me in the $80 to $90 range before fasteners.
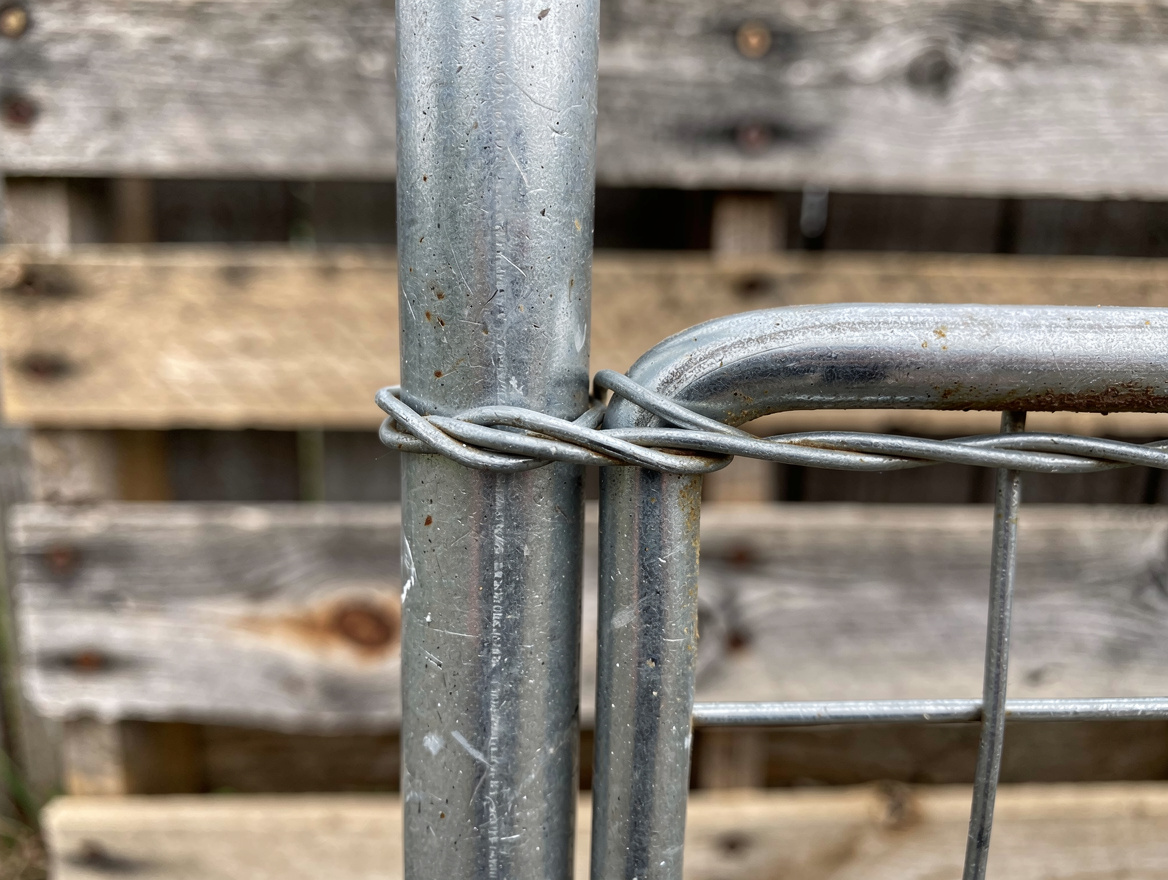
For the vertical support, I drove in steel T-posts at roughly $5 each. Six posts was enough for my build, and I would not bother with flimsier garden stakes because wind will expose every weak decision fast.
This part went faster than I expected. Once the posts were aligned and the panels were bent into place, the shelter finally looked intentional instead of improvised.
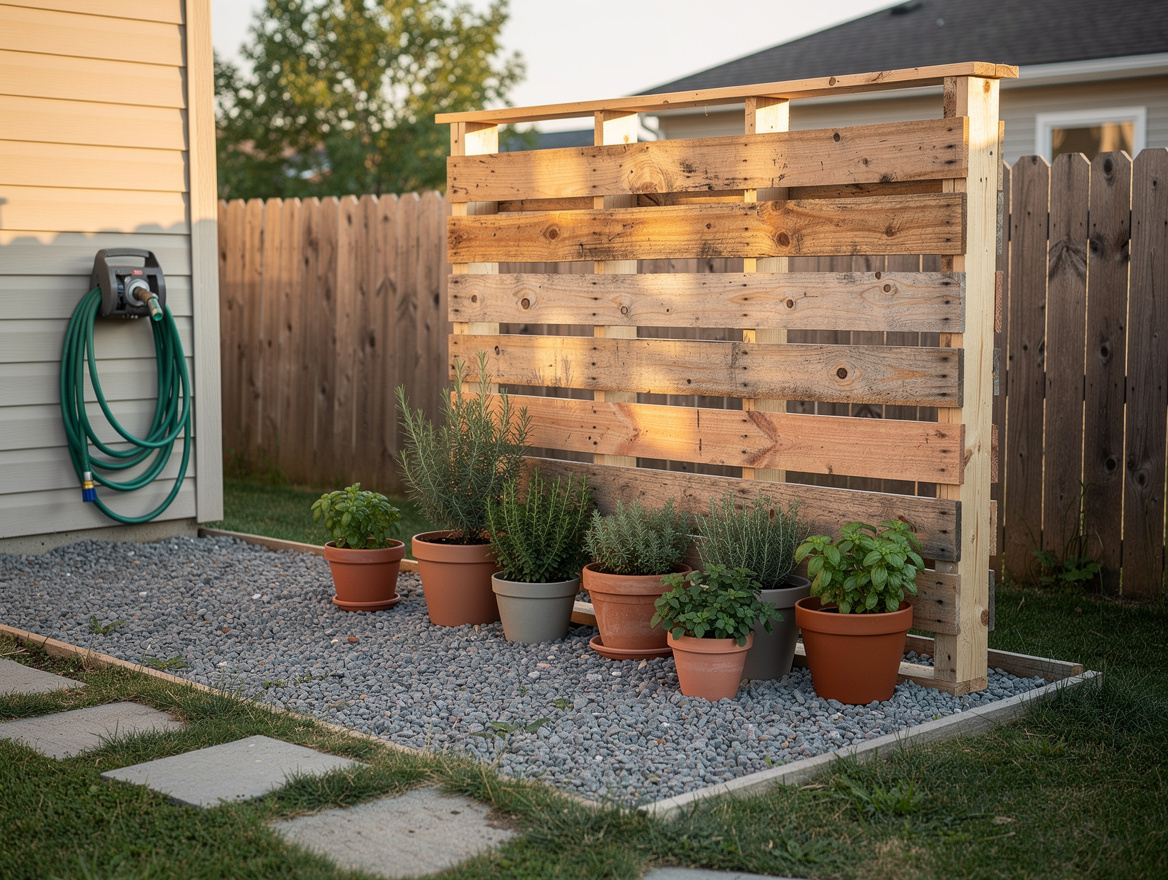
Use free pallets where wood actually helps
I did not waste money framing full walls. I used two recycled wood pallets on the back side as low screening, mostly to block the neighbor-facing view and give the shelter a little visual weight.
Pallets are worth using only if they are free and still solid. Garden centers, warehouses, and some hardware stores often have a stack they want gone, and paying for beat-up pallet wood defeats the whole point of a budget build.
I screwed the pallets to simple bracing and left gaps open. That kept airflow moving, which matters more than people think once summer heat gets trapped under a roof.
This was also the line I would not cross: no full enclosure. The moment you start adding solid walls, a door, and a real roof deck, you are building something very different, and usually far more regulated.
Choose shade cloth instead of a heavy roof
I skipped corrugated panels and went with Coolaroo shade cloth stretched over the arch. A light roof was cheaper, easier to tension, and a lot more forgiving for a first weekend build.
A typical shade cover for something this size runs about $25 to $40, depending on UV rating and width. That was the right place to spend because the cover changes how the shelter feels more than almost anything else.
I also looked at polyethylene tarp and greenhouse film from Home Depot. That can work if you want rain protection first, and for a small hoop setup the film itself often lands in the $20 to $40 range, but it looks more temporary and gets noisy in wind.
Shade cloth was my pick because I wanted comfort, not a plastic tunnel. It softens the light, does not scream utility project, and still gives enough overhead cover for quick summer showers.
Anchor everything like weather actually exists
The cheapest mistake on a project like this is weak anchoring. I added zip ties, galvanized wire, and a handful of rebar-style stakes, then tightened every connection until nothing rattled.
Fasteners and tie-downs are not exciting, but they are the reason the shelter still looks straight a month later. I spent roughly $15 to $20 here, and I would spend it again without thinking.
If you go with a PVC hoop version instead, this rule matters even more. PVC conduit can build an ultra-cheap 6.5-foot by 10-foot shelter for about $90 to $110 total with film, clamps, rope, and stakes, but only if it is anchored properly.
I used spring clamps from Home Depot to test roof tension before fixing the final layout. That small step saved me from locking in saggy fabric, which is exactly how water pockets and wind damage start.
Finish the floor and keep the budget honest
I did not pour pavers or build a platform. I laid down pea gravel over landscape fabric, then slid in one narrow bench and a basic metal side table I already owned.
That floor choice kept the whole shelter feeling light and washable. Mud disappears, weeds stay down longer, and nothing about it suggests a permanent room added to the yard.
My total came in under $200 because I mixed bought materials with scavenged ones. The cattle panels were about $85, T-posts about $30, shade cloth about $30, ties and wire about $15, gravel about $20, and the pallets were free.
That kind of budget is realistic in 2026 if you stay small and do not chase a cabin look. The second you add a framed roof, plywood sheathing, and decorative trim, your weekend shelter turns into a several-hundred-dollar project fast.
Treat the design like a shelter, not a tiny shed
The reason this worked is simple: I built for one job. A small open-sided garden shelter for shade, light rain cover, and a place to sit near the beds is affordable because it does less.
I did not ask it to store bikes, hide tools, survive snow loads, and look like a guest house. When people blow past budget, it is usually because they keep changing the assignment.
I also think the open arch shape looks better than a cheap square box. A curved roof made from livestock panels has enough structure to feel deliberate, and enough softness to sit nicely beside plants and wood fencing.
Would I use this for serious storage, no. For coffee in the morning, seed trays, a hammock, or a shaded bench by the tomatoes, it works far better than the price suggests.
Start with the size, not the shopping list. Mark out a 5-by-10-foot rectangle on the ground first, and if that footprint already solves your problem, you have a real shot at finishing the whole thing in one weekend without blowing past $200.
Mia Carter writes about small-space living and budget home makeovers. She has restyled three rentals and tests most ideas in her own 45 sqm flat.