My patio was a graveyard of mildewed seat cushions and pool noodles that never dried. I wanted a bench with storage, but I don’t own a drill, a miter saw, or the patience to rent either.
I built this cinder-block and 2×4 storage bench entirely with hand tools, spending under $75 at big-box stores. It took one afternoon, two sore arms, and zero trips to a workshop.
Map Out Your Block Layout First
My patio was a mess of soggy cushions and stray pool toys. I needed storage, a seat, and zero trips to borrow a circular saw.
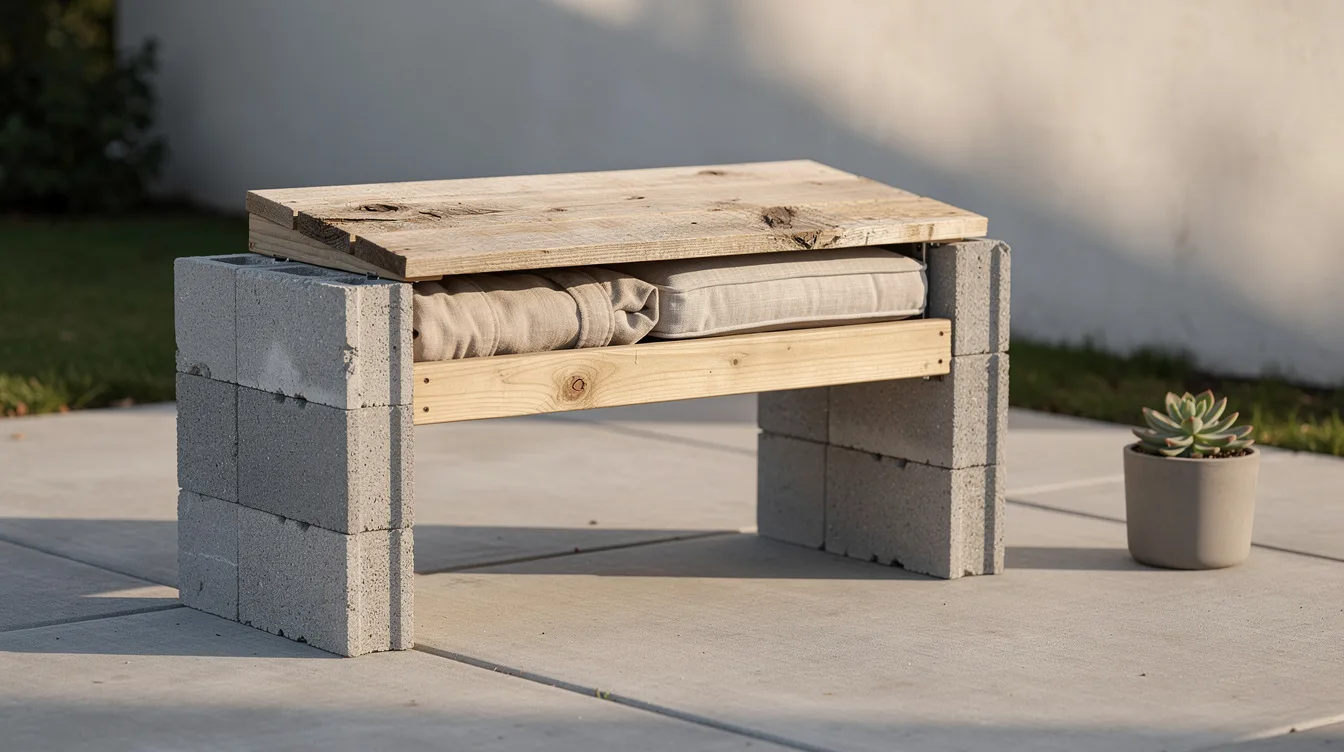
I sketched a 48-inch-wide bench using standard 8x8x16-inch cinder blocks as legs and side walls. Two blocks stacked per corner hits roughly 18 inches, a comfortable seat height for most adults. You can stretch to 60 or 72 inches by swapping longer 2x4s and dropping a third block stack in the center.
Source Materials at Home Depot or Lowe’s
I grabbed eight Quikrete standard hollow blocks at Home Depot for about $1.80 each. For the frame, I picked up five pressure-treated 2x4x8s in the lumber aisle, roughly $4 apiece. The cashier didn’t blink at my cart full of concrete and wood.
A half-sheet of 3/4-inch exterior plywood ran me $22. I had Lowe’s cut it to 48 by 17 inches at the panel saw, free with purchase. That’s your lid, done.
Assemble the Base by Hand
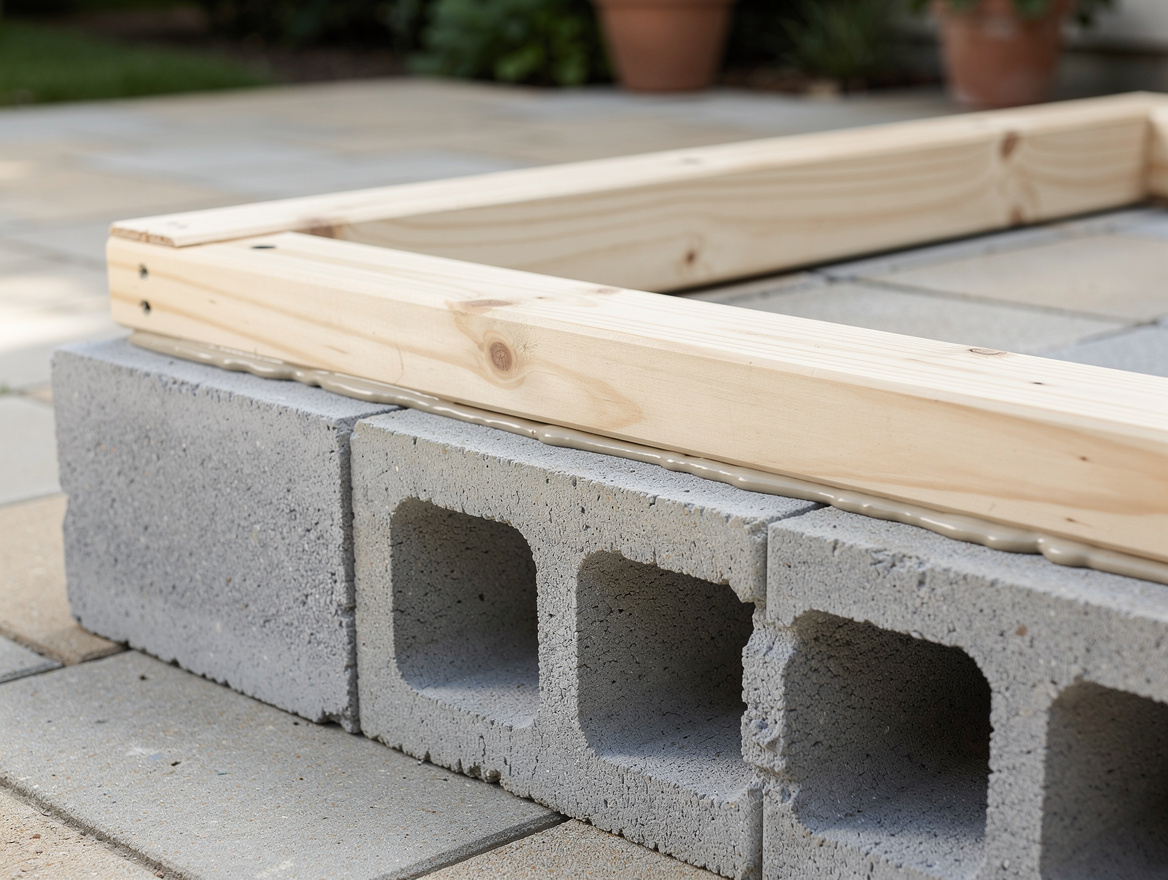
No drill? No problem. I laid out two block stacks per side, two blocks high, with the hollow cores facing inward to create side walls.
The cavity between them is your storage zone, roughly 32 inches wide and 8 inches deep.
I squeezed a bead of Liquid Nails LN-901 between each block layer, about $6 a tube. It adds stability without anchoring to concrete. Let it cure for an hour before loading weight.
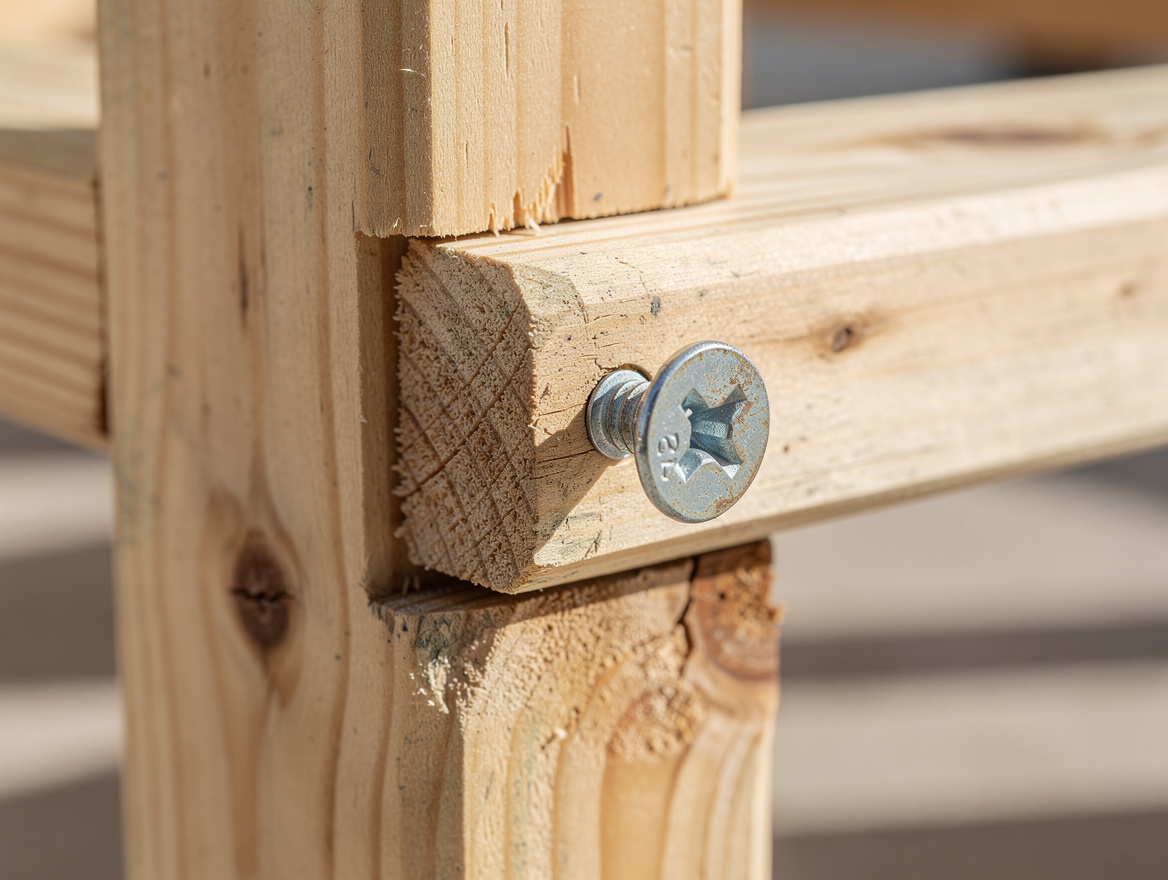
Screw the 2×4 Frame Together
I cut my 2x4s with a simple hand saw: four pieces at 48 inches for front and back rails, four at 14 inches for cross-pieces. A basic miter box from Ace Hardware, maybe $12, keeps cuts square if your eye isn’t trained.
I joined everything with 3-inch exterior wood screws and a manual screwdriver, pre-drilling with a cheap bradawl to prevent splitting. GRK screws at Lowe’s run about $10 for a 75-count box. It’s slow work.
My forearms burned. The frame held anyway.
Build the Plywood Lid with a Simple Hinge
I screwed the 48-by-17-inch plywood sheet to a back 2×4 rail using 1-5/8-inch exterior screws, creating a basic hinge line. The lid lifts forward to access the block cavity underneath.
I added two short 2x4s across the underside as stops, so the lid doesn’t slide backward when someone sits. A strip of leftover Thompson’s WaterSeal, about $28 a gallon, went on all wood surfaces. I skipped the block paint.
The raw concrete grew on me.
Weatherproof and Load It Up
The typical untreated 2×4 frame lasts 3-5 years in ground-contact conditions. A yearly refresh with Thompson’s or a similar sealer pushes that toward 8-10. The cinder blocks don’t care about rain, ever.
My finished bench holds two adults comfortably, stores four folded lounge cushions in the cavity, and cost under $75 total. The lid isn’t airtight. I toss cushions in a $12 Walmart storage bin inside the cavity if storms roll through.
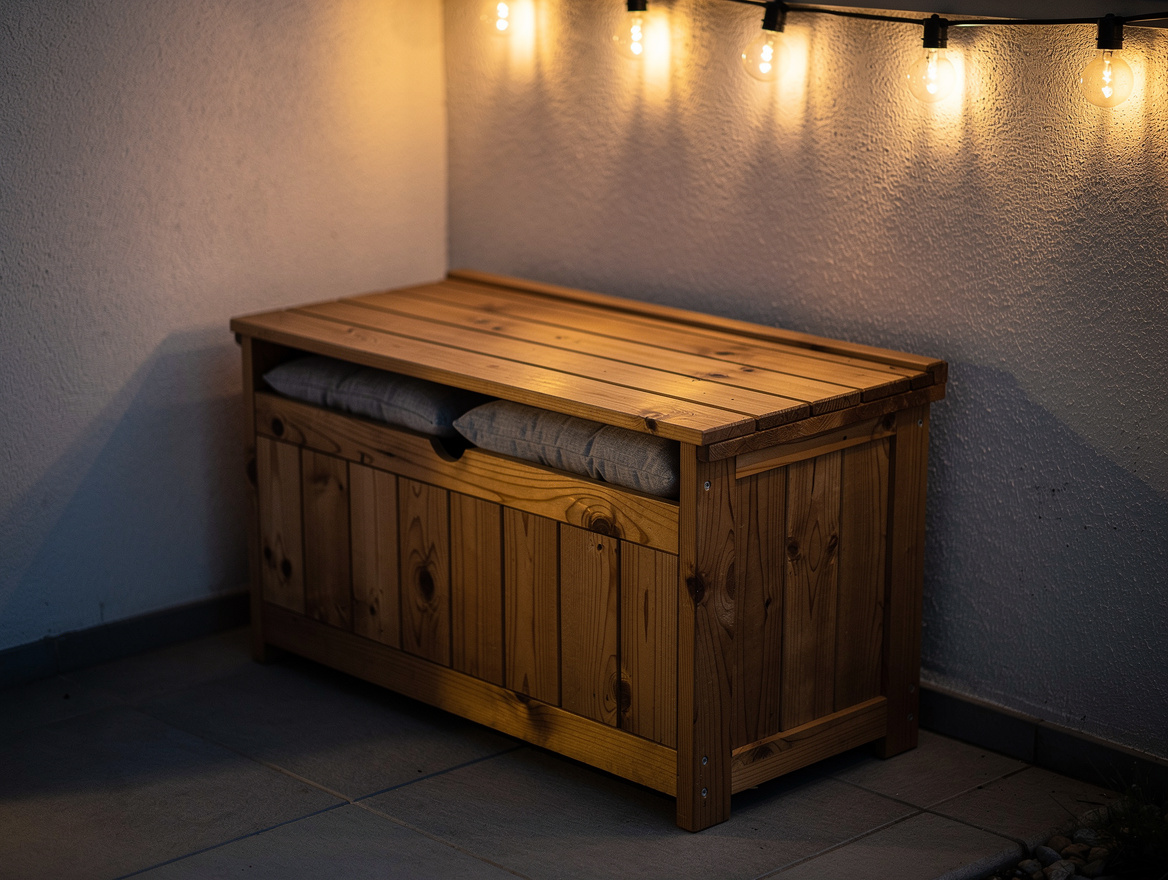
If I had to pick one upgrade, I’d start with the plywood lid. It turns a basic block-and-beam seat into actual hidden storage. Everything else is just stacking and screwing.
Mia Carter writes about small-space living and budget home makeovers. She has restyled three rentals and tests most ideas in her own 45 sqm flat.