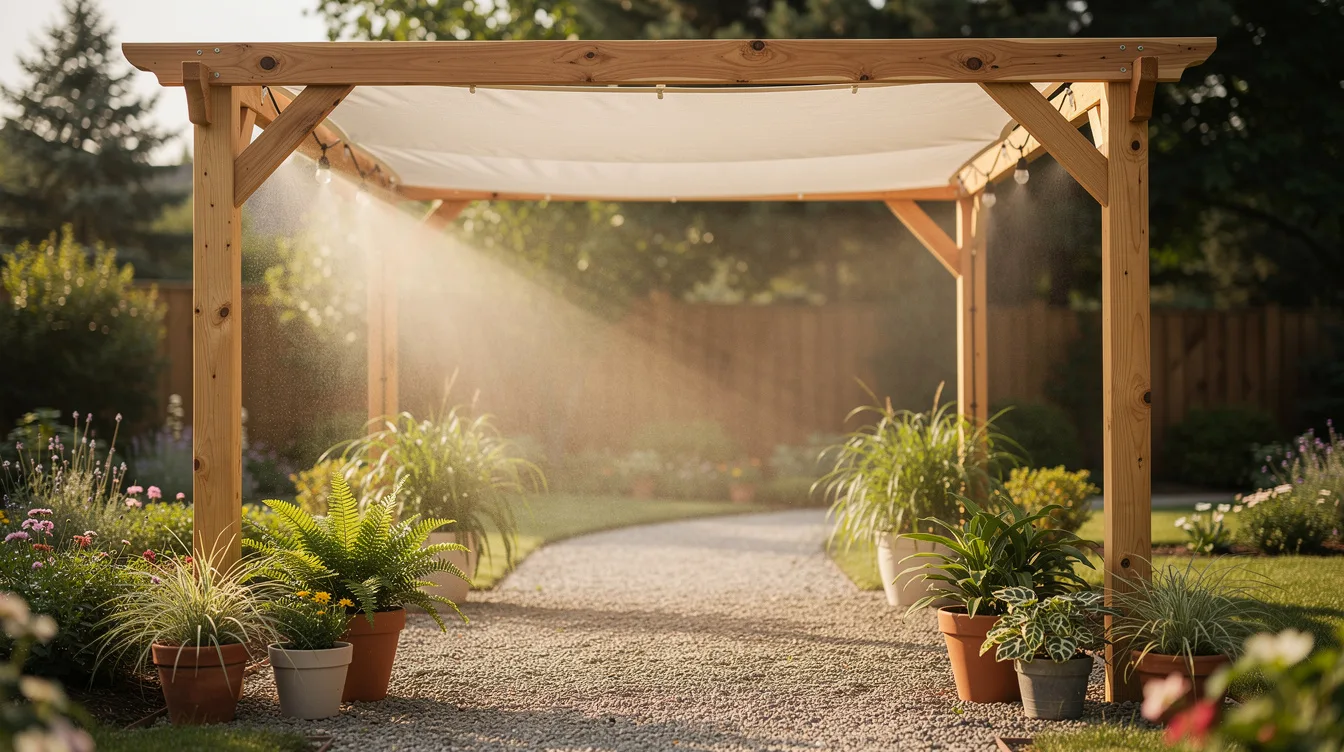
I wanted backyard shade that felt lighter than a pergola and cheaper than a full patio cover. The problem was heat pooling over a gravel path by late afternoon, right where people naturally slowed down with a drink.
A misting arbor fixes that exact moment if you keep the build simple. You do not need a miter saw or a concrete mixer, but you do need a plan that respects basic width, weight, and where the water line will hide.
Keep the footprint small enough to finish
Start with a walk-through opening of 36 to 42 inches and a finished height around 84 inches. That size feels generous for a garden path, but it still lets a basic frame made from cedar 2x2s stay light enough for a weekend build.
At Home Depot and Lowe’s, an 8-foot cedar 2×2 is typically around $6 to $10, and that is the sweet spot here. Skip chunky 4×4 posts for this project, they look serious but they slow the job down and make the whole arbor harder to square by hand.
Build two ladder-style side panels on the ground
Lay out two side frames flat on a driveway or patio and screw them together before they ever stand up. Each panel can be about 18 to 24 inches deep, using horizontal cross rails spaced evenly so the arbor looks intentional instead of homemade in the bad way.
A basic one-pound box of exterior deck screws usually costs about $10 to $12 at Home Depot or Ace Hardware, and a cordless drill is enough. I would rather use more screws and simpler cuts than chase fancy joinery that nobody notices once vines and mist are doing the work.
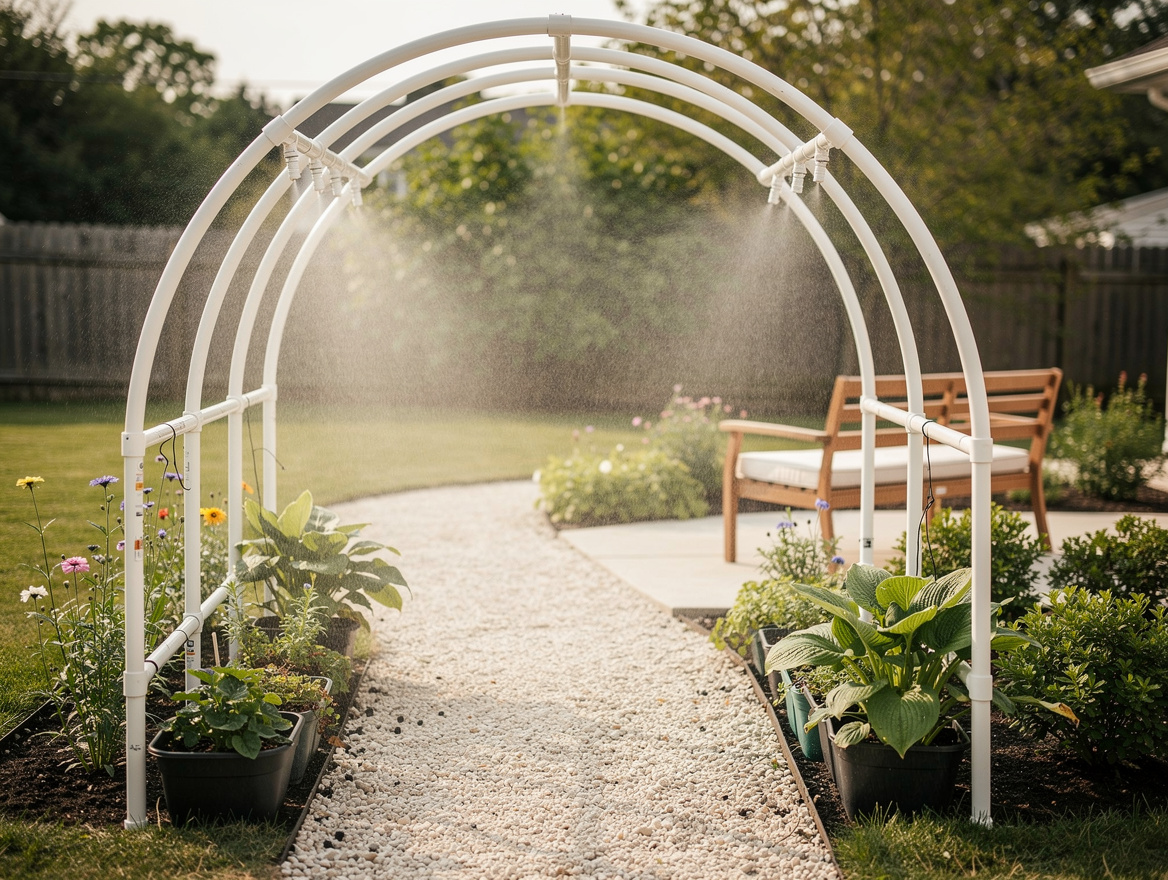
Span the top with lightweight arches, not heavy lumber
The easiest top is a pair of bent 1/2-inch PVC pipes or a straight ladder top made from more 2x2s if you want a boxier shape. A 10-foot length of 1/2-inch Schedule 40 PVC typically runs about $5 to $8 at Lowe’s or Home Depot, and it bends just enough for a soft arch without special tools.
If you want the arbor to read as decor instead of utility, the slight curve wins every time. Heavy dimensional lumber up top makes a small arbor look clumsy, while light arches keep the structure airy and leave room for the mist to drift instead of trapping it.
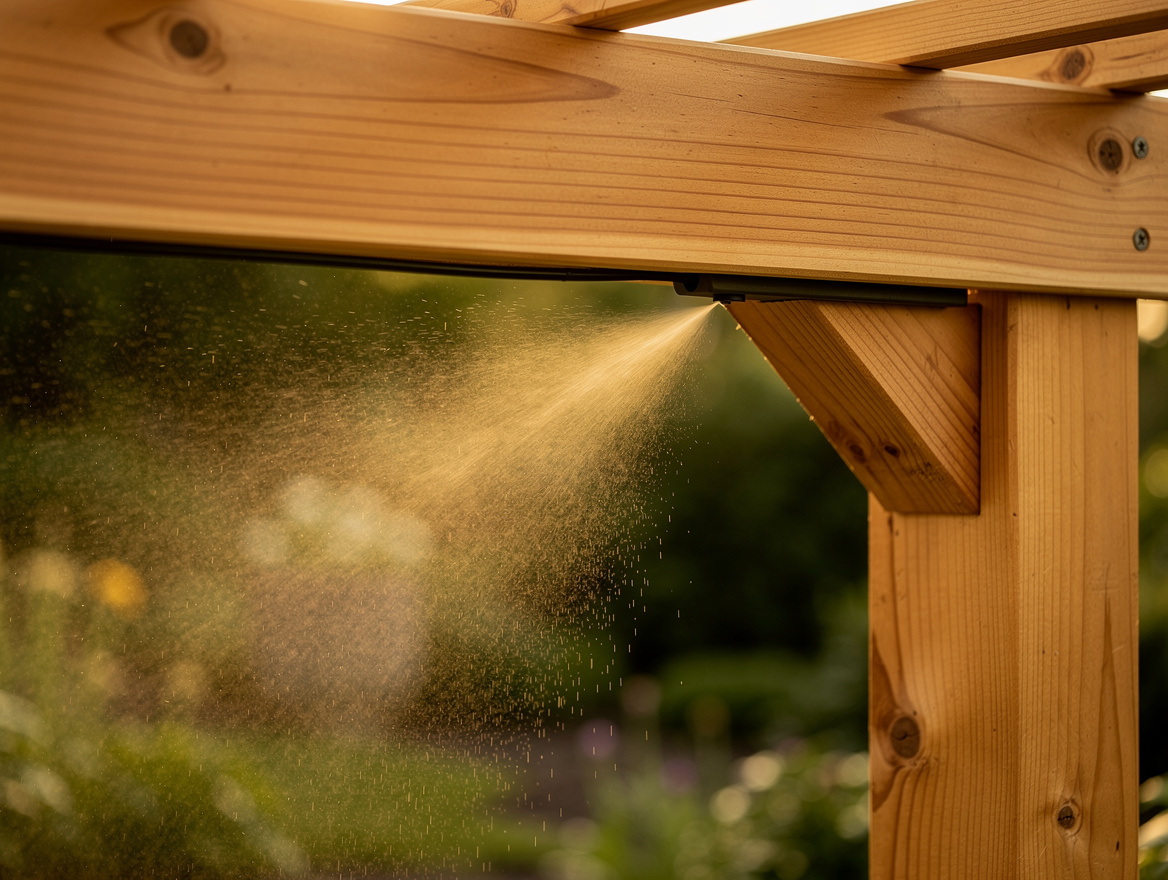
Hide the misting line inside the frame
Run a simple misting kit along the inside top edge so the nozzles point down and slightly outward, not at face level. A basic patio kit from Amazon or Lowe’s usually lands in the $25 to $45 range, and that is enough for a short arbor plus a little extra line for routing.
Place nozzles roughly 18 to 24 inches apart and keep the tubing tucked against the wood or PVC with clips. I would not overbuild this part with exposed loops and adapters, because the cleaner the line looks, the more the arbor feels like a finished outdoor feature instead of a weekend science project.
Anchor it with ground screws or weighted planters
If you do not want to dig post holes, use 15-inch ground anchors at each side and strap the frame low where the hardware stays out of sight. A four-pack typically costs around $20 to $30 on Amazon or at Ace Hardware, and that is a very fair trade for avoiding concrete.
On a hard surface, set the legs into large planters filled with paver base or gravel, then bolt or screw hidden blocks inside to stop wobble. Walmart, Target, and IKEA all sell basic outdoor planters, and a 15- to 20-inch size usually gives enough visual weight to make the arbor feel planted instead of temporary.
Add shade fabric before you add plants
A narrow panel of shade cloth across the top changes the experience immediately, because mist works better when the sun is not blasting straight through the frame. A 6-by-8-foot outdoor shade panel typically costs about $20 to $35 at Amazon or Costco, and you can trim or fold it without needing perfect carpentry.
I would install the shade first, test the mist pattern, and only then decide whether you even need climbing plants. Too much foliage too soon can block airflow and drip constantly, while a light canopy plus one restrained vine keeps the arbor cooler, cleaner, and much easier to maintain.
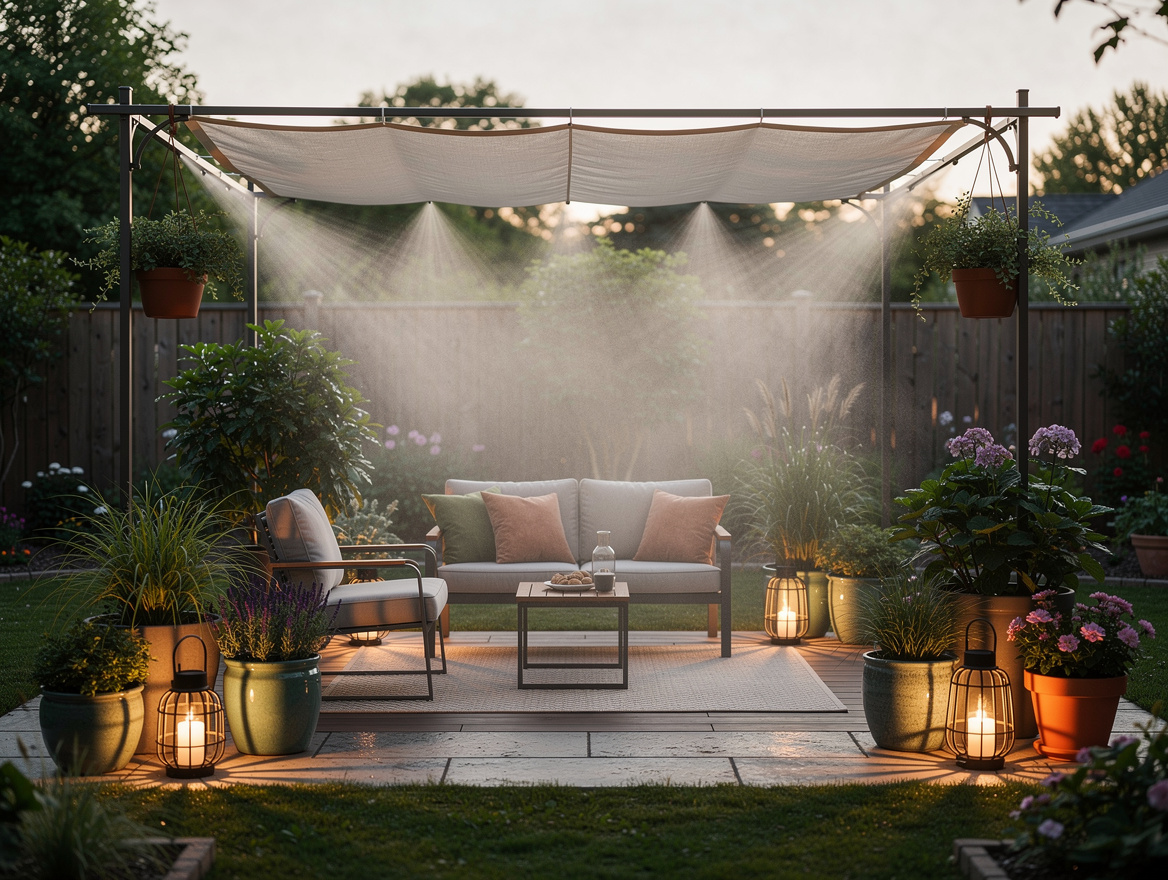
Finish with weatherproof details that make it look intentional
Use an exterior wood sealer if you went with cedar, or a soft white paint if you want the arbor to pop against green planting. Typical outdoor sealers from Home Depot or Lowe’s often cost $18 to $30 a can, and one can is usually enough for a slim arbor.
Then add one or two outdoor pieces nearby, maybe a metal bench or a pair of lanterns from Target, IKEA, or Wayfair, so the arbor reads as a destination. This is where the project stops looking like lumber and tubing and starts feeling like a deliberate cooling spot you will actually use.
Buy the frame materials first, then size the mist kit to the opening you actually built, not the sketch you started with. A modest arbor with clean lines and average parts will cool better, look sharper, and cost a lot less than a bloated build you never quite finish.
Mia Carter writes about small-space living and budget home makeovers. She has restyled three rentals and tests most ideas in her own 45 sqm flat.