
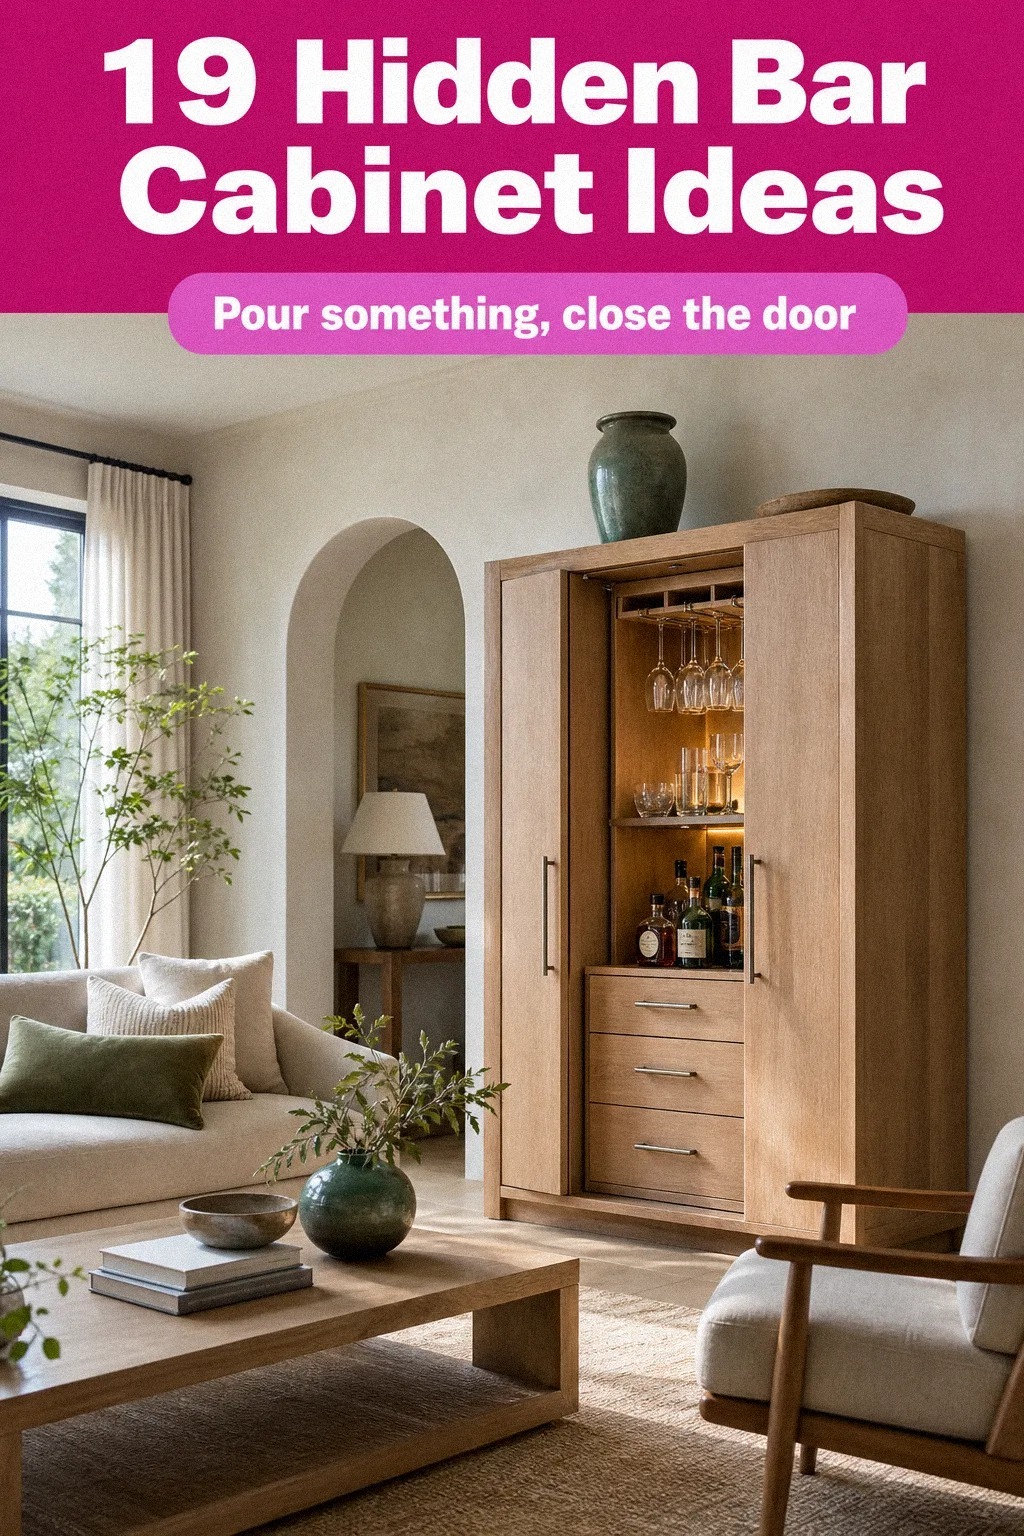
Your living room doesn’t need another piece of “bar furniture” announcing itself. I’ve watched too many good rooms get ruined by a glossy liquor cabinet that looks like it rolled out of a 2005 catalog, and the fix is almost always the same: stop hiding the bottles in plain sight and start hiding the cabinet behind the room. A hidden bar cabinet works because it borrows a shape you already trust (a bookshelf, a console, an armoire, a paneled wall) and quietly opens up to a fully stocked bar the second you want one. That’s the move nobody tells you when they sell you a $1,800 “speakeasy cabinet.” The room has to wear it like it’s always lived there. That’s what this guide is for.
If you’re a renter, every step here has a no-damage swap. If you’re a homeowner, the high tier buys you a permanent piece of millwork that nobody will ever clock as a bar.
Read the steps in order; skip one and the next one won’t land. For the bigger room you might also love our speakeasy living room ideas once you’ve nailed the cabinet shape.
- Start with the cabinet shape you already love
- Measure the footprint twice, including the swing
- Pick the wood tone before you pick the hardware
- Choose hardware that doesn’t say “liquor”
- Build out the interior like a tiny pantry
- Add a hidden interior light (this is the upgrade that sells it)
- What surface should catch the light behind the bottles?
- Anchor the cabinet to the wall
- Style the outside like the rest of the room
- Add a tray for service
- Hide the tell-tale bar smells
- Plan the cocktail workflow before the first pour
- Which single detail earns a real double-take?
- Test the cabinet in three lighting conditions
- Plan for the off-season
- Where should the cabinet actually live in the room?
- Make the cabinet feel lived-in from day one
- Photograph the room with the bar closed first
- Maintain the bar like a room, not a stage
1Start with the cabinet shape you already love
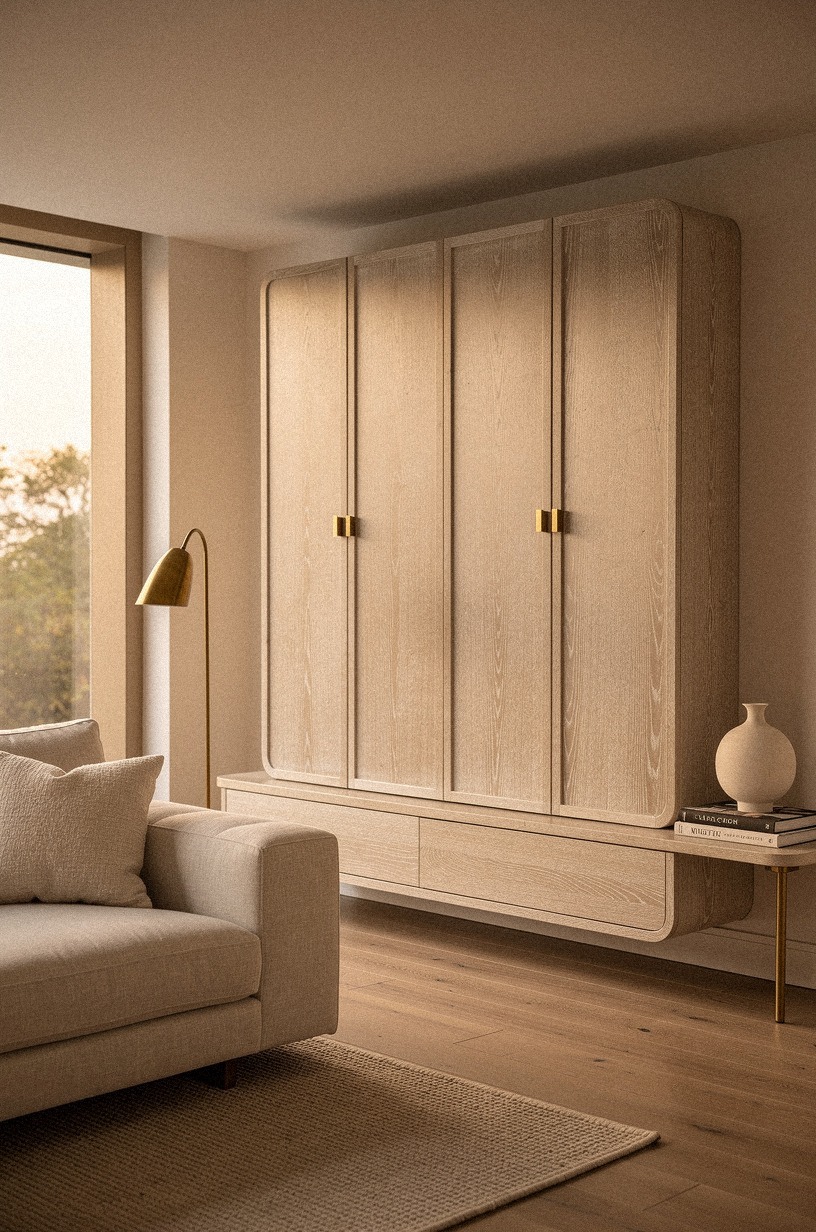
Before you buy a single hinge, decide which piece of furniture you want your bar to imitate. The whole game is camouflage, and camouflage only works when the disguise is something your eye already trusts.
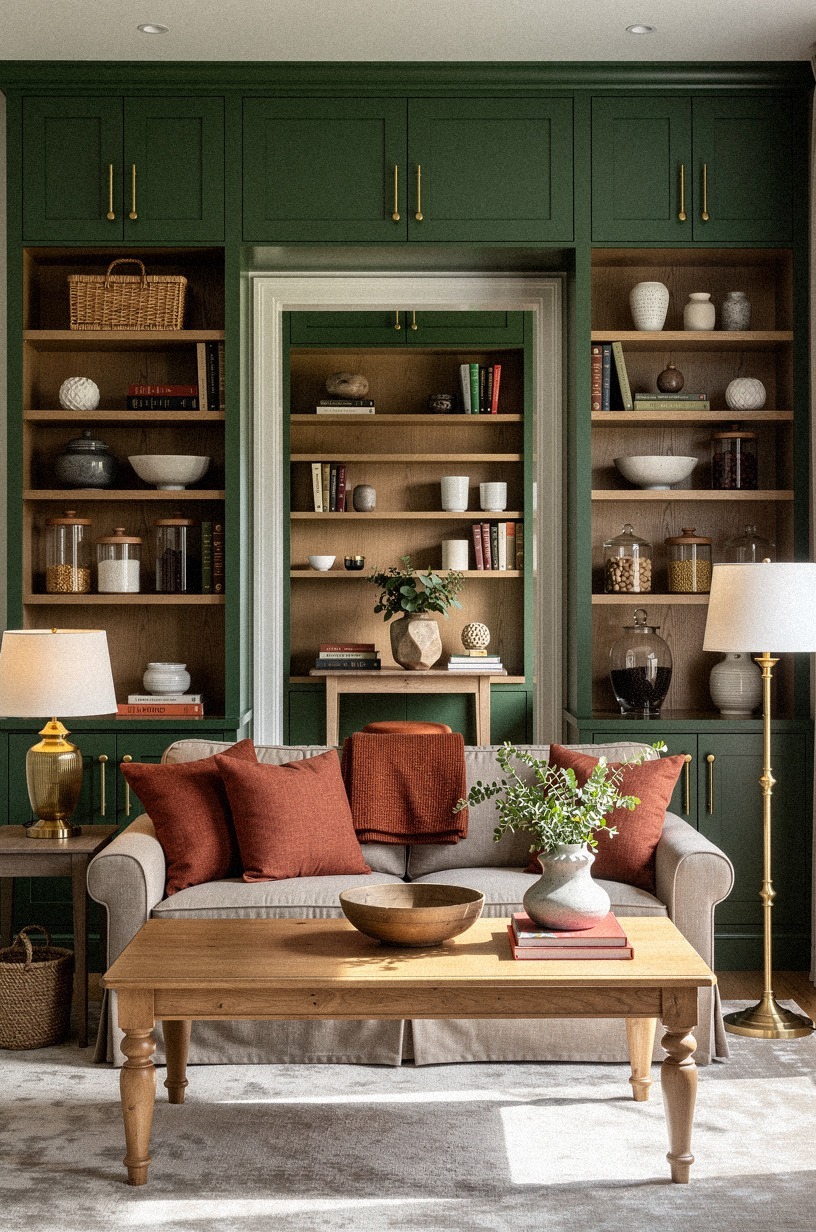
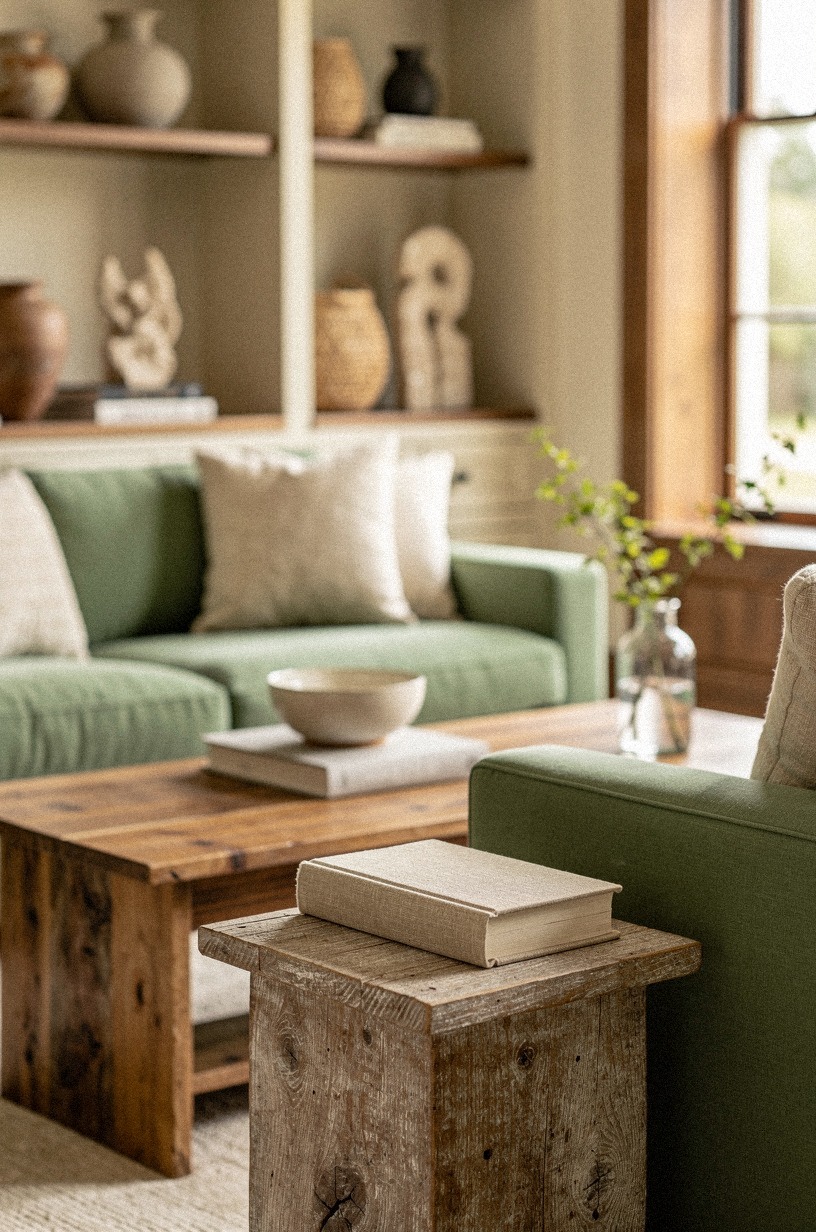
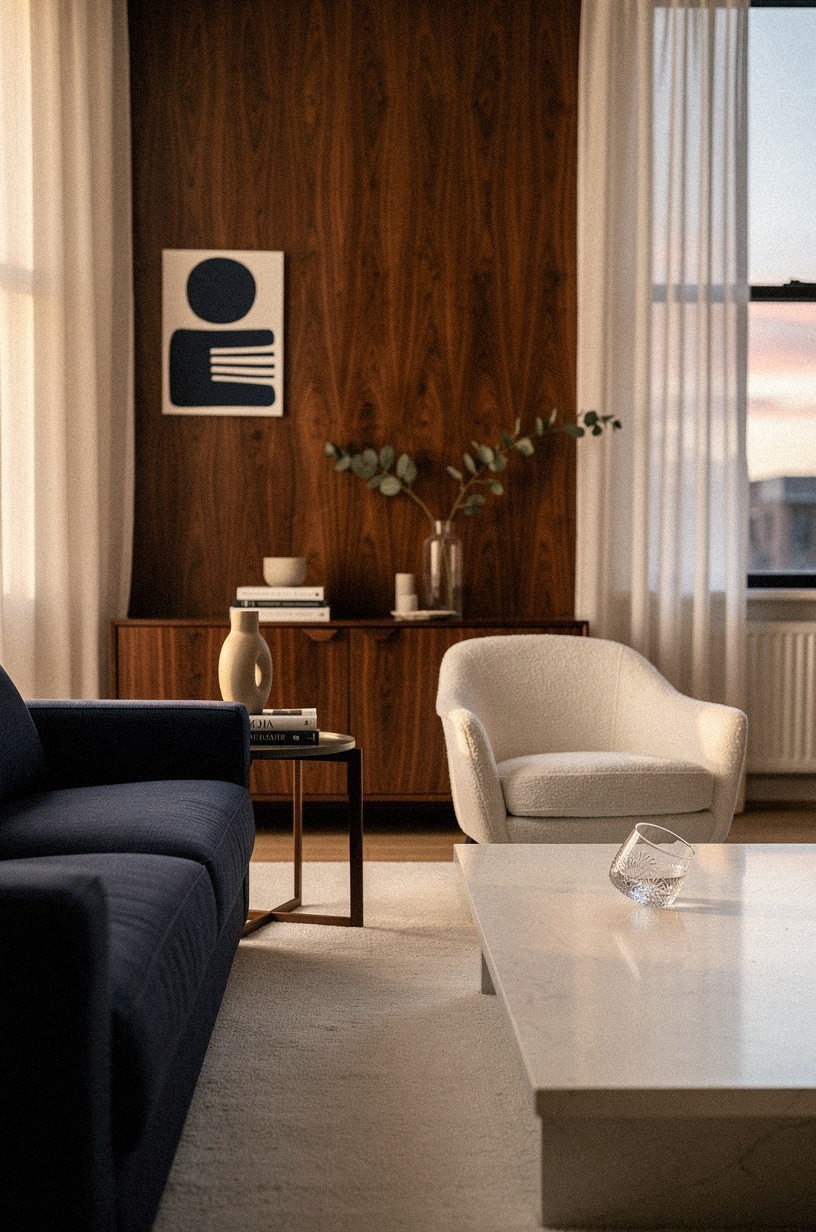
A credenza in cerused white oak in the dining room, a slim armoire in the living room, a console table behind the sofa, a hollowed-out coffee-table book stack, even a paneled wall section in the hallway. These are your options, and the palette around them usually leans clay, linen, and aged brass so the cabinet inherits the room’s warmth before you even style it.
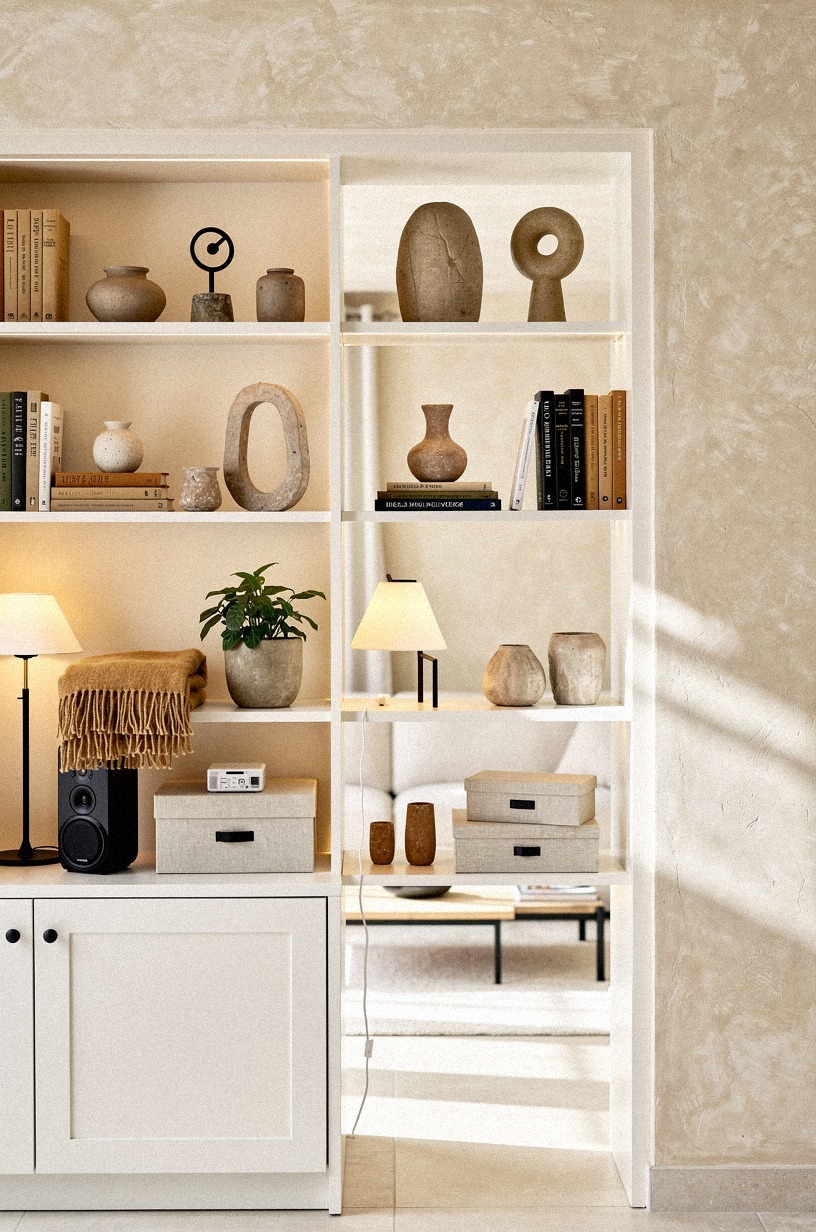
Walk the room and pick the silhouette that’s least “bar-like” first. If you have an open floor plan, a bookcase bar behind the sofa is your safest move because every guest expects books there.
If your dining room already has a sideboard, that’s the one to convert because the function (linens, platters, wine) is so close to bar service that nobody will flinch when you open the doors. I’ve done both, and the sideboard is faster because the interior depth is usually already 18 to 22 inches, which fits standard liquor bottles standing up.
2Measure the footprint twice, including the swing
Measure width, depth, and height, then measure the door swing. A bar door that opens past 90 degrees eats floor space you probably use. For tight living rooms, I default to inset doors that slide or fold so the bar footprint when open is the same as when closed.
You’ll want at least 18 inches of interior depth for standing bottles, 24 inches of interior width for a double-shelf, and 30 to 36 inches of height for a stemware rack up top. Leave yourself 2 inches of clearance on the back for cords, and don’t forget to test the floor for level. A bar that rocks doesn’t feel like furniture, it feels like a stage prop.
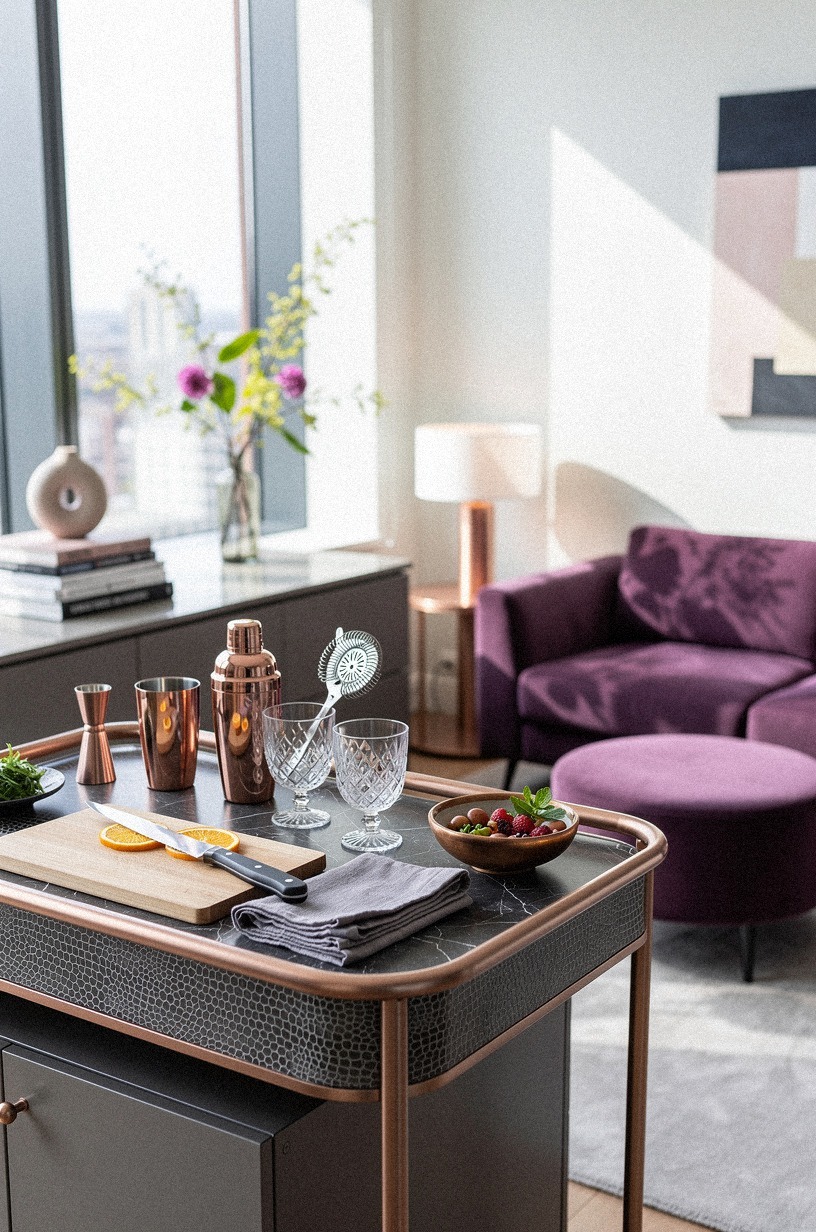
If the room itself is tight, our small speakeasy room ideas walk through the layout workarounds. A small shagreen inlay on the door face costs almost nothing and adds a plum-and-rose-gold note that reads as jewelry, not bar.
3Pick the wood tone before you pick the hardware
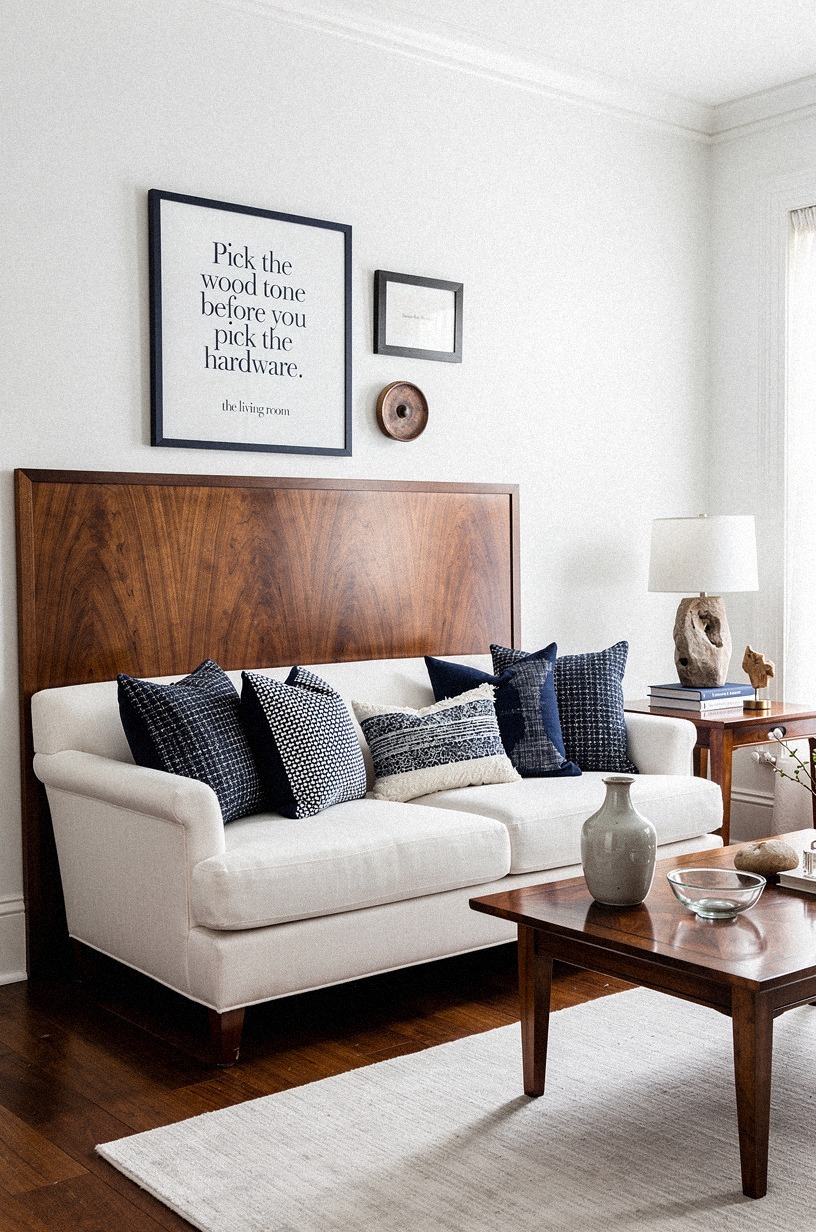
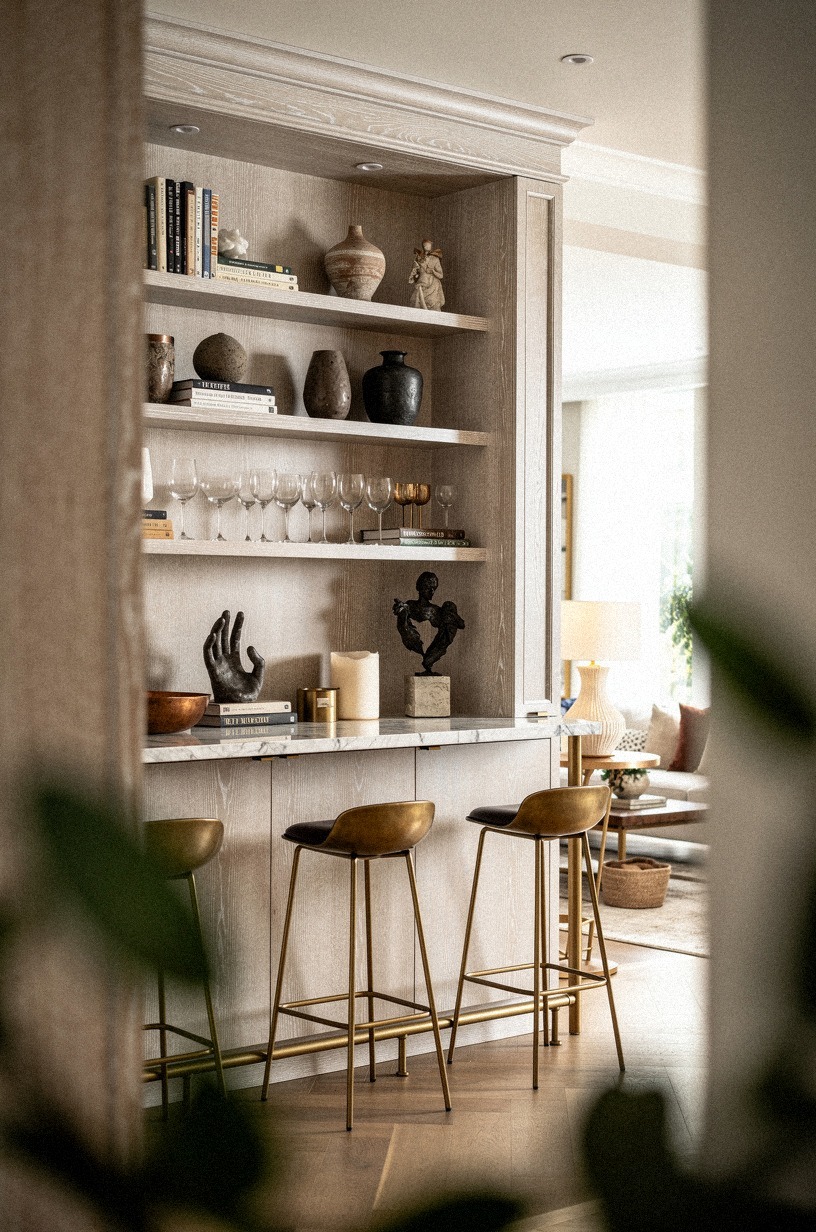
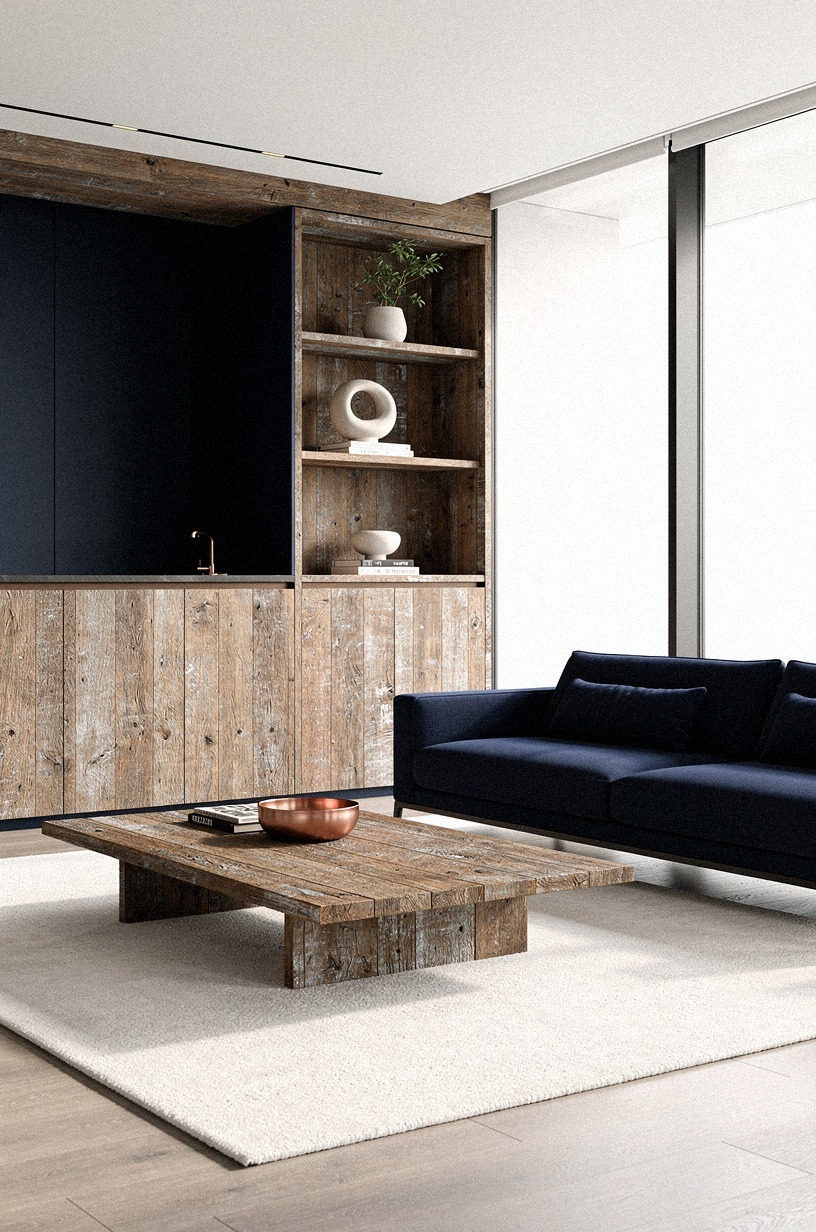
This is where most people reach for whatever brass is on sale, and the room pays for it later. The wood tone is what carries the disguise, so pick that first, then choose hardware that flatters it. White oak reads modern and warm; cerused oak reads old-money coastal; book-matched walnut reads library and serious (the mirrored grain on each door panel is the detail that quietly does the work); black-painted MDF reads dramatic but anonymous, which is perfect if your room leans contemporary and pulls navy and white into the scheme.
If your room has existing wood floors, match the undertones (warm with warm, cool with cool), not the species. A walnut bar in a room with ash floors looks intentional only if you add a rug to break the comparison.
For the renter version, an IKEA BESTÅ in a wood-tone veneer is the cheapest way to fake custom millwork, and a $30 stick-on veneer sample will tell you in five seconds whether it belongs in your room. Don’t skip this step.
I’ve seen more “almost right” cabinets killed by the wrong undertone than by anything else. Trust me on this one!
4Choose hardware that doesn’t say “liquor”
Knobs and pulls are how a cabinet announces its job. Drop-bar cabinet pulls, ornamental escutcheons, and crystal knobs all scream “bar.” Skip them. Instead, choose hardware that matches the rest of the room: simple unlacquered brass cup pulls if your hardware is warm; matte black bar pulls if the rest of the room is dark; satin nickel if your kitchen is the same.
The unlacquered brass route ages beautifully, and the patina after six months will look like the cabinet has been there since the previous owner, which is exactly the moody, lived-in energy you want.
If you can’t replace the existing pulls, try lining the inside of the door with a thin magnetic strip behind the handle so the original hardware stays in place but the door opens to the touch. Renters love this move because there’s no screw hole to fill at move-out.
If you’re building from scratch, Rejuvenation and Schoolhouse Electric both have hardware lines that read “furniture” rather than “bar,” and a single $14 cup pull will quietly do the work. A door panel wrapped in organic bouclé in emerald, gold, and cream tones is the stealth move that hides the cabinet among your upholstered pieces; nobody reads bouclé as bar. For a deeper brass walkthrough, our speakeasy gold and brass accent ideas cover the patina game in detail.
5Build out the interior like a tiny pantry
A bar that’s just a shelf of bottles is a liquor cabinet, and liquor cabinets are exactly what you’re trying to avoid. The interior has to do real work: stemware, mixing glass, bitters, napkins, opener, decanter, the things you reach for at 9pm on a Tuesday.
Plan the interior zones vertically. Top zone for stemware (stem-up so dust doesn’t settle in the bowl).
Middle zone for bottles, standing, with a small lip to keep them from rolling when the door swings. Bottom zone for tools and mixers, ideally a shallow drawer so you don’t have to dig.
Spec the interior fittings in unlacquered brass so they develop patina right alongside the cabinet pulls; the whole interior quietly ages in unison.
Add a X-shaped wine rack to one side if you drink more wine than spirits; it doubles as a structural divider and it breaks up the bottles visually so the cabinet doesn’t read as a liquor shelf from the outside. If you’re handy, a single sheet of 3/4-inch plywood and a weekend of cuts will give you a custom interior that fits like a glove. If you’re not, the ClosetMaid drawer inserts and IKEA KOMPLEMENT boxes can be cut to size and glued in place with construction adhesive.
6Add a hidden interior light (this is the upgrade that sells it)
A bar you have to feel around in in the dark is a bar nobody uses. Add a rechargeable motion LED strip to the top interior of the cabinet.
They cost about $15 and they last six months on a charge. The light comes on when the door opens, hits the bottles from above, and the whole thing suddenly feels like the kind of detail you see in a high-end speakeasy.
So worth it!
Wire it with a thin magnetic switch so the light only triggers the moment the door opens. If you own your home and you’re willing to lose a Saturday, hard-wire a 12V LED puck light with a door-triggered switch.
It’s cleaner and you never have to charge anything. Either way, warm 2700K is the right color temperature; anything cooler reads like a fridge. Line the back panel or door interiors with a touch of deep-pile mohair velvet in dusty rose or charcoal so the bottles read against plush, not plastic; the velvet eats glare and makes the whole interior feel upholstered.
This single move is what separates “cabinet with bottles” from “hidden bar.” It’s not optional if you want the magic. For the rest of the room’s glow, our speakeasy lighting ideas walk through how to layer it.
7What surface should catch the light behind the bottles?
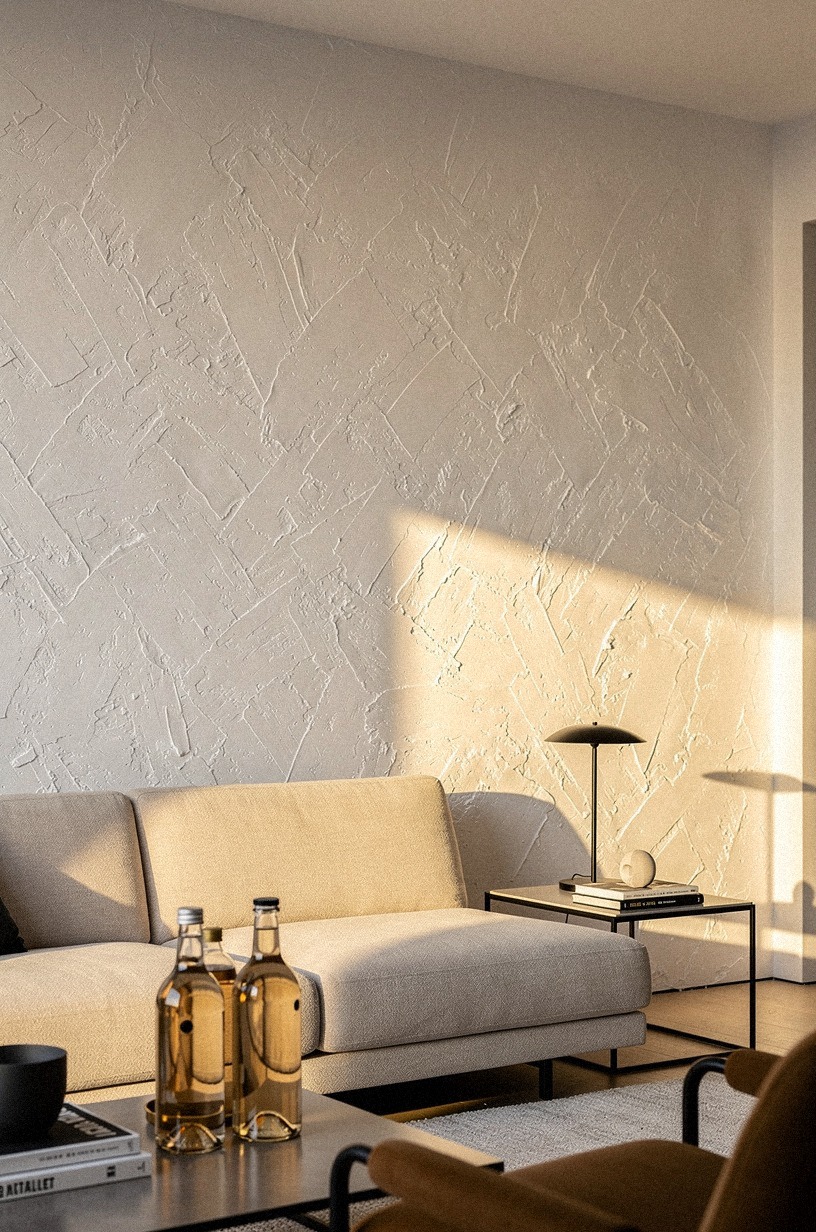
A plain painted back panel is fine, but a back panel that catches the light is the move that makes the bottles glow. Skip the builder-grade mirror and go for a hand-applied Venetian plaster finish in warm white, camel, and a touch of black for depth.
Real plaster takes light unevenly across its troweled surface, so the bottles pick up soft highlights instead of one flat reflection, and the whole interior reads warmer than any foil or acrylic will. It costs more than peel-and-stick and less than custom tile, and a single weekend with a trowel and two coats of wax is enough for a bar-sized panel.
If you’re a renter, a venetian-plaster-look peel-and-stick vinyl in a warm camel does 80% of the effect for under $40 and leaves no residue at move-out.
8Anchor the cabinet to the wall

A 200-pound cabinet full of bottles is a serious tip-over hazard, especially if you have kids or pets, or a friend who leans on furniture when they’ve had two glasses of wine. Anchor it.
A simple L-bracket screwed into a stud will do it, or a furniture anti-tip strap if you’re renting and can’t put a screw in the wall. Spec the cabinet itself in reclaimed weathered teak if you’re buying new or refinishing an old piece; teak is heavy enough to stay planted on its own and the midnight-blue patina it picks up over the years is exactly the “this has always been here” tone you’re after.
This is also the right moment to think about ventilation. If you have a fridge inside the cabinet (yes, some people do this for mixers and bottles that need chilling), you’ll need a silent 12V fan with a vent grille in the back.
Heat kills compressors and also cooks your vermouth, which is a worse tragedy than most people realize. I learned this the hard way after a $200 wine fridge died in a closed cabinet during a heat wave.
Don’t be me.
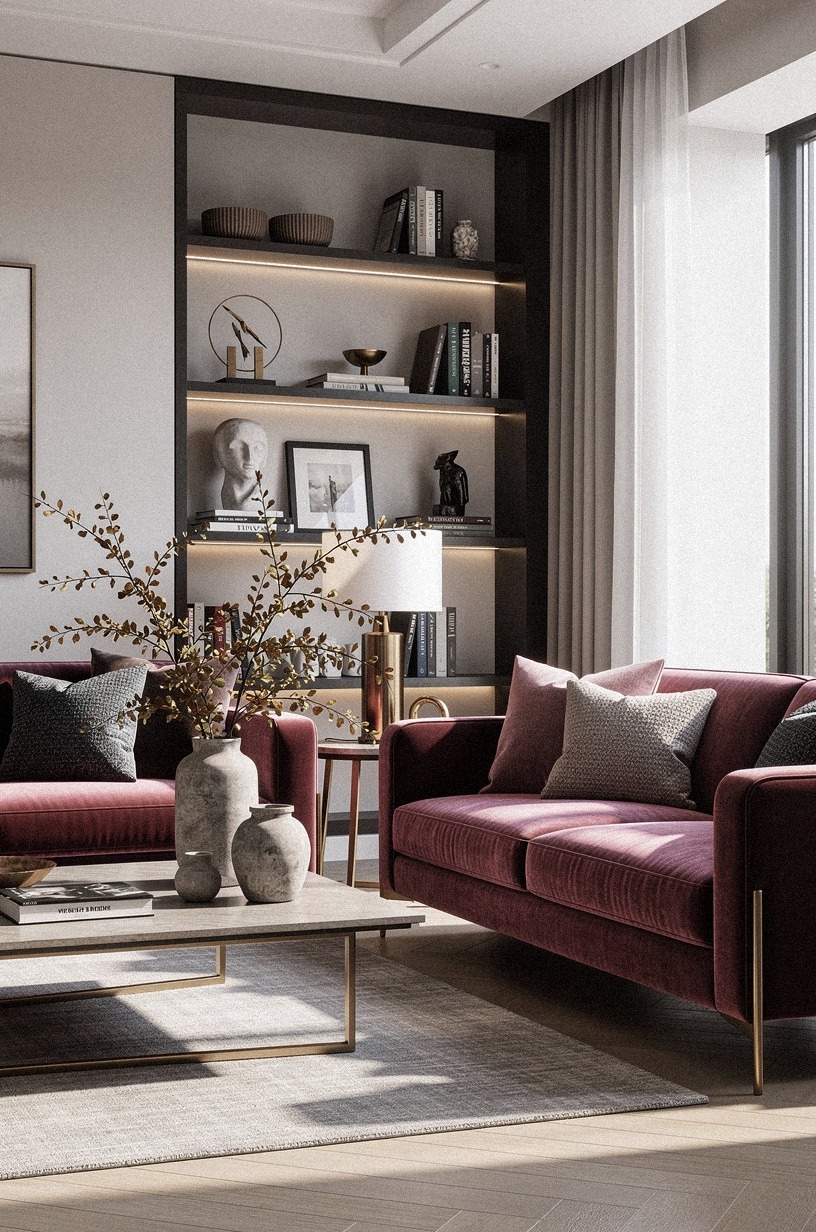
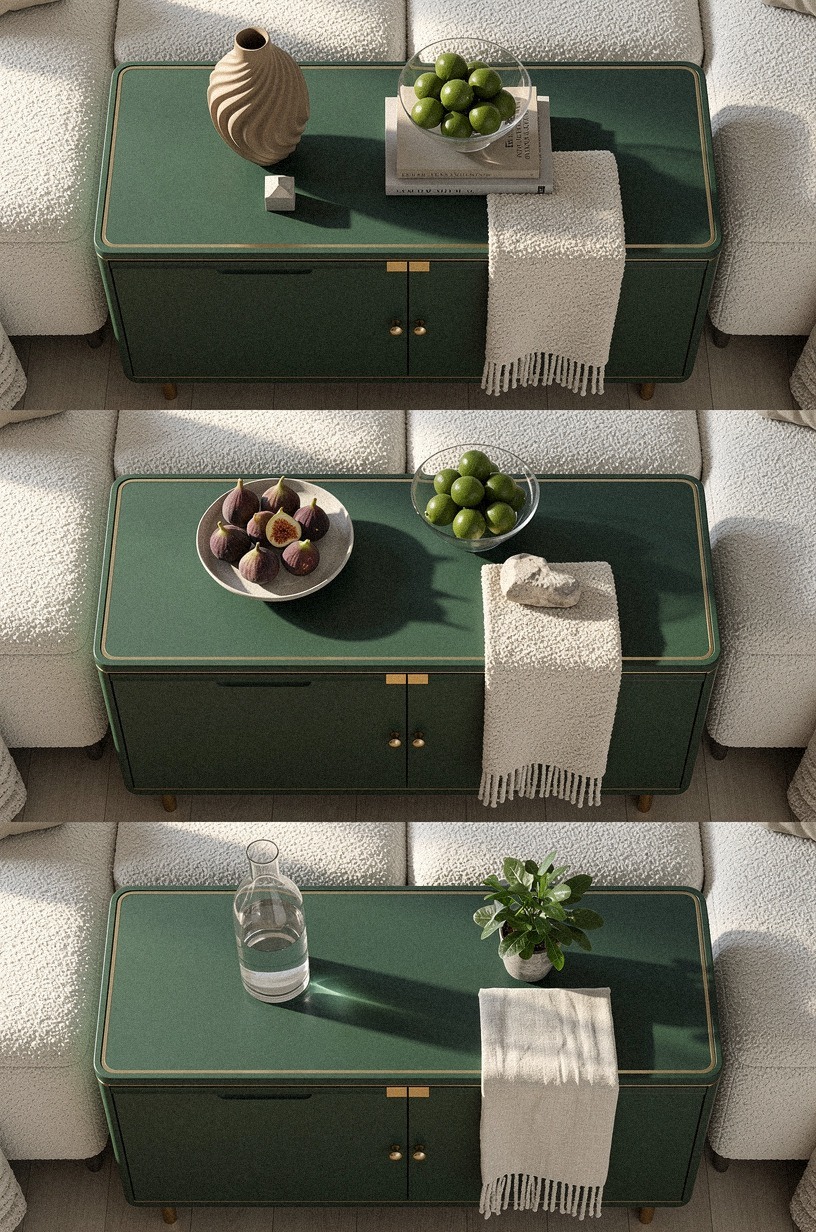
9Style the outside like the rest of the room
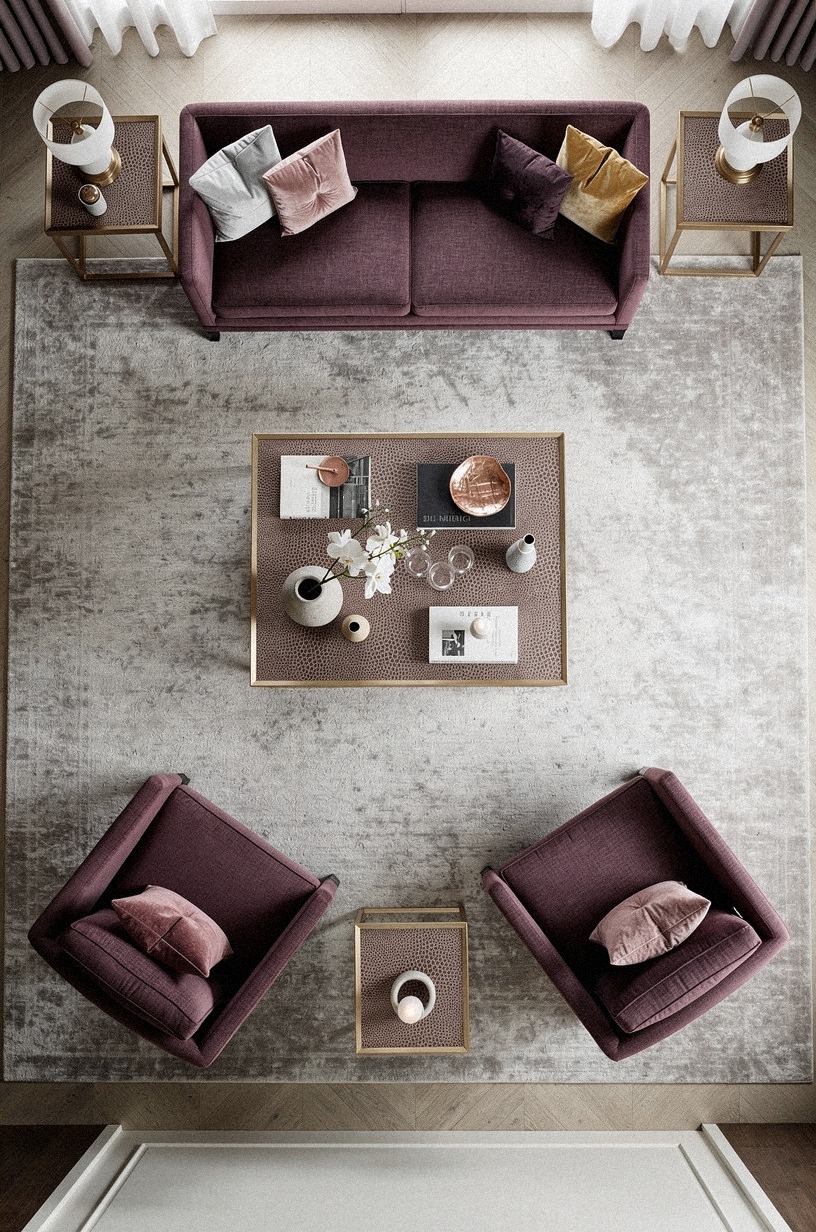
This is the camouflage step, and it’s where the room either accepts the cabinet or rejects it. Style the top and the visible exterior the same way you’d style the rest of the room. If your living room has a tray with a candle and a stack of books on the coffee table, your bar cabinet top should have a tray, a candle, and a stack of books.
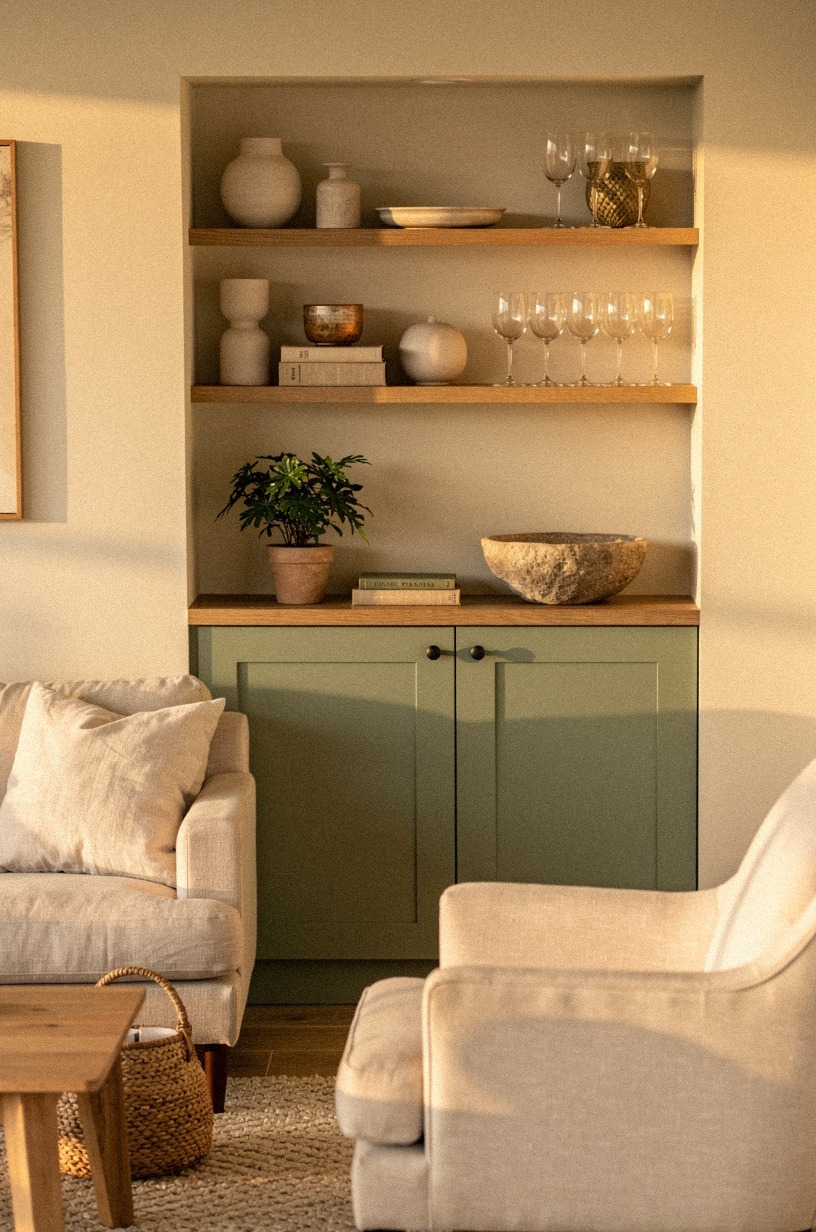
Match the styling language, not just the wood. A cabinet in reclaimed weathered teak reads as a sideboard the moment you put a small plant and a stoneware bowl on top, because teak is the wood the rest of your sage-and-cream living room already speaks.
For credenzas, a long, low mirror above it and a single piece of art will make it feel like a sideboard. For armoires, lean a piece of framed art against the side so the eye reads “decor, not bar.” For bookcase bars, leave at least one full shelf of actual books, because a bookcase with no books is suspicious and a bookcase with only bottles is a confession.
I’ve styled bar cabinets where guests have used them for two hours without realizing there was a bar inside, and that’s the win condition. For styling the wall around it, our speakeasy wall decor and signage ideas cover the prints and frames that make a cabinet blend in.
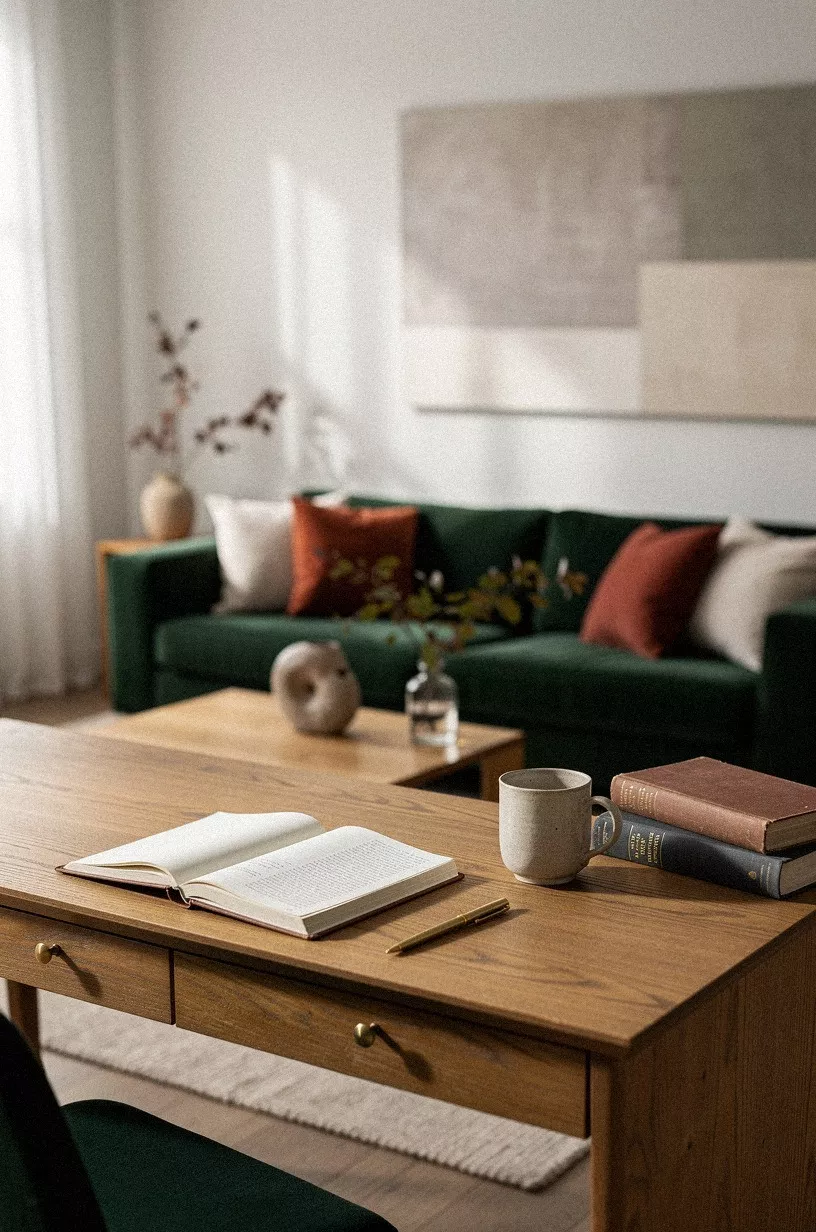
10Add a tray for service
Even when the bar is closed, the room has to behave like a normal room. A wooden serving tray on top of the cabinet (or on a nearby surface) lets you stage the cocktail moment without opening the cabinet at all. Two glasses, a small bottle of bitters, a mixing spoon.
That’s enough to make the room feel ready without giving the game away.
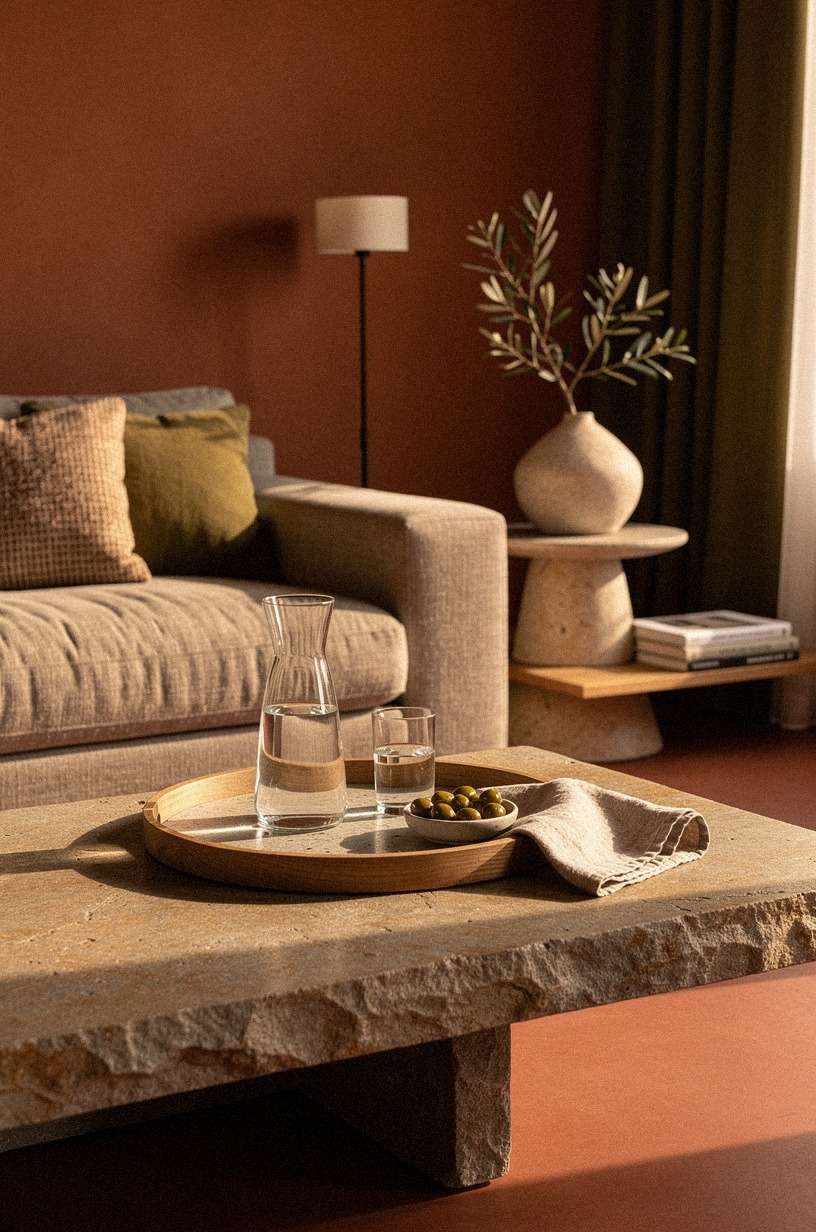
The tray itself should match the cabinet wood, not contrast with it. I like a carved wooden tray with raised edges because it catches drips and it doesn’t slide when you carry it, and a washed Belgian linen napkin tucked under the glasses in terracotta, stone, and olive gives the whole vignette a softened palette that doesn’t read “bar service.” Avoid metal trays; they scratch the cabinet finish over time and they read “bartender station” instead of “home bar.” If you want to go higher end, a RH leather-trimmed tray does the same job with a little more ceremony, and it’s the kind of object that quietly ages well. For a few trays and carts worth comparing, our speakeasy home bar design ideas round up the options side by side.
11Hide the tell-tale bar smells
A room that smells like bourbon at 2pm is a room that knows you have a bar. Most people forget this step and then wonder why guests keep drifting toward a specific wall.
Use a passive diffuser in the room (not inside the cabinet, which would muddle the bottles’ aromas) with something woodsy or citrusy to keep the ambient scent neutral. Cedar blocks inside the cabinet are even better because they keep the bottles from picking up ambient smells, and the cerused white oak shell itself absorbs and releases scent gently, so the cabinet interior smells like old furniture rather than last night’s Negroni.
Skip the plug-in air fresheners; they read as “trying too hard.” A single cedar block and a beeswax candle in the room will do the work. If you smoke cigars or have heavy spirits (Scotch, mezcal), this becomes essential rather than optional. A discreet Muji diffuser running cedar or hinoki will keep the room smelling like a hotel lobby instead of a taproom, and most guests won’t even notice why the room feels expensive.
They will notice, though. They just won’t be able to name it.
12Plan the cocktail workflow before the first pour
This is the step most people skip, and it’s why their beautiful bar becomes a graveyard of unused bottles. Decide on three to five cocktails you reach for often, and stock for those.
A Negroni drinker needs Campari, sweet vermouth, gin, an orange. A Manhattan drinker needs rye, sweet vermouth, bitters, cherries.
A Margarita drinker needs tequila, lime, Cointreau, salt. Trying to support every cocktail means you’ll end up with 30 half-empty bottles and no clear pour. Three to five bottles of spirits, two bottles of modifier, one bottle of bitters, and a single bottle of vermouth is a real bar.
Pre-stage the bottles you reach for most often at eye level. Pre-stage the bottles you reach for rarely at the bottom.
Pre-stage the glasses you reach for all the time in the front of the stemware zone. Rest the cocktail tools on a small shagreen tray in plum, grey, and rose gold; shagreen is grippy enough that a mixing spoon won’t slide when you reach for it, and the color story stays in the same family as the rest of the room.
The first time you mix a drink from this cabinet, it should take you 30 seconds, not two minutes, and that’s only possible if you’ve already arranged the bottles by frequency of use. This is the unglamorous step that makes the bar feel like yours instead of a showroom.
13Which single detail earns a real double-take?
Every great hidden bar has one detail that makes a guest do a double-take, and the best one isn’t a gadget or a glass, it’s the book-matched walnut door panel. Book-matching means two adjacent slices of the same walnut log are opened like a book and mirrored across the door, so the grain flows symmetrically across the surface. It’s the same technique used on high-end Bösendorfer pianos and mid-century credenzas, and it costs about $300 to $600 extra on a custom door but reads as “this piece was always expensive.” A second-place option is a discreet organic bouclé wrap on a single door panel in emerald, gold, and cream tones, because nobody associates bouclé with a bar, and the texture makes the cabinet read as an upholstered piece of furniture until you open it.
14Test the cabinet in three lighting conditions
A bar that looks great at noon can look terrible at 9pm with one lamp on. Test it.
Open it at noon with full daylight. Open it at 5pm with overcast light. Open it at 9pm with just the room’s ambient lamps. The interior light, the back panel, and the bottle arrangement should all hold up in all three.
If the bottles disappear at 9pm, your interior light is too dim. If the back panel overpowers the bottles at noon, your light is too bright.
An organic bouclé door panel in emerald and cream tones behaves very differently across those three lighting conditions: flat and almost quiet at noon, dimensional at 5pm, and warmly shadowed at 9pm, which is why it pays to test the actual fabric, not a swatch.
I test every bar cabinet I style at three times of day before I call it done. The reason is that you don’t always control when guests arrive, and a bar that only works at cocktail hour is a bar you’ll be too anxious to use the rest of the time. The best hidden bar is one you forget is there, until the moment you open it.
15Plan for the off-season
A bar that’s wide open every day stops being a bar and starts being a shelf, and that’s the moment a hidden bar loses its magic. Build a quiet rhythm: closed Sunday through Tuesday for resets, open Wednesday for a single glass of wine with dinner, open Thursday through Saturday when guests come.
Rotate which bottles sit at eye level so the front row is always the ones you actually drink. The interior fittings, especially the unlacquered brass shelf lips and stemware rack, will pick up a forest-green-and-rust patina across the seasons, and that patina is the detail that quietly tells your guests the cabinet has been here longer than they have.
Rotate your back-panel styling (a single book, a candle, a small framed piece) every few months so the cabinet top stays alive even when the doors stay closed.
16Where should the cabinet actually live in the room?
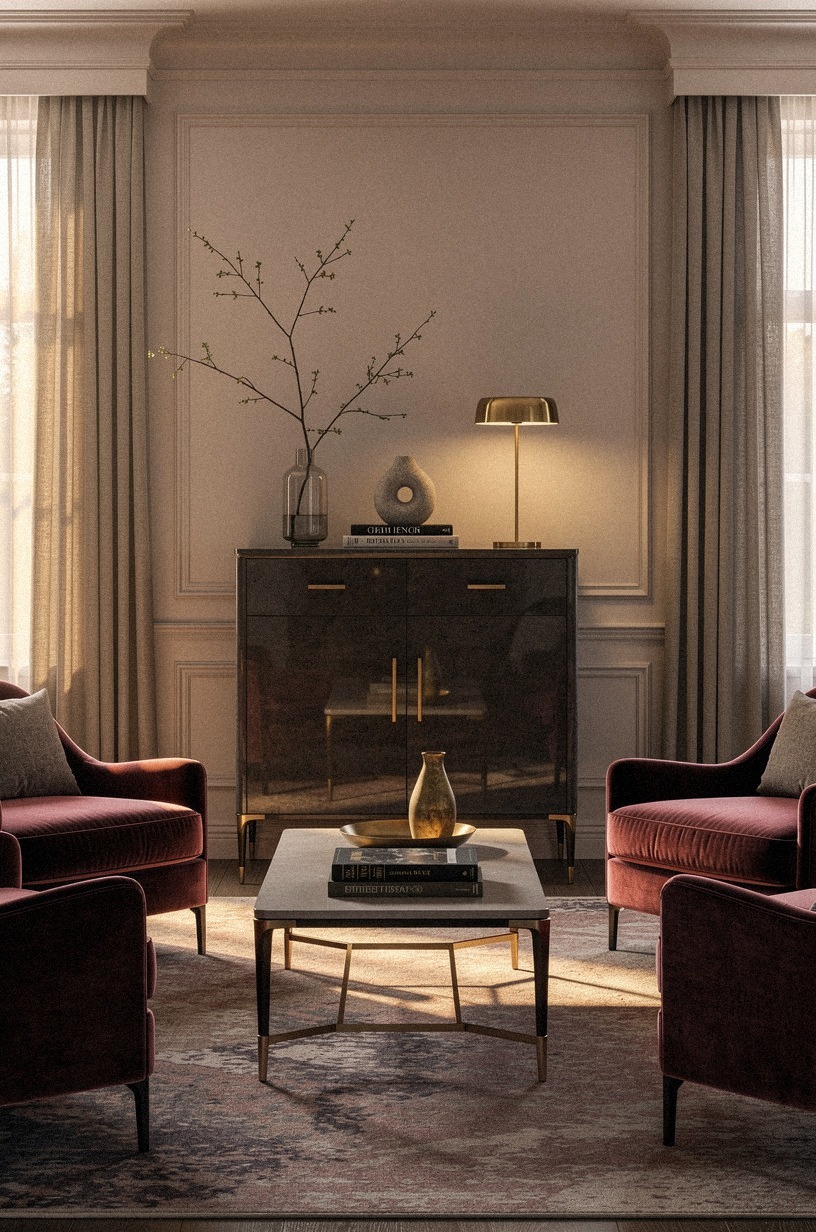
Don’t put the bar where the layout says it should go. Put it where the traffic pattern of the room naturally drifts.
Most living rooms have a dead zone: a corner that guests pass through on their way to the sofa, or a wall they face while they wait for the bathroom. That dead zone is your bar location, because it puts the cabinet in the room’s natural circulation without forcing anyone to look at it.
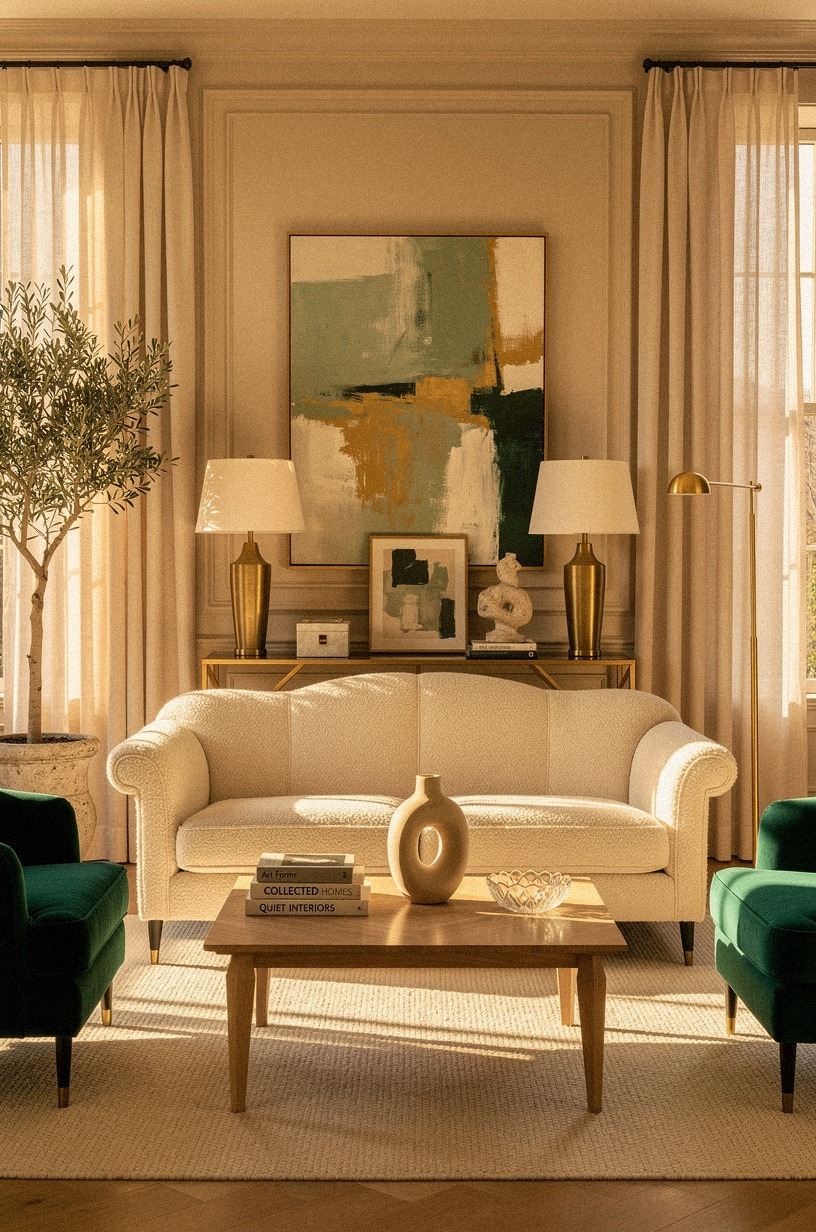
Avoid placing the bar directly across from the TV, because the open door will block the screen and your guests will resent it. Avoid placing it next to a window, because the backlight will silhouette the bottles and read as “liquor store.” The sweet spot is a side wall or a room-divider position that catches light from the side and stays in the room’s peripheral vision.
If your living room has a fireplace, the bar on the opposite side of the same wall is the most elegant answer; the two anchor the room together without competing. Pair the cabinet with a small reading chair upholstered in deep-pile mohair velvet in dusty rose or charcoal; mohair catches light the same way the cabinet hardware does, and the visual rhyme is what makes the whole vignette feel composed instead of staged.
17Make the cabinet feel lived-in from day one
The fastest way to kill the disguise is to leave the cabinet looking brand new. A few moves help.
Age the hardware with a light coat of patina spray if it’s unlacquered brass, or leave it alone for six months and let it develop naturally. Add a single scratch to the wood surface with a fine-grit sandpaper, in a place that’s plausible (like the back corner where a delivery person would have grazed it). Stage a half-finished drink on the top from time to time, like someone walked away mid-pour.
A hand-applied Venetian plaster back panel in warm white and camel tones is already forgiving: small marks wipe away, the troweled surface hides fingerprints, and the patina deepens with every season so the panel looks older than the cabinet around it.
If you’re a renter and you can’t age the cabinet, buy a secondhand piece instead. Facebook Marketplace, Habitat for Humanity ReStores, and local estate sales are full of sideboards and armoires from the 70s and 80s that already have the patina. A $200 vintage find beats a $1,200 new one for this purpose, and the older wood has a depth that doesn’t exist in new production.
18Photograph the room with the bar closed first
If you ever share this room online (and if you’ve gone this far, you probably will), photograph the room with the bar fully closed and styled like furniture first. That photo is the cover image.
The “open bar” photo is the second image, and it should feel like a reveal rather than the main shot. Reversing that order (open bar as the cover) is the single most common mistake in bar content, and it’s the difference between a room that gets pinned and a room that gets scrolled past.
The cover photo should be the room doing its day job. The reveal photo is where you let the room transform. A cabinet in reclaimed weathered teak with a midnight-blue undertone photographs warm in any light, so the cover image carries the room even when the styling is minimal; the teak does the visual work for free.
Get both right and you’ll see the difference in your analytics within a week. Worth every minute of styling!
19Maintain the bar like a room, not a stage
The last step is the one nobody respects: maintain it. Once a month, take everything out, wipe the bottles, dust the back panel, restock what you finished, retire what you didn’t.
A bar that isn’t maintained is a cabinet of dead bottles and dusty glassware, and that reads worse than not having a bar at all. Refresh the washed Belgian linen liners on the trays and in the bottom drawer every season; linen absorbs scent and dust and a quarterly swap keeps the interior smelling like the cabinet, not last month’s bourbon.
The maintenance doesn’t have to be heavy. 20 minutes is plenty, but it has to be regular.
You’ll also want to rotate your “open” nights so the bar feels alive but not constant. I rotate mine: closed Sunday through Tuesday, open Wednesday for a quiet glass of wine with dinner, open Thursday through Saturday for guests.
This keeps the bottles fresh, keeps the glassware clean, and keeps the room’s identity intact in sage, cream, and natural wood tones year-round. The bar becomes a chapter of the room, not the whole book, and that’s the difference between a bar cabinet and a hidden bar.
The one detail that decides whether the room believes it
There’s a moment when a hidden bar either becomes furniture or stays a costume, and it’s not the wood, the hardware, or the lighting. It’s whether the room has been allowed to argue back during the install.
A perfectly new cabinet in a perfectly styled room reads as a perfectly styled room. A slightly imperfect cabinet in a room that has a few of its own imperfections (a coffee ring on the side table, a stack of magazines by the chair, a candle that’s burned down halfway) reads as a room that happens to have a bar in it.
I learned this installing a bar in a friend’s reading room. We did everything right: the walnut, the brass, the Inchyra Blue interior, the cedar blocks.
The room still felt staged until we put a half-drunk cup of tea on the cabinet top and left it there overnight. The next morning, the room had absorbed the cabinet. That’s when the camouflage locked in.
Honestly, the room had been waiting for someone to stop trying so hard.
This is the part of styling you can’t buy. You have to let the room wear the piece for a week before you decide whether it belongs.
If after seven days you’re still noticing the cabinet every time you walk past, the disguise isn’t right yet, and you’ll want to adjust the wood tone, the styling, or the location. If after seven days you’ve stopped noticing it, you’ve built a hidden bar.
For a deep dive on the cabinet-versus-cabinet question, our speakeasy seating and furniture ideas cover the matching pieces that pull the whole lounge together.
The Questions Worth Answering First
What is the best hidden bar cabinet for a small living room?
A credenza-style bar in walnut or cerused oak is the best choice for a small living room because it doubles as a media console. Look for pieces at Article and West Elm in the 48 to 60 inch range; they’re slim enough to clear a 36 inch traffic lane and deep enough for standing bottles.
The interior should be at least 18 inches deep. For matching chairs and stools, our speakeasy seating and furniture ideas round up the velvet and brass picks.
Where can I buy hidden bar cabinet pieces on a budget?
IKEA BESTÅ and HEMNES are the best budget starting points at $200 to $500. For hardware, Amazon and Rejuvenation’s outlet have unlacquered brass pulls for $10 to $20 each. For second-hand finds, Facebook Marketplace, Craigslist, and local Habitat for Humanity ReStores regularly have sideboards and armoires under $300 that need only a paint refresh and new hardware to become a hidden bar.
How much does a hidden bar cabinet makeover cost?
The full range is $300 to $8,000 depending on whether you’re refinishing an existing piece or commissioning a custom build. A typical mid-range project (vintage cabinet, refinish, hardware, interior LED, mirror back panel, stemware rack) lands around $1,200 to $2,500.
DIY can drop that to $300 to $800 if you have the tools and a long weekend. For a longer read on the color side of the build, our speakeasy paint colors and palettes cover Inchyra Blue and the deep greens that hide a bar best.
Can I create a hidden bar cabinet on a budget?
Yes, and the easiest entry point is a $200 secondhand sideboard with a $50 paint refresh, $30 in new hardware, and a $40 peel-and-stick antiqued mirror inside the back panel. Total: about $320.
Add a $15 rechargeable motion LED and you have a hidden bar that guests will talk about for the price of a nice dinner out. The camouflage is in the styling, not the price tag.
Is a hidden bar cabinet worth it in a small space?
Yes, and small spaces argue for a hidden bar more than large ones do. In a small living room, every piece of furniture has to do double duty, and a credenza-style bar can also be the media console, the sideboard, and the entryway catch-all. Worth it is the right word; it’s the single piece of furniture that pulls the most weight per square foot in a tight room.
Is a hidden bar cabinet a good idea for a rental?
Yes, three no-damage swaps make it renter-friendly. (1) Use furniture anti-tip straps instead of wall screws for the anchor. (2) Use peel-and-stick antiqued mirror instead of glued tile for the back panel. (3) Use a freestanding IKEA BESTÅ instead of a built-in. You can take the whole setup with you when you move, and your landlord will never know it was a bar. For more renter-friendly bar ideas, our turn a closet into a hidden speakeasy bar guide walks through the no-drill version.
If I Had to Pick One Step to Start With
I’d start with the cabinet shape, not the hardware. Walk your room, pick the silhouette you already trust, and let that decision make every other choice.
Everything else lands once the disguise is right. Pin this for the weekend.