I got tired of dragging out a flimsy kiddie pool that turned the yard into a muddy ring by noon. I wanted a setup my kids could actually use more than once, and I did not want a jackhammer, a trench, or a concrete quote anywhere near it.
What finally worked was treating the whole thing like a shallow recirculating splash surface, not a mini pool. That one mindset shift kept the budget under control and made the whole build removable.
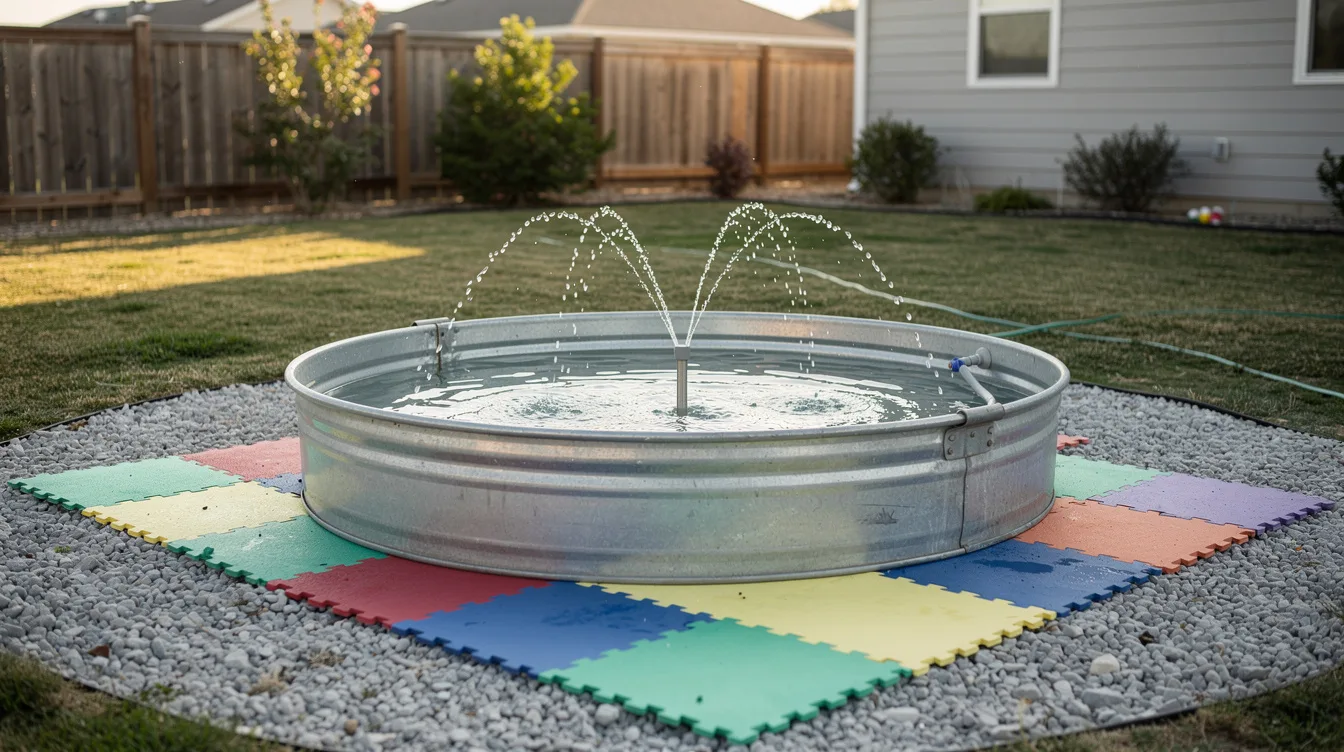
Start with a small tank, not a giant one
I skipped the oversized livestock tank fantasy and went straight to a CountyLine galvanized stock tank in the 2 to 3 foot range. Typical pricing for smaller models lands around $40 to $60, and that is the only size band where this project still has a real shot at staying under $100.
A shallow wall, around 10 to 12 inches high, is what makes this feel manageable. It gives you enough basin depth for splash play, but it does not push you into expensive pumps, plumbing parts, or a heavy permanent base.
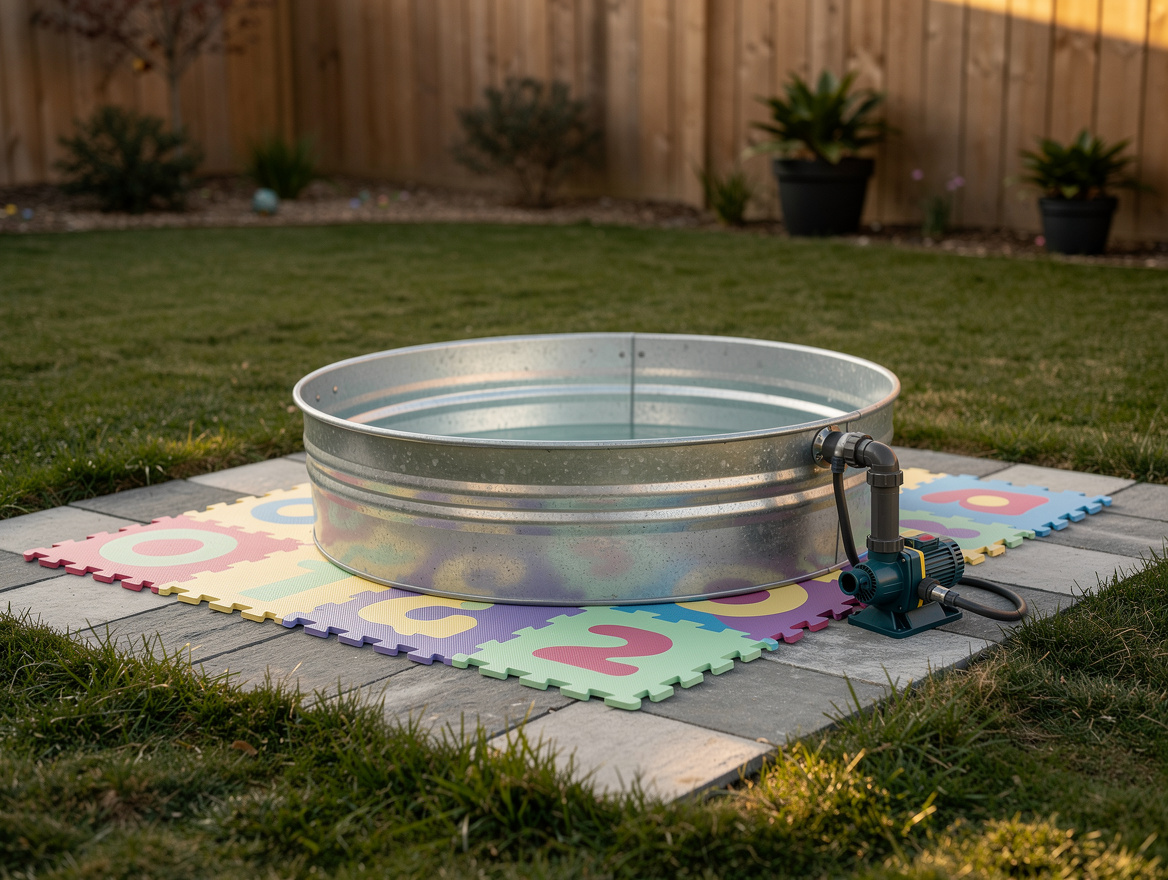
Level the base with gravel or pavers
I did not put the tank straight on grass because wet soil shifts fast, and then the water line looks crooked forever. A simple base of pea gravel, compacted sand, or a few flat pavers gives the tank a fighting chance without locking you into concrete.
This is where people cheap out and regret it. Even a basic level surface matters more than a fancy spray head, because a tilted basin makes recirculation messy and sends water over one side.
Use a budget pump that matches the scale
I kept the pump in the 400 to 600 GPH range, which is the sweet spot for a small setup like this. A Simple Deluxe, Vivosun, or Harbor Freight submersible pump typically runs about $25 to $35, and that is enough flow for a gentle sprinkler effect.
I would not overspend here. This is not a full plunge pool build, so a compact fountain or pond pump is the smarter buy than anything made for a permanent concrete water feature.
If you are building for toddlers, softer spray is better anyway. A smaller pump also keeps the noise down, which matters more than people admit when the thing is ten feet from your patio chairs.
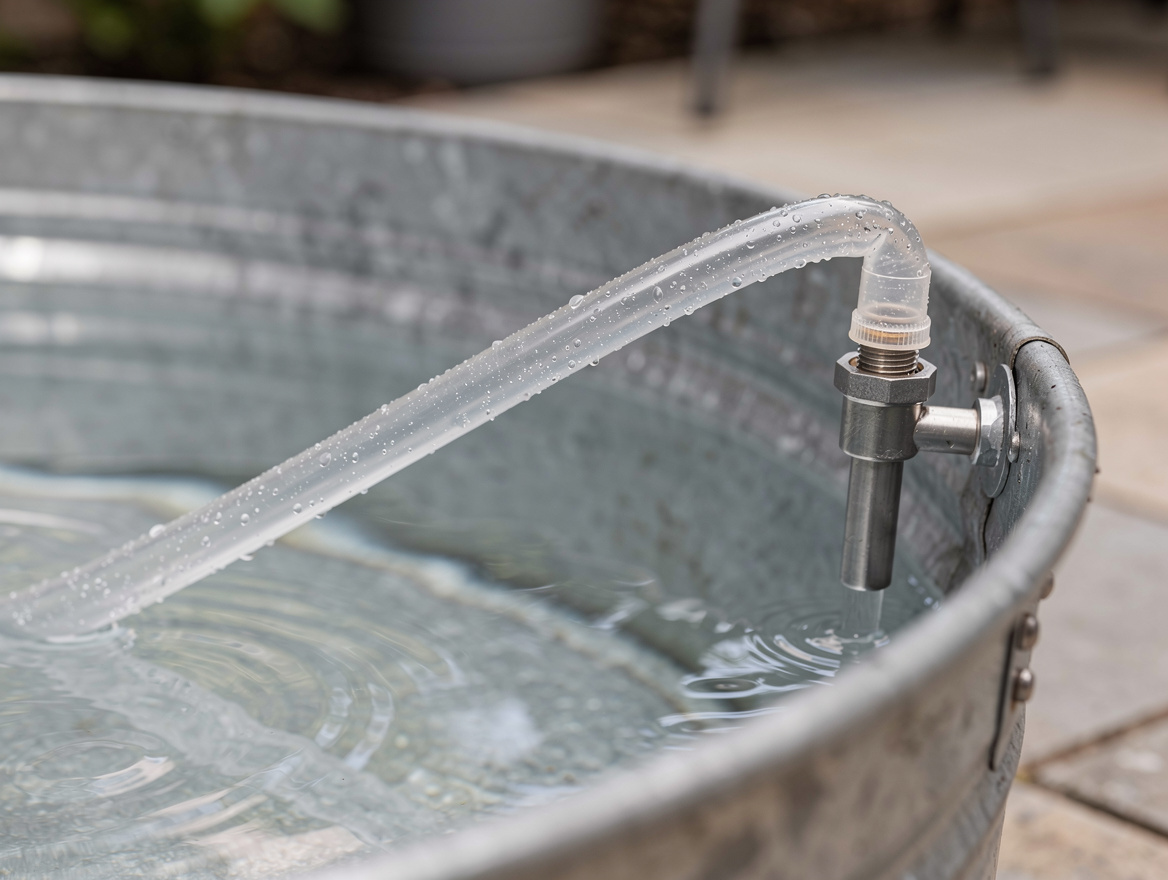
Run simple vinyl tubing over the rim
The cleanest low-cost move was basic vinyl tubing in 3/8 inch or 1/2 inch, usually about $5 to $10 depending on length. I ran it right over the tank edge instead of drilling fittings, because the whole point was zero concrete and zero permanent plumbing.
That decision saved money and hassle. Once you start cutting holes and adding specialty connectors, the project stops being a weekend splash pad and starts acting like a long-term water install.
I also liked that I could pull the tubing off in two minutes and empty the tank. It made cleanup feel realistic, which is a big reason the setup actually got used more than once.
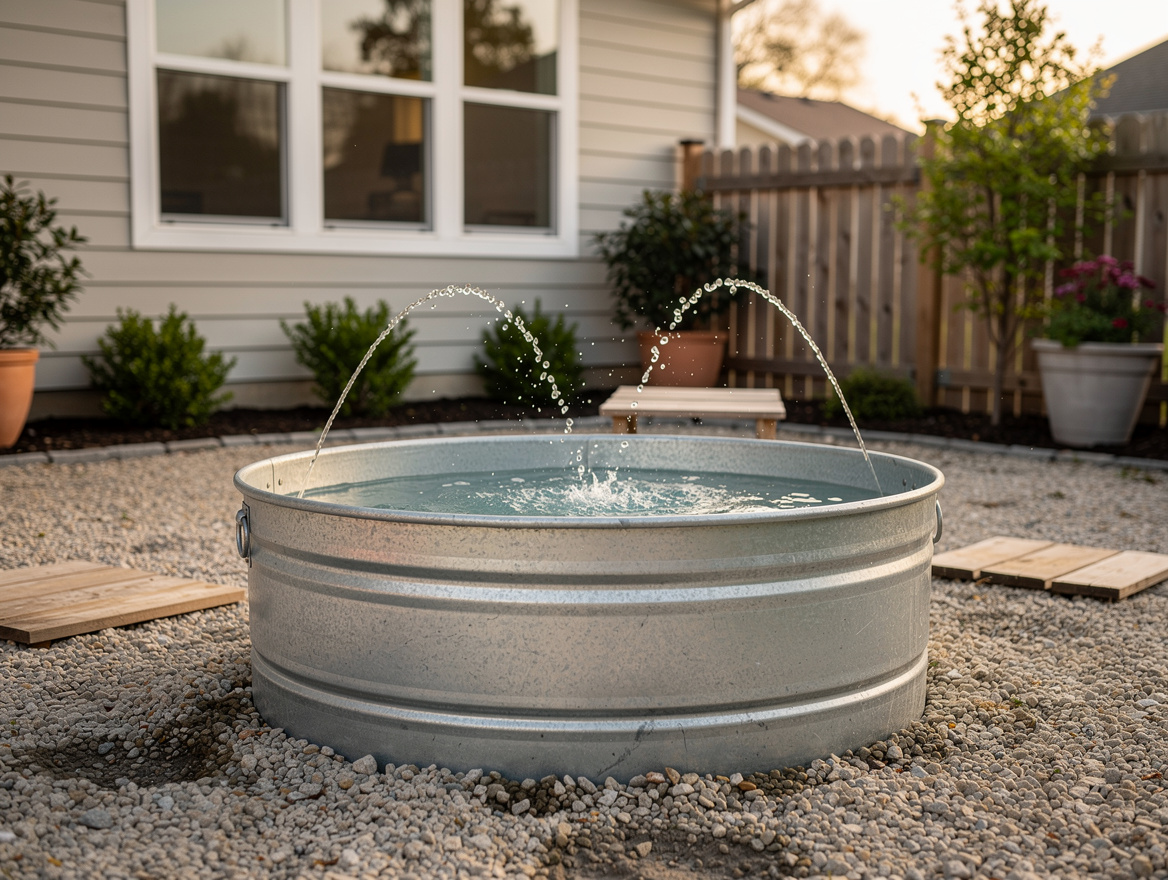
Keep the spray head basic and removable
I did not buy an elaborate fountain kit. A cheap garden sprinkler head or even a simple PVC elbow with small drilled holes can create the rain-back effect you want for around $5 to $10, and many low-cost pumps already include a usable nozzle.
The goal is not dramatic height. The goal is getting water to arc back into the tank so the system recirculates instead of soaking the yard.
This is the part where restraint pays off. A low spray looks less flashy, but it wastes less water and keeps your budget setup from turning into a muddy sprinkler zone by the end of the afternoon.
Add a soft edge so the metal does not win
The most worthwhile comfort add-on was a few EVA foam tiles around the perimeter. Budget packs, including Harbor Freight style floor tiles, often come in around $10 for four tiles, and that small layer makes stepping in and out much nicer.
I would call this optional for the math, but close to essential for daily use. Metal edges and bare ground feel rough fast, especially once everything gets slick.
A soft landing zone also makes the setup look more intentional. Not fancy, just finished enough that it does not read like farm equipment dropped in the backyard by accident.
Protect the budget by thinking like a splash surface
The reason my total stayed under $100 was simple: I stopped expecting pool performance from a stock tank. With a small tank at roughly $40 to $60, a pump at about $25 to $35, and tubing plus spray parts around $10 to $15, the average total lands in the $85 to $100 range before any extras.
I also kept the water shallow, around 2 to 4 inches. That made the recirculating setup feel safer, faster to fill, and far less annoying to clean.
If you want a flatter play area, the same recirculating idea can work with EVA foam tiles over a liner and a 5 gallon bucket reservoir, but I still think the small tank version is the easier first build. It asks for fewer parts, fewer cuts, and fewer opportunities to blow the budget on things nobody notices once the water is on.
Buy the tank first, then choose the pump to match it, not the other way around. If you keep the footprint small and the spray modest, this project stays cheap, removable, and a lot more useful than a sad inflatable pool.
Mia Carter writes about small-space living and budget home makeovers. She has restyled three rentals and tests most ideas in her own 45 sqm flat.