By noon on Saturday, the pool deck was too bright to sit on, and the shallow end had that hard glare that makes every towel feel hotter than it should. I wanted real shade, but I rent, and I was not about to start drilling into concrete or the fence line.
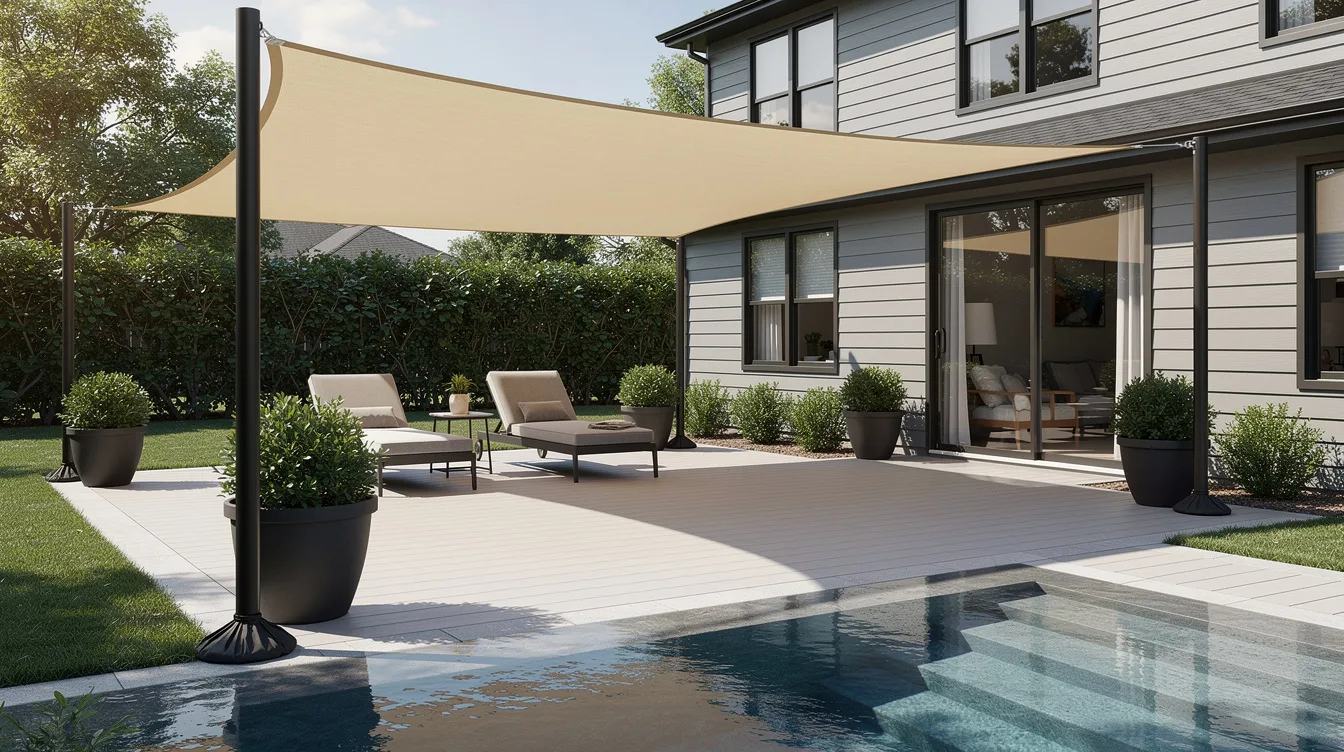
So I built a no-drill setup in one weekend: one sail, two weighted posts, two clamp-style anchor points, and enough tension to keep the fabric from sagging. It looks cleaner than a patchwork of umbrellas, and it feels far more permanent than it really is.
Start With a Breathable Sail, Not a Waterproof One
I went with a HDPE shade sail because pool areas get brutally hot, and breathable fabric feels better underneath than coated polyester. A typical 10 x 13 foot rectangle from Amazon or Home Depot runs about $40 to $80, which is the sweet spot for a weekend build.
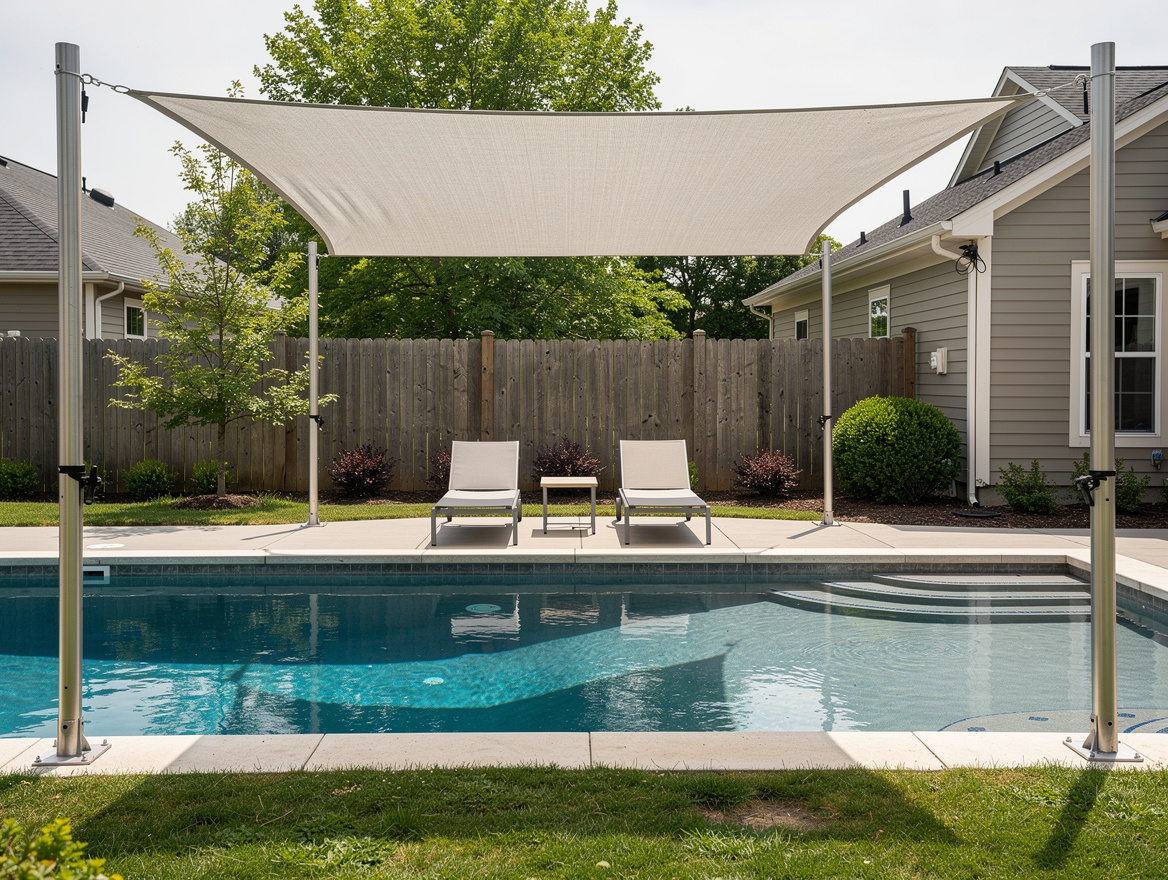
For a standard pool that is roughly 23 x 11.5 feet, that size can cover about half the water plus a strip of deck if you angle it right. I think that is the smarter move than chasing full coverage, because fewer anchor points usually means a cleaner no-drill setup.
I skipped waterproof fabric on purpose. It blocks rain better, sure, but it also traps more heat and demands tighter pitch so water does not collect in the middle.
Use Weighted Posts Where You Need Real Height
The biggest win came from two freestanding steel posts on the deck side. You can find shade-compatible poles, post kits, and heavy umbrella-style bases at Lowe’s, Amazon, and Wayfair, with posts typically in the 8 to 10 foot range and bases often landing around $80 to $150 each.
I would not cheap out here. A sail can pull harder than people expect once tension is on it, and a skinny post in a light base looks fine for ten minutes, then starts feeling like a bad idea.
If you want the safest renter-friendly version, use ballast-style bases that hold pavers or filled weight trays instead of a decorative stand. They are bulkier, but near a pool I prefer ugly and stable over sleek and nervous.
Steal Your Opposite Anchors From What Is Already There
On the far side, I used existing verticals instead of adding more freestanding supports. A solid railing clamp, fence post connection, or wrapped strap anchor can do the job if the structure is sturdy and the load direction makes sense.
Amazon and Ace Hardware both carry stainless hardware, ratchet straps, and heavy-duty UV-resistant ties that work for temporary or seasonal installs. Typical hardware cost for two corners is often only $20 to $50, and that is where this project starts feeling refreshingly doable.
This is also where people get sloppy. If the fence wiggles when you push it by hand, it is not a real anchor point, and no clever strap setup will magically fix that.
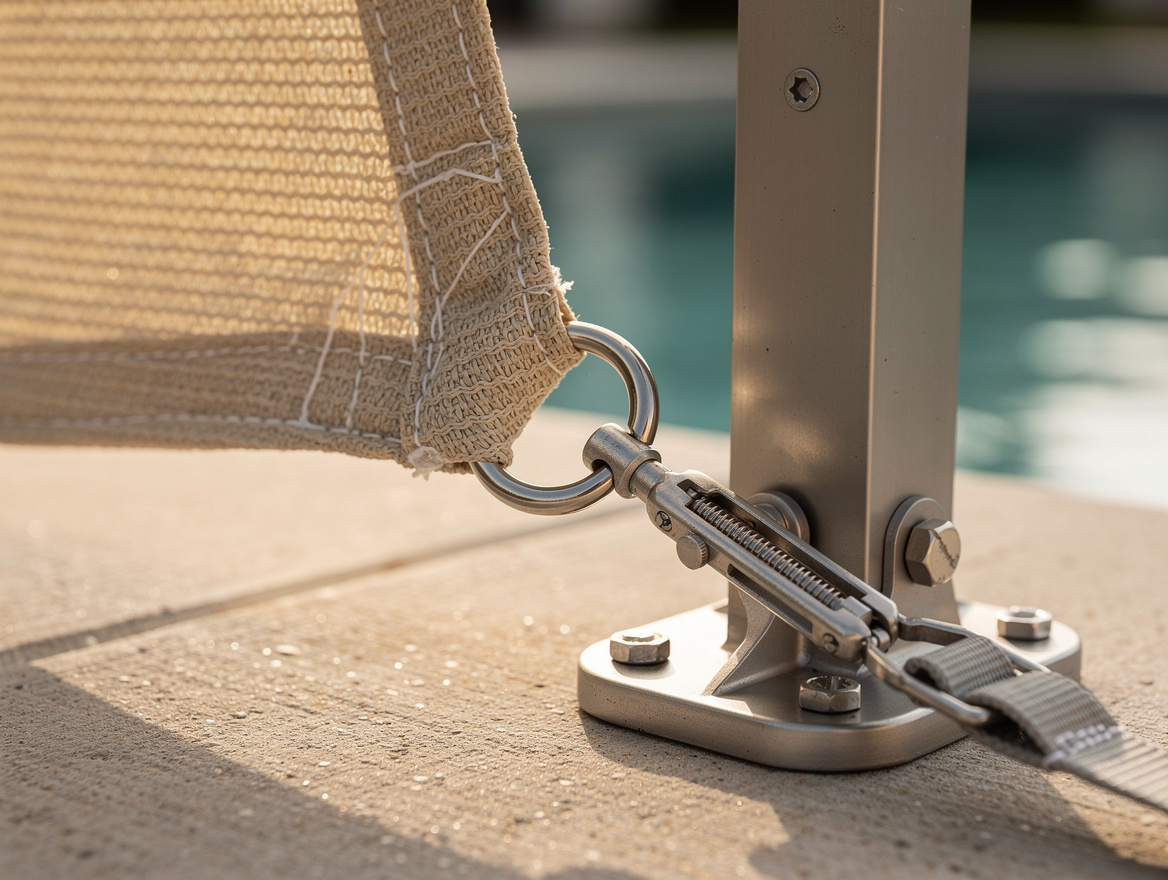
Build Tension With Hardware You Can Adjust Fast
I did not want a setup that looked taut in the morning and loose by dinner, so I used adjustable ratchet straps and tension hardware at every corner. That made leveling and retightening simple, especially since freestanding posts can settle a little once the base takes full load.
At Home Depot or Amazon, a basic bundle of stainless carabiners, turnbuckles, pad eyes, and ratchet straps usually costs about $30 to $70 total. That is money well spent, because bad tension is the reason a lot of shade sails look temporary even when the materials are decent.
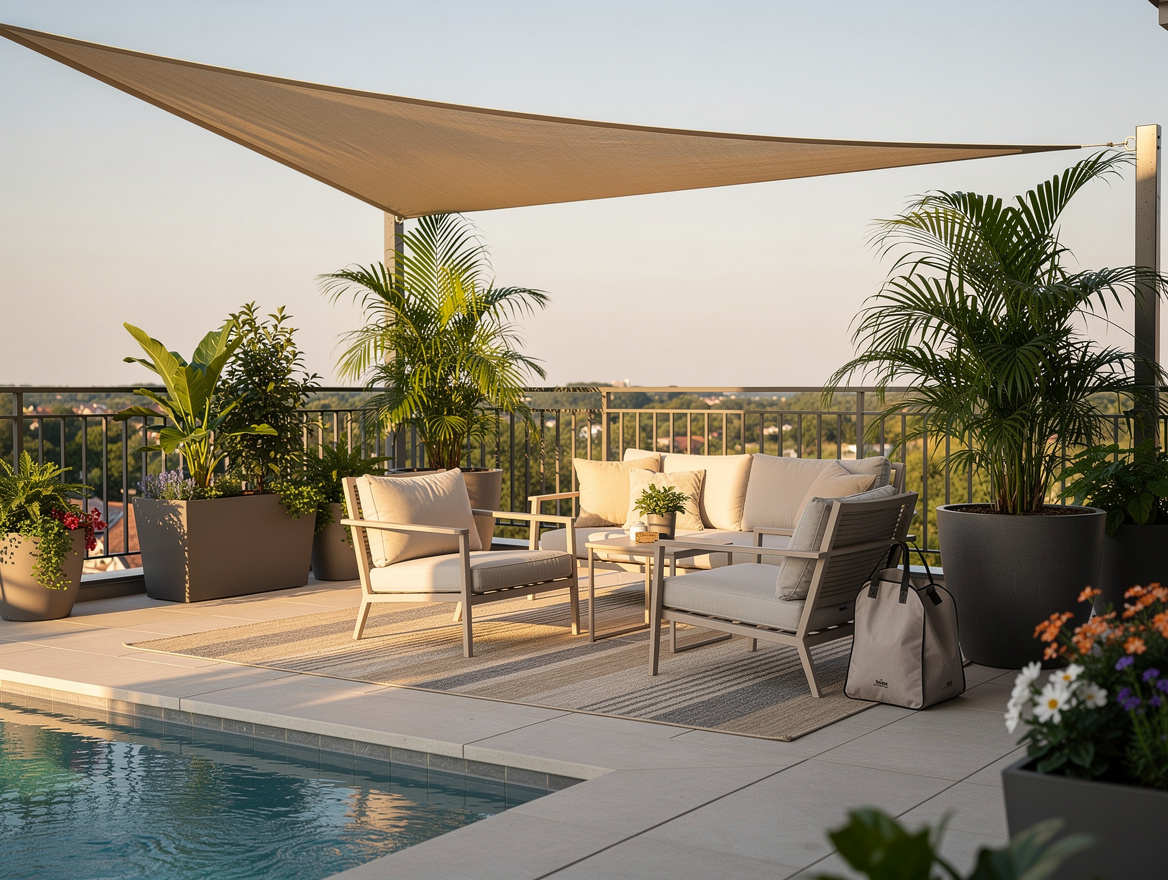
I also gave the sail a noticeable slope instead of trying to keep it perfectly flat. A slight height difference looks better, handles wind better, and keeps the whole thing from reading like a sagging tarp.
Place the Shade Where You Actually Sit, Not Where It Looks Centered
The temptation is to center the rectangular sail over the pool because it photographs nicely. I shifted mine toward the shallow end and the lounge side, because that is where people stand, drop towels, and complain about the sun.
That one choice made the whole layout feel more useful. A no-drill build works best when you stop treating the sail like architecture and start treating it like a movable comfort layer.
I also kept one corner a little higher to préservé the open view across the yard. Full symmetry is overrated here, and a slightly off-center layout often feels more relaxed around water.
Hide the Rental Feel With Planters and Outdoor Pieces
The final step was making the structure look intentional instead of improvised. I tucked the bases near large resin planters, added a rolled outdoor rug, and kept the palette to black hardware, pale decking, and one muted blue towel stack.
Target, Walmart, IKEA, and Wayfair all have oversized planters and outdoor accessories that can soften the heavy base look without pretending it is invisible. A typical large planter is often around $30 to $60, and that small styling layer matters more than people think.
I would skip fussy decor near the posts. This setup already has enough visual lines, so it looks best when the accessories are chunky, simple, and a little quiet.
Buy the sail first, then mark the exact shade footprint with string before you spend a dollar on posts or bases. If the deck gets the most use, shade the deck on purpose and let the pool keep a little sun.
Mia Carter writes about small-space living and budget home makeovers. She has restyled three rentals and tests most ideas in her own 45 sqm flat.