
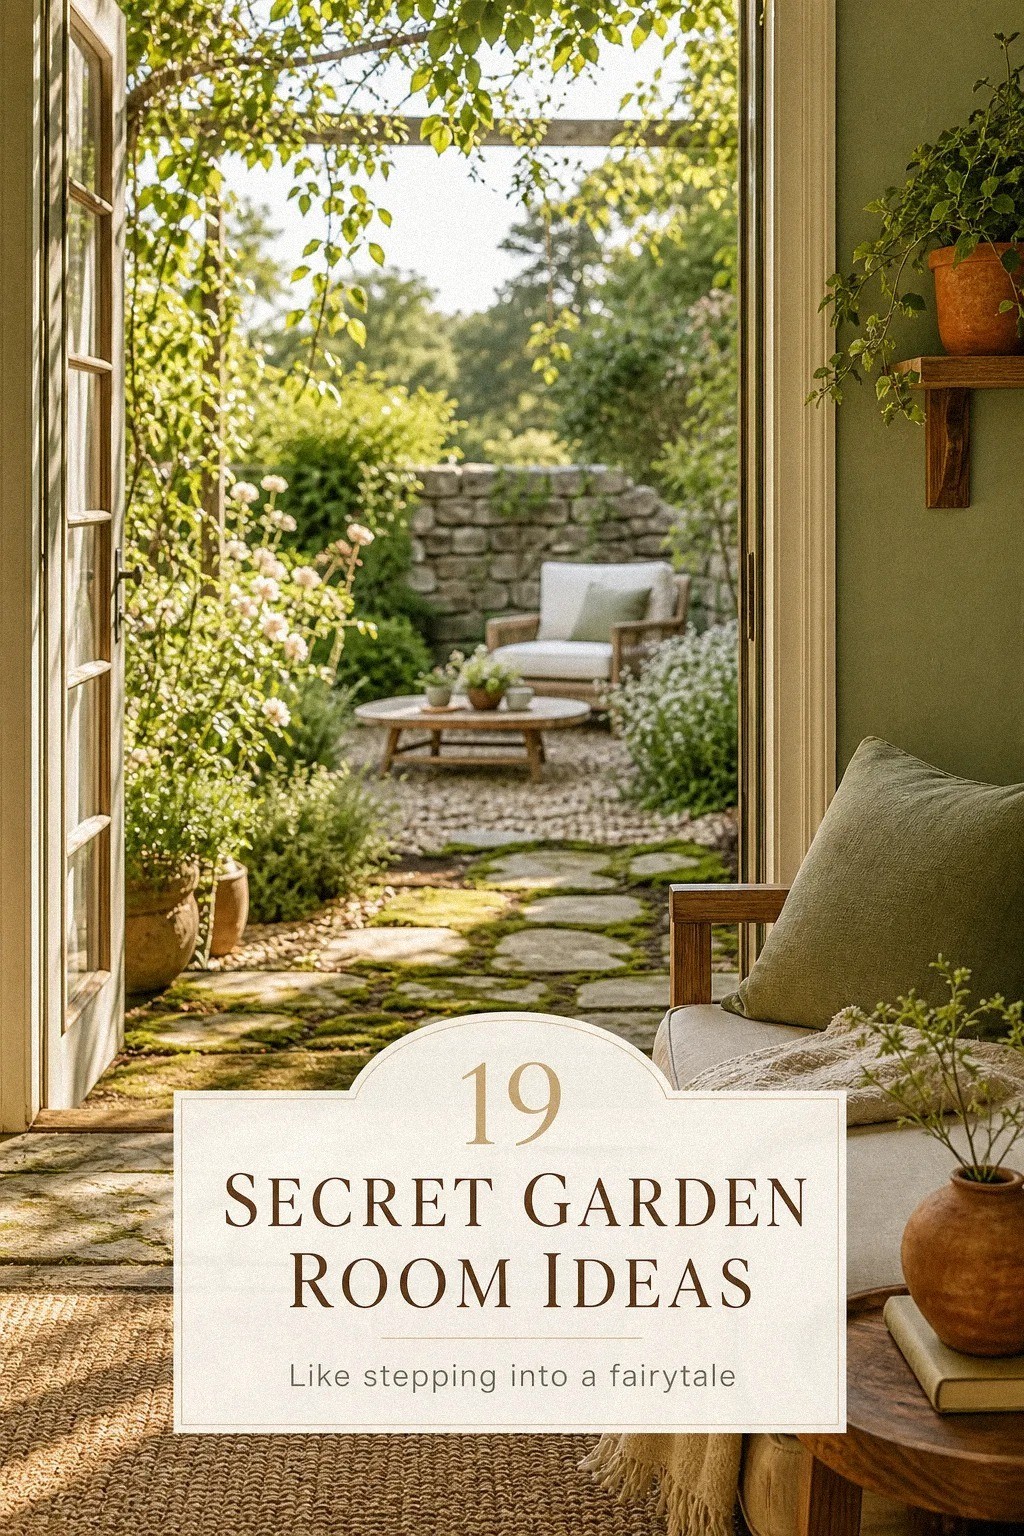
detail Garden Room Ideas for a Lush Indoor Oasis work best when you build them in layers, not all at once. I learned that after trying to copy a full garden corner in one weekend and ending up with a muddy path, one lonely lantern, and nowhere comfortable to sit. Start with the threshold, then the planting, then the light. Your room will feel grounded long before you’ve bought every last pot.
Before You Start: The Three-Layer Garden Rule
If you want this look to hold together, think in three layers: threshold, enclosure, and glow. Your threshold is the first hard surface you touch, usually stone, gravel, or painted wood. Your enclosure is what gives the room privacy, whether that is willow screening, a pergola, or climbing vines.
Your glow is the evening layer, the part people remember after sunset. I would not start with lights first, even though they are tempting, because a bright bulb can’t fix a weak layout.
A typical US spend depends on how much furniture you already own. If you only need styling, paint, and containers, stay in the budget band. If you are adding seating, a rug, and several light sources, the middle tier is more realistic.
- Start with a mossy stone threshold
- Anchor the entrance with climbing jasmine
- Layer ferns around a gravel path
- Hang lanterns from low tree branches
- Build a vine-covered reading nook
- Tuck a fairy door into ivy
- Frame the seating with willow screens
- Plant foxgloves beside the hidden doorway
- Add a weathered bench under roses
- Trail string lights through overhead greenery
- Nestle a bistro table behind hydrangeas
- Line the path with creeping thyme
- Hide storage inside a potting cabinet
- Drape sheer curtains from a pergola
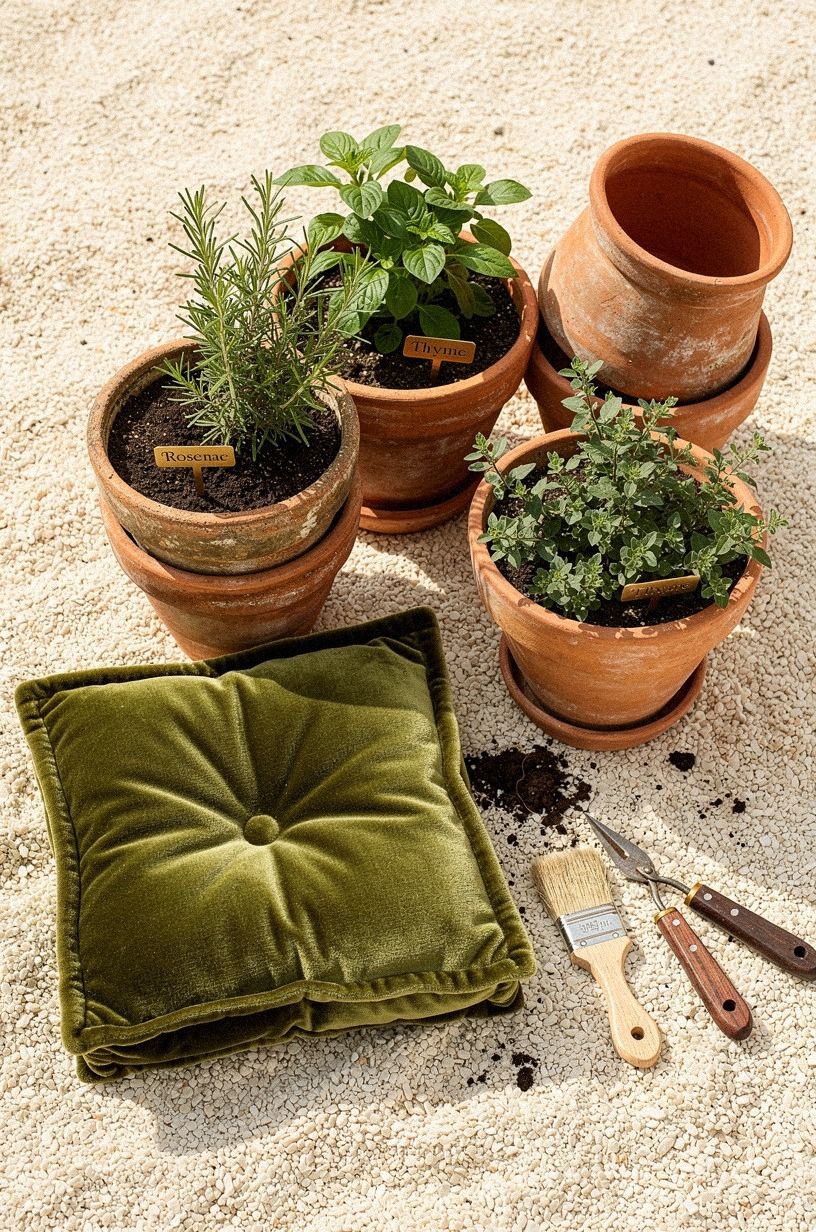
- Cluster terracotta pots around the corner
- Install a small fountain behind boxwoods
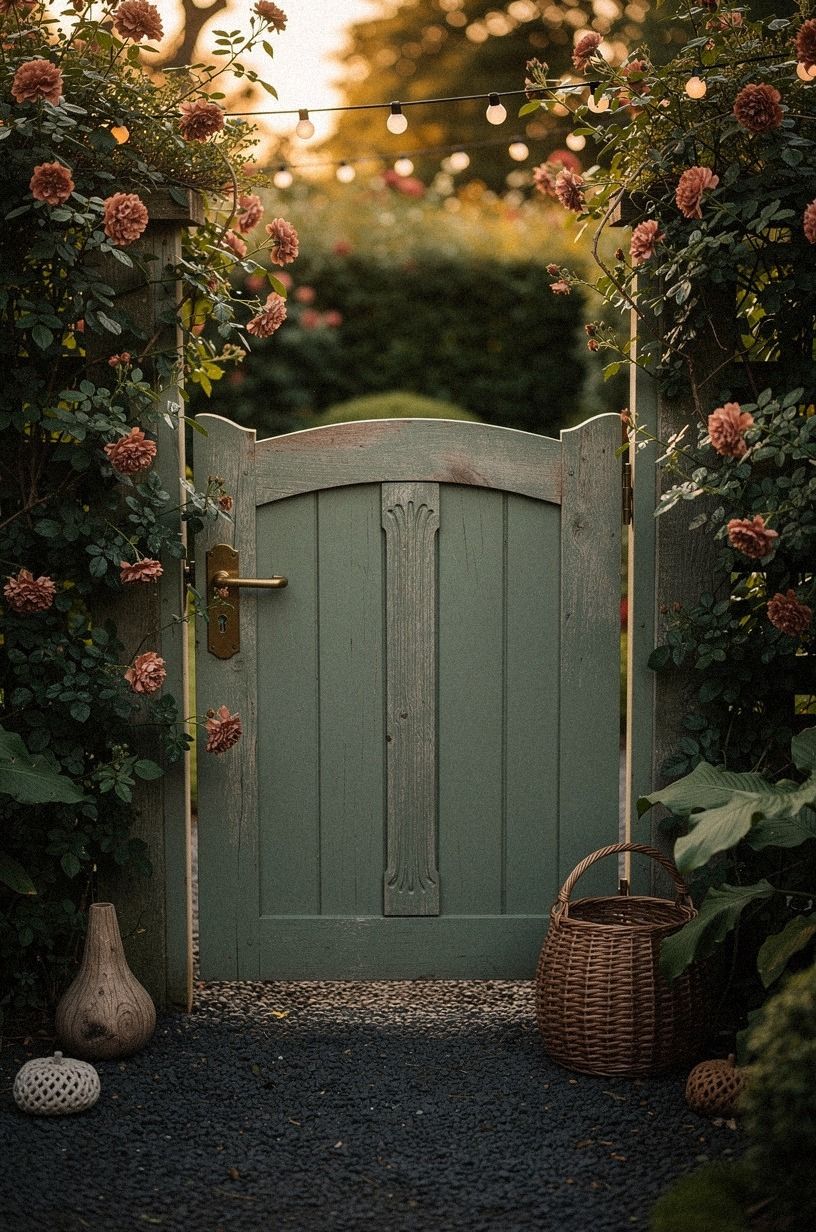
- Paint the gate a deep sage
- Set a library cart under the arbor
- Finish with candles inside glass hurricanes
1Start with a mossy stone threshold
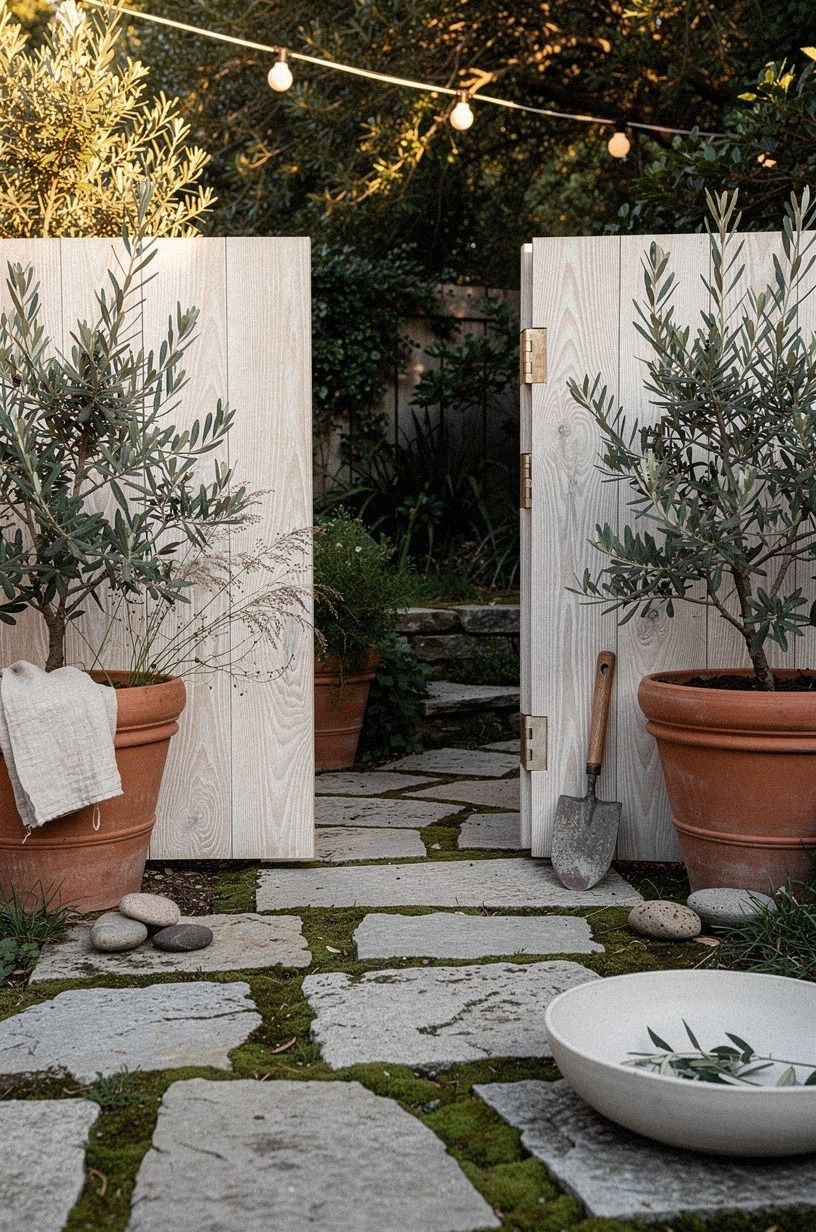
Begin at the floor, because your entrance has to feel older than the room around it. A run of worn pavers with a little moss in the joints gives you that settled-in look right away, and you will notice it before you register any furniture. I like honed limestone pavers here because the surface stays soft instead of shiny, and the green reads believable next to terracotta.
And keep the threshold centered and symmetrical so your eye relaxes as you step in. Two clay pots, olive foliage, and a slim strip of gravel are enough. I would skip bright ceramic planters because they pull attention away from the doorway.
If you like the storybook mood of this old-world garden escape, your own entrance needs the same quiet floor under it.
2Anchor the entrance with climbing jasmine
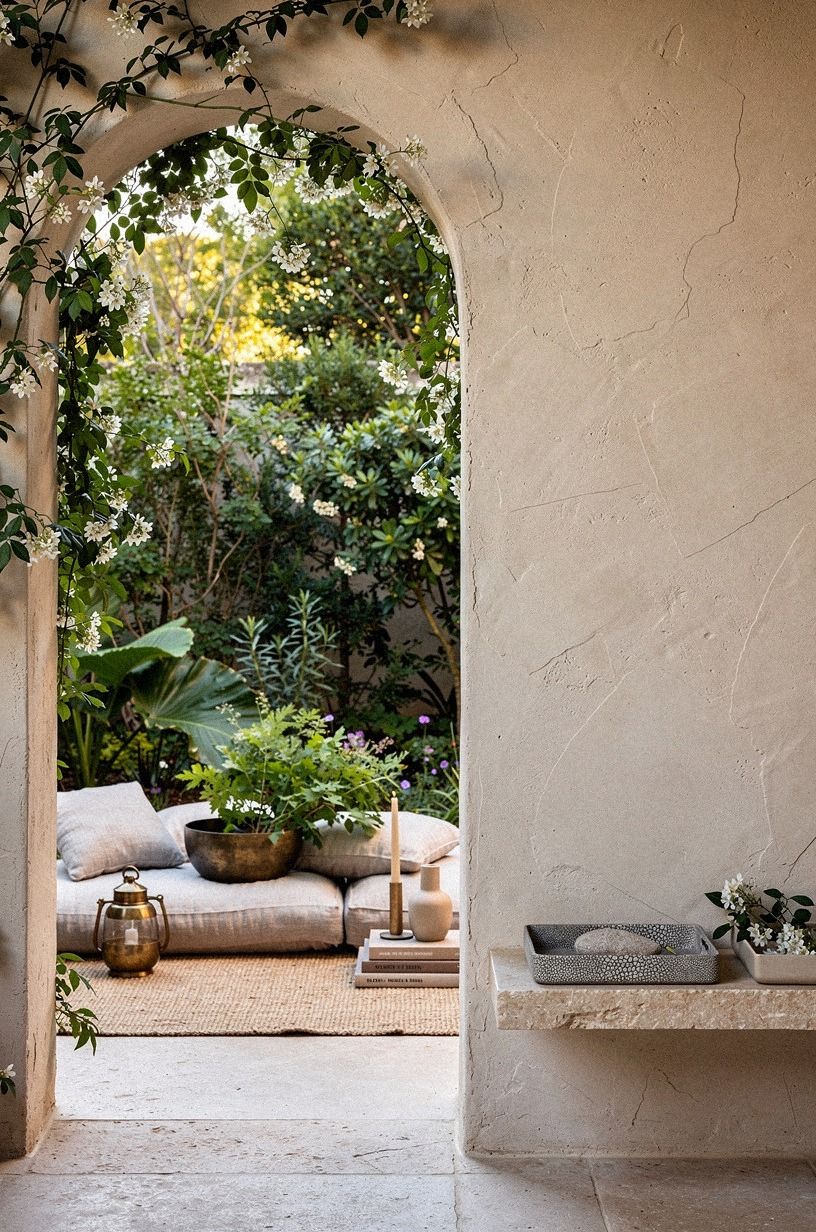
Now give the doorway height. A simple arch can look flat until something climbs it, and star jasmine is the plant that makes the opening feel dressed instead of bare.
You want growth that reaches a little above eye level, then softens over the curve. That first brush of green is what tells you the room is changing from patio to hideaway room.
Train it early with thin jute ties so the stems move where you need them. I made the mistake of letting a vine wander once, and it swallowed the arch line in one season.
Clay plaster, linen cushions, aged brass, all of that lands better when your greenery frames it on purpose. And if you love enclosed garden paths, this London rose pergola story shows why overhead bloom changes everything.
3Layer ferns around a gravel path
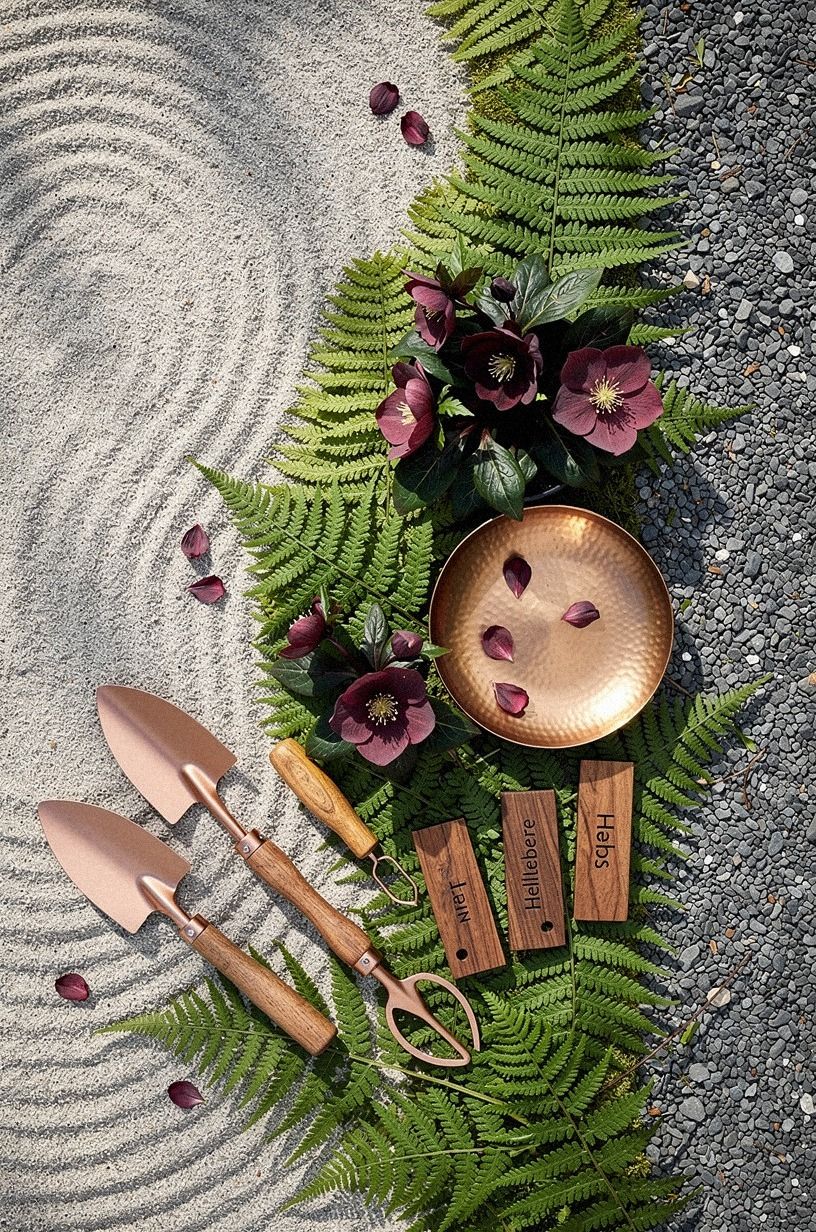
This is where your path stops feeling new. Use different fern heights so the gravel edge doesn’t read like a hard stripe, and let the planting drift wider on one side than the other.
A pale crushed gravel works better than bright white stone, especially if your room already has plum flowers or warm clay nearby. The cooler the gravel, the more your green tones show up.
You do not need dozens of varieties. Three is enough if the textures contrast: Japanese painted fern, a deeper holly fern, and a lower mossy groundcover. Keep breathing room in the middle so the path still reads from above.
But don’t crowd the edge with boxy pots. A path should feel like it appeared there, not like you lined it up for inspection.
4Hang lanterns from low tree branches
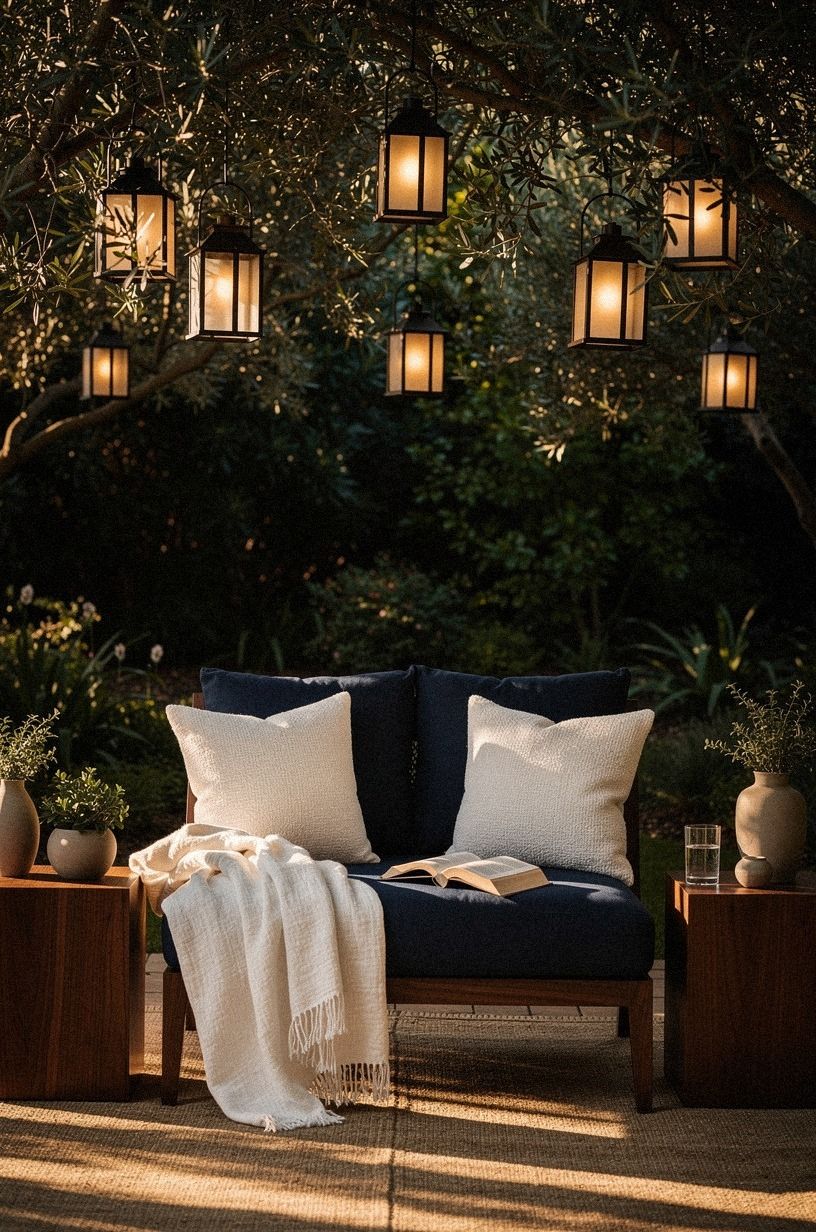
Once the ground is working, add evening light at head height.
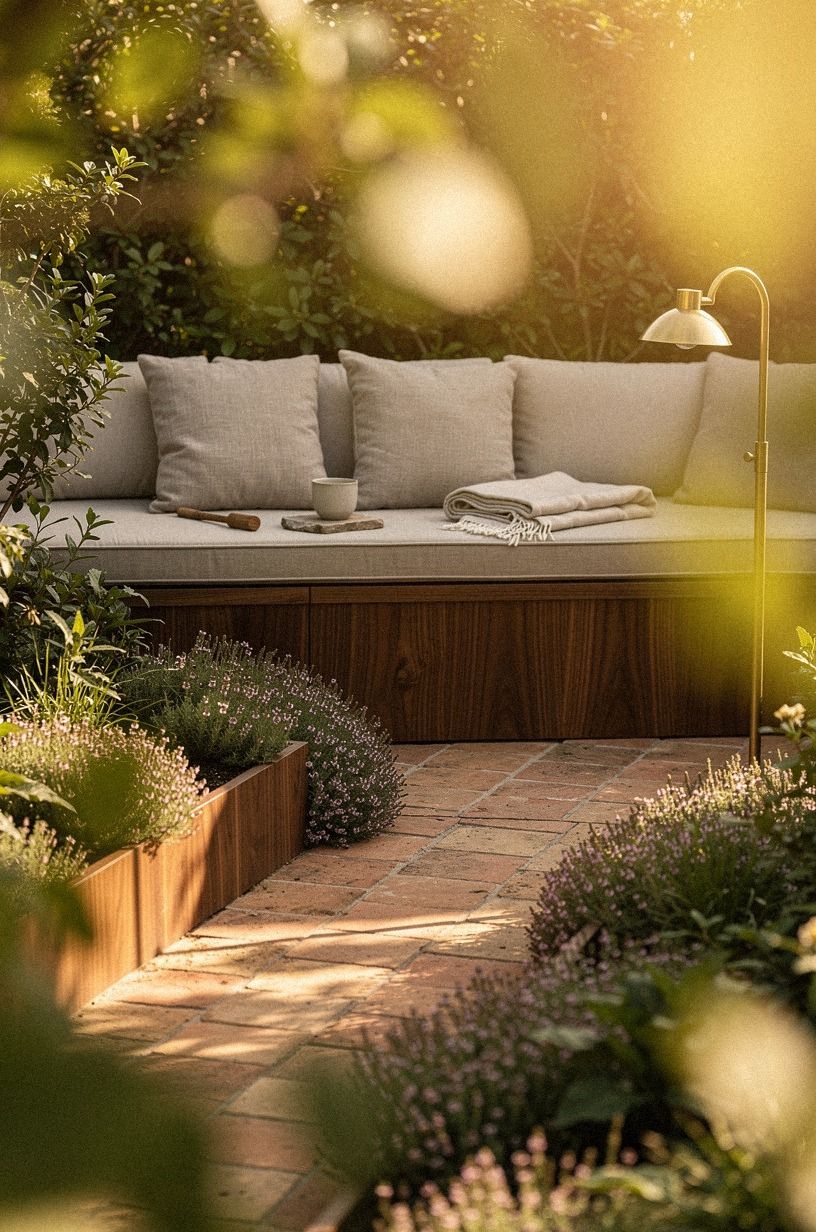
5Build a vine-covered reading nook

A reading nook needs less furniture than you think. One chair, one place to set a cup, and one reason to stay.
A cream lounge chair under vines does more than a full conversation set if your space is small, because you can still see the planting around it. I like a West Elm Portside outdoor chair here since the shape stays quiet and the cushion does not fight the leaves.
Add one gold-toned lantern, one open book, and a throw that can handle damp evenings. Belgian flax linen. A faded green stripe.
That is enough! Why crowd a calm corner with extra pieces you just move every time you sweep?
If you’re building a nature-inspired home library design outdoors, this is the place to do it, and you can echo that collected feeling through this tucked-away room inspiration.
6Tuck a fairy door into ivy
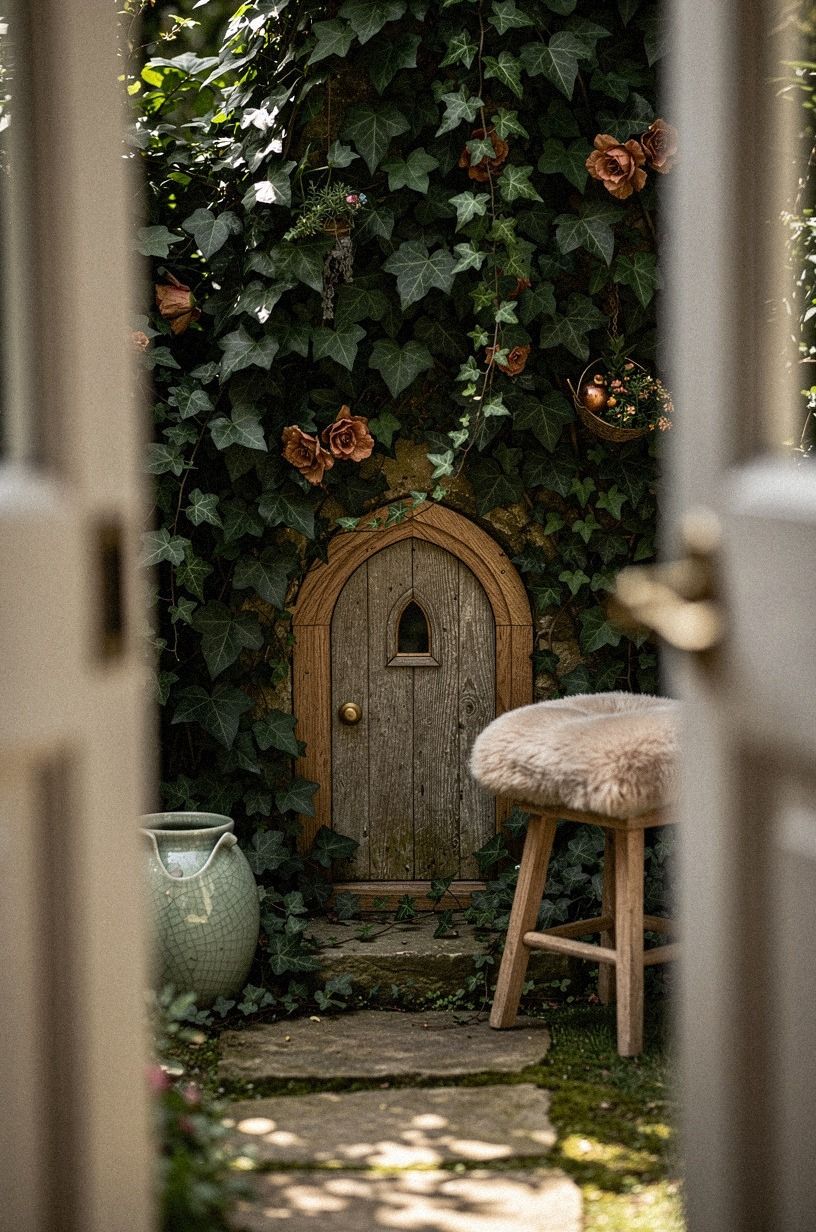
This is the playful step, but it still has to feel believable. A tiny door disappears best when you treat it like architecture, not décor. Set it low into ivy, give it a little oak edging, and let the leaves overlap the frame so it looks found.
Your best version will use natural white oak trim with a matte finish, not glossy craft paint.
But rust flowers nearby help the miniature scale read warmer, especially against dark green leaves. I would not center the door in a wide blank wall because then it looks staged.
Push it into a layered view through another opening and let people discover it late. But keep the hardware simple.
One tiny ring pull is charming. Five fake hinges are trying too hard!
7Frame the seating with willow screens
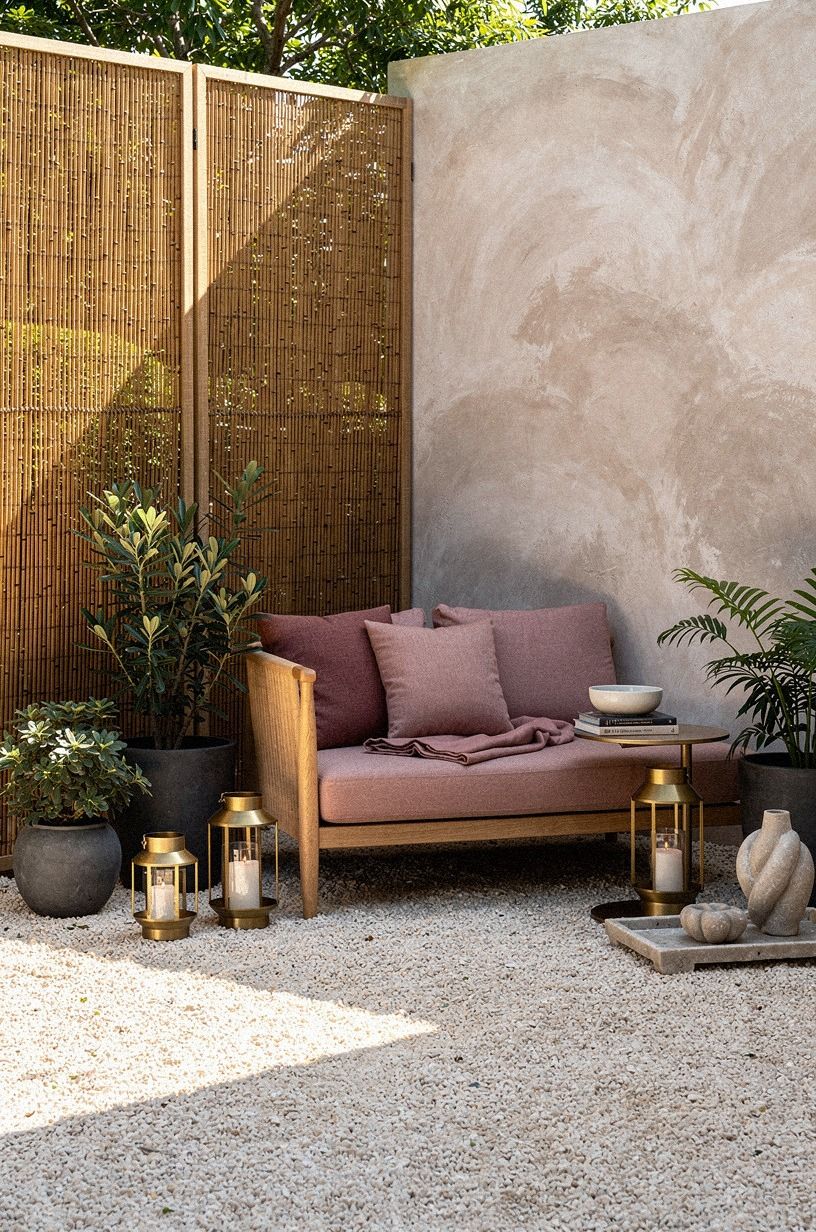
Privacy matters more than matching furniture in a garden room. Willow screens do the job without making the corner feel sealed off, and that loose woven texture is exactly what keeps the scene breathable. Put them just behind the sofa zone, not tight against it, so you leave a narrow shadow gap.
A woven willow hurdle panel gives you enough texture without the heavy look of painted fencing.
Let the seating sit slightly off-center and keep the pale gravel visible on the long side. That is what makes the room feel editorial instead of boxed in. I tested reed screens once and wouldn’t use them again because they read too yellow by late summer.
If you’re after a cozy hidden room that still feels airy, willow is the better call every single time.
8Plant foxgloves beside the hidden doorway
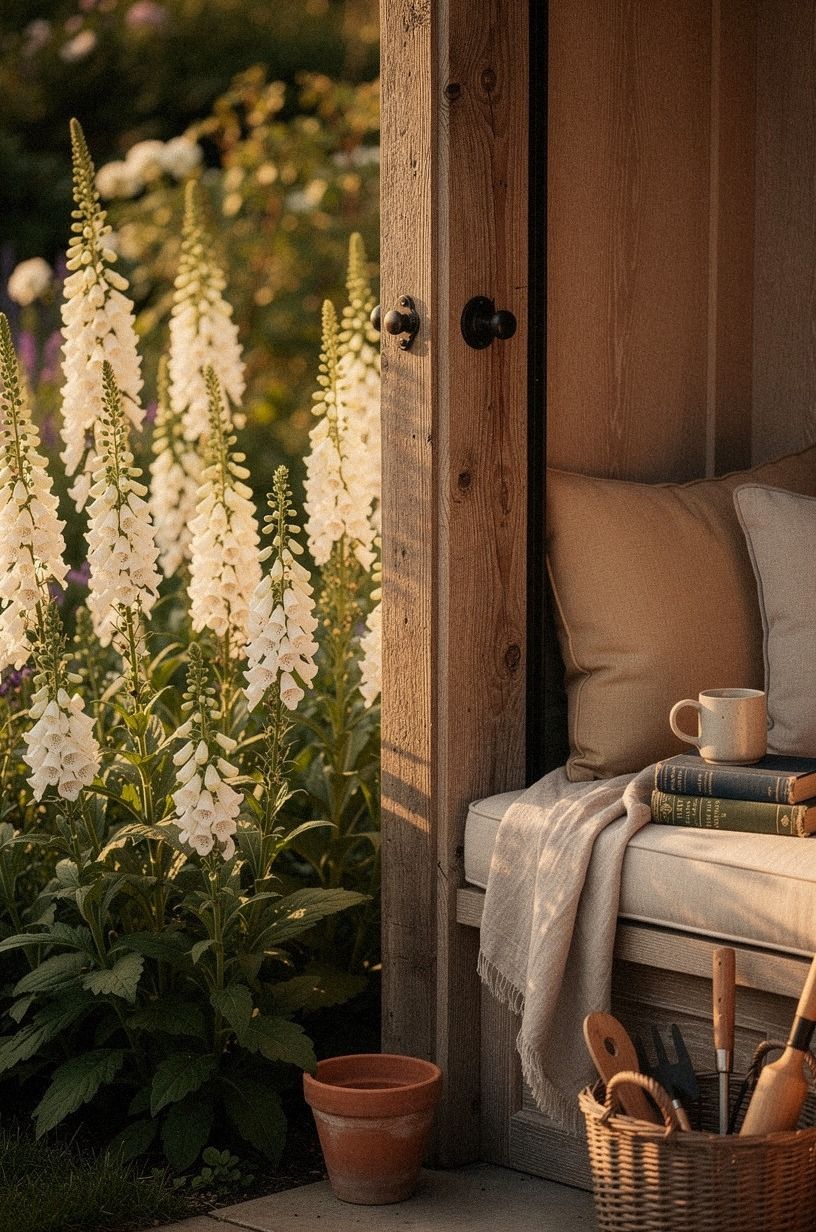
Tall blooms should mark your doorway like exclamation points, not swallow it whole. Foxgloves work because they rise straight up while everything else rambles and spills. You get structure without losing romance.
I prefer Digitalis purpurea in warm white or soft blush here, since the color keeps the entry visible even when the surrounding foliage goes deep green.
Plant them a little to one side, then repeat the tone in one small pot across the path so the composition does not tip over. But don’t use bright magenta if your arch and gravel are already busy.
It wins the fight for no reason. The hidden doorway should still be the thing you notice first, with the flowers acting like a nudge rather than a billboard.
9Add a weathered bench under roses
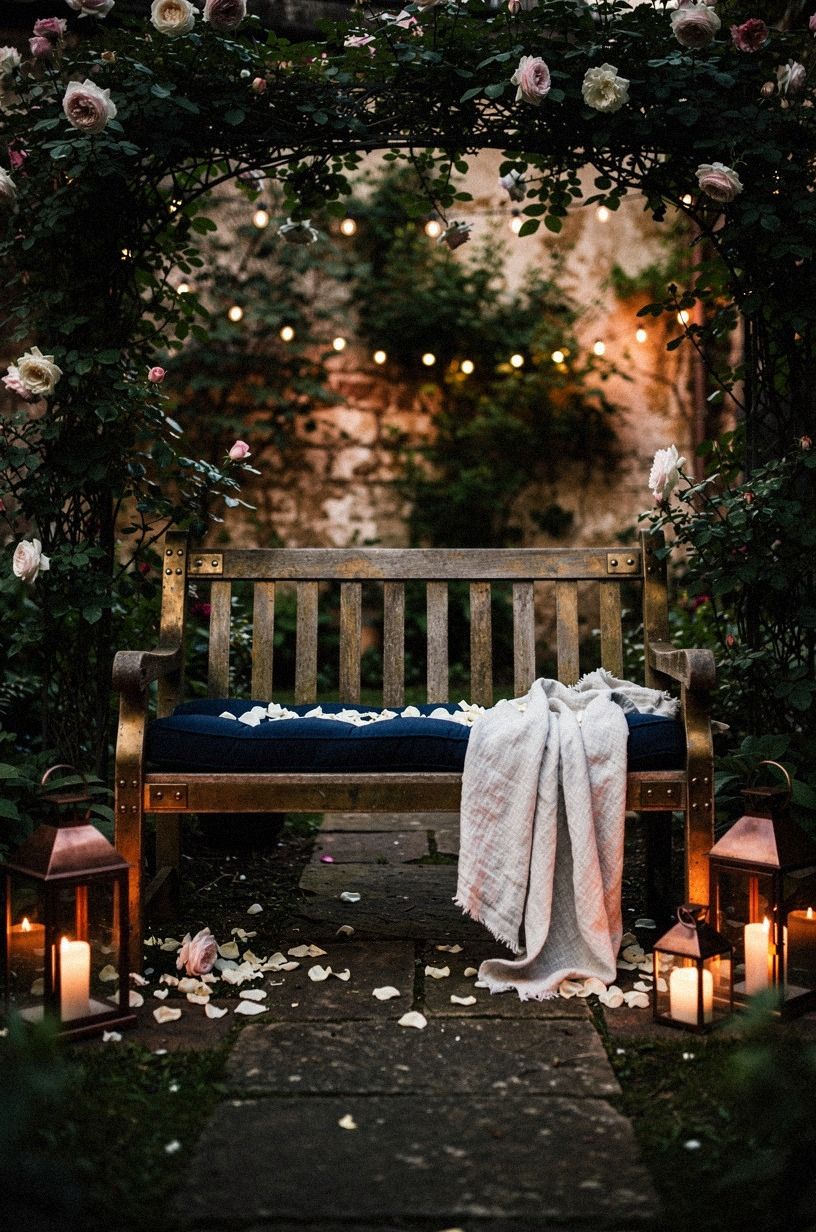
Every garden room needs one seat that feels a bit accidental, like you found it there and kept it. A weathered bench under climbing roses does that job fast.
The wood should look dry and silvered, not orange, and the bench wants breathing room around it so the rose canes stay readable. I’d use reclaimed teak or a bench with the same faded tone rather than anything newly stained.
A low angle makes this setup sing because you see the midnight cushions, the rose canopy, and the bench line in one glance. I wouldn’t over-style it.
One folded throw, maybe one book. That’s it. And if you love outdoor corners that feel discovered instead of bought all at once, this French garden village story is worth a look for mood alone.
10Trail string lights through overhead greenery
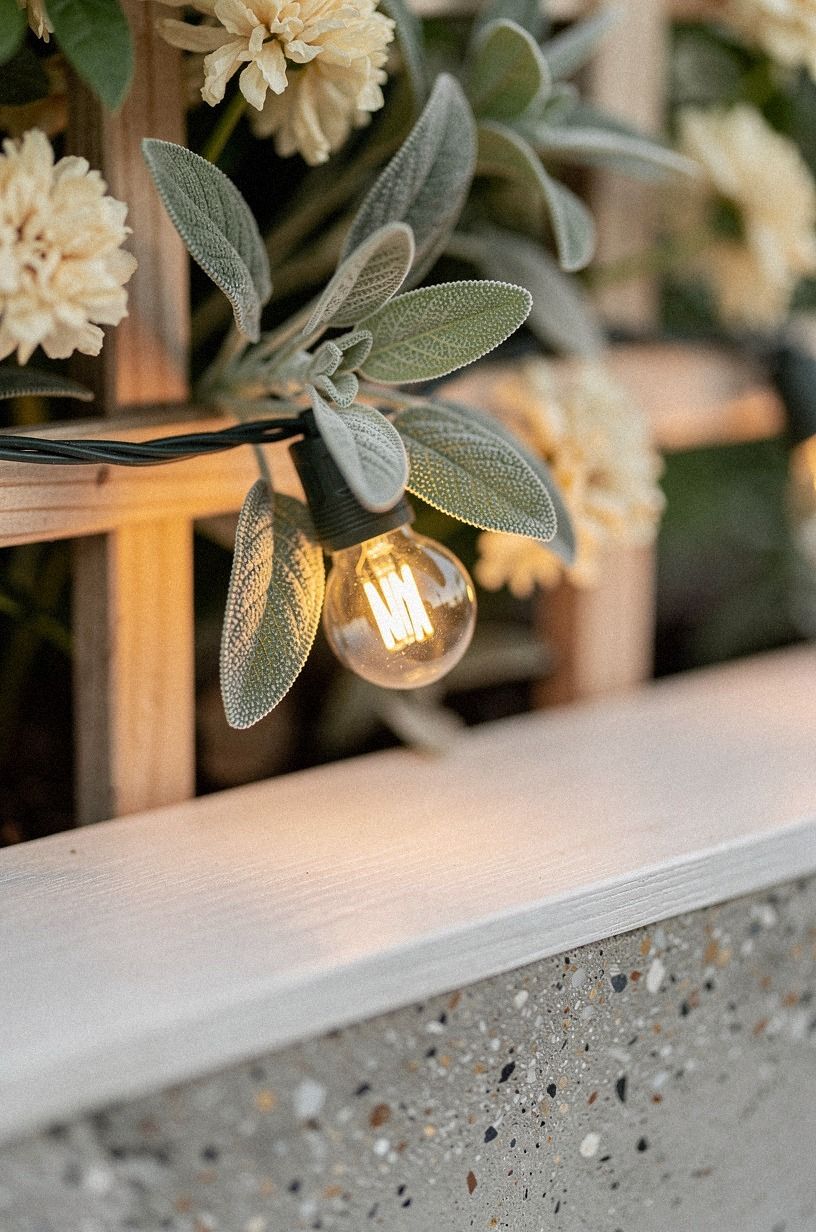
Here is the lighting move most people get wrong.
11Nestle a bistro table behind hydrangeas
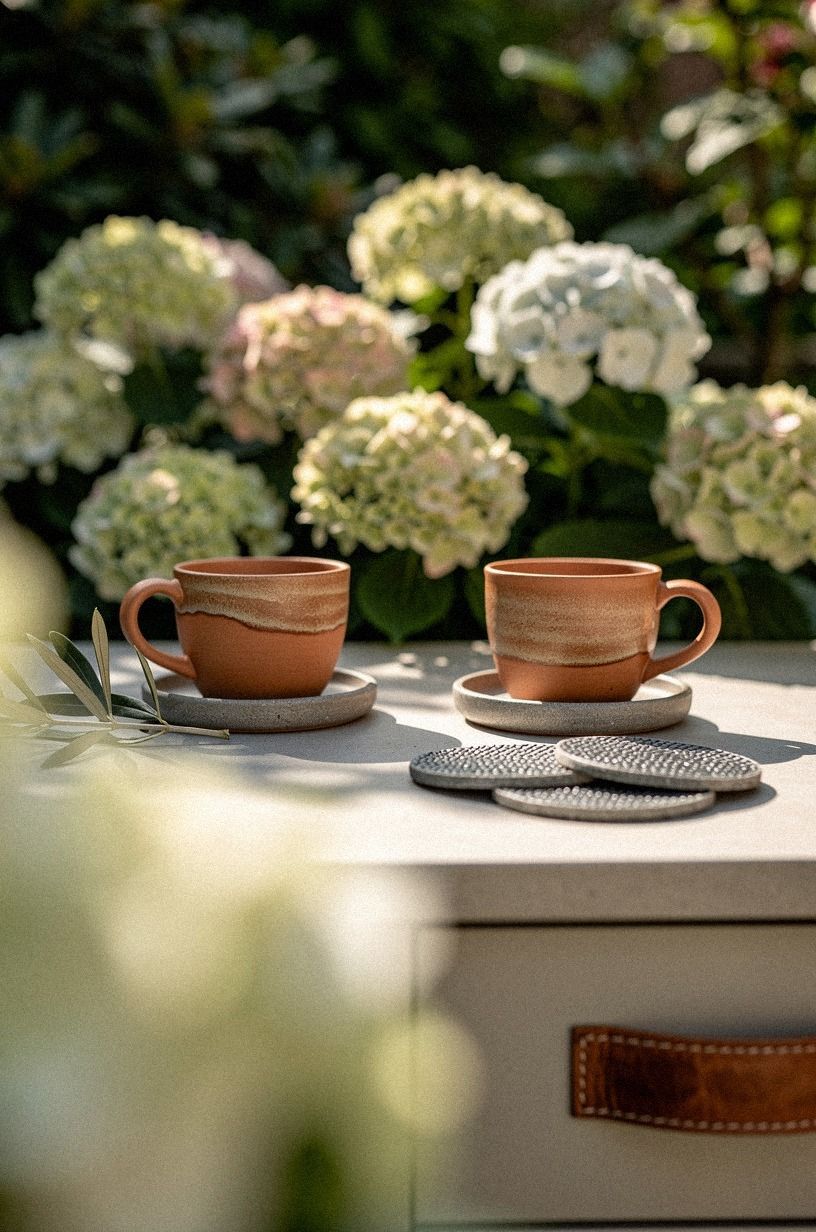
A bistro table works best when it feels half hidden. Place it just behind the hydrangea line so you look through blooms before you see the tabletop, then keep the table itself simple.
Your cups, stone saucers, and olive leaves become the styling layer. I like a Fermob Bistro folding table if you want color, or a dark iron version if the flowers are already doing plenty.
Terracotta cups warm the scene more than white mugs do, especially in late afternoon. But don’t choose a table that’s too large for two people.
The point is intimacy, not utility. A small table also leaves more path visible, which matters if you’re working with a narrow backyard and still want the room to breathe.
12Line the path with creeping thyme
This is one of those low-cost moves that pays off far above its price. Creeping thyme softens the path edges, releases scent when you brush past it, and keeps the gravel from looking harsh. You want the thyme hugging the route in irregular pockets, not one stiff green border.
Elfin thyme is especially good if your path is narrow and you need a tighter spread.
Give the path a little asymmetry so it doesn’t read like a driveway. I made mine too even once, and it looked like landscaping by spreadsheet.
Not good! If you want inspiration for paths that feel discovered, this oasis story with spring-fed planting shows how soft edges make a route feel older than it is.
13Hide storage inside a potting cabinet
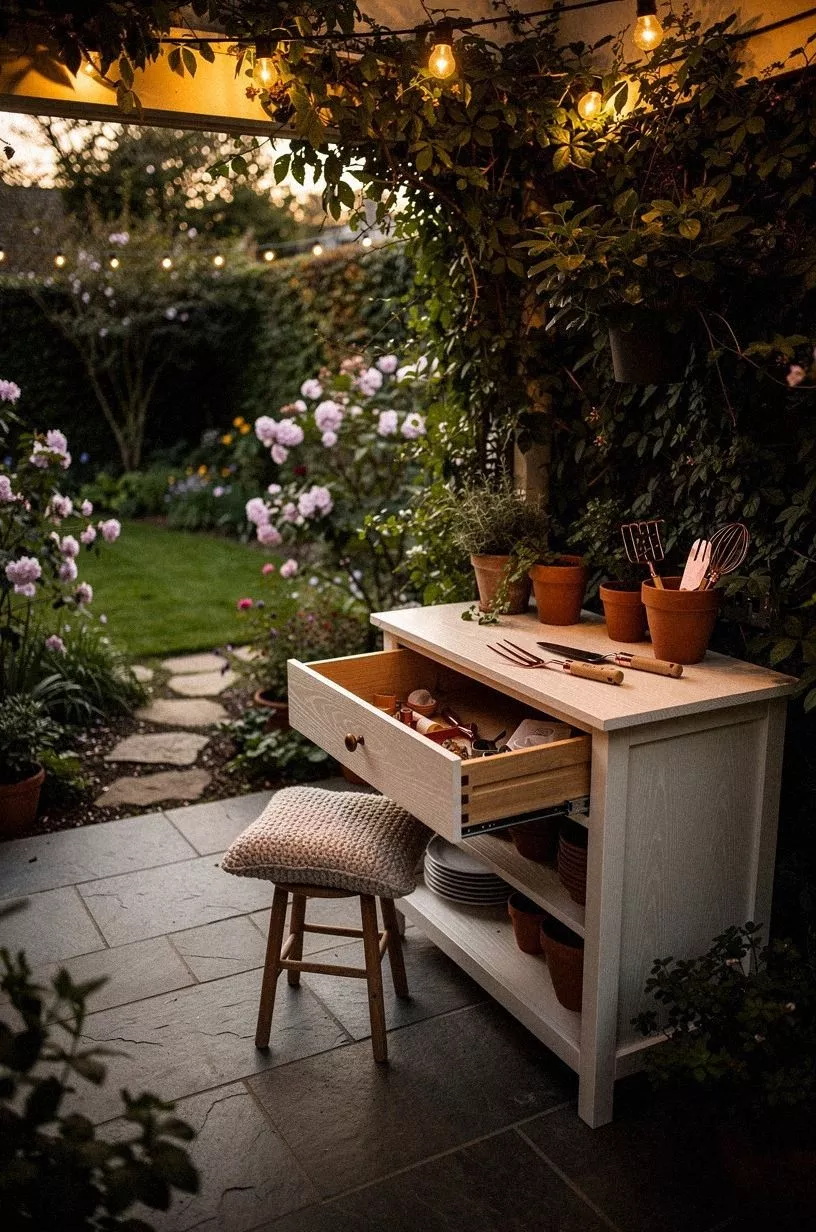
You need one hardworking piece, or the room turns into a parade of visible clutter. A potting cabinet hides gloves, candles, ties, spare cups, and the bits you never want on show.
Go for a cabinet with a shallow upper shelf and closed lower storage so you can display the pretty things and bury the ugly ones. A Pottery Barn Abbott cabinet shape works well, even if you buy a simpler dupe.
I’d paint the cabinet body in Benjamin Moore Revere Pewter HC-172 if your stone runs cool, because that soft grey sits back instead of jumping forward. Skip glossy paint.
It looks wrong next to gravel and plum flowers. And if you’re always chasing more storage in odd corners, this under-stairs room guide proves hidden utility can still feel charming.
14Drape sheer curtains from a pergola
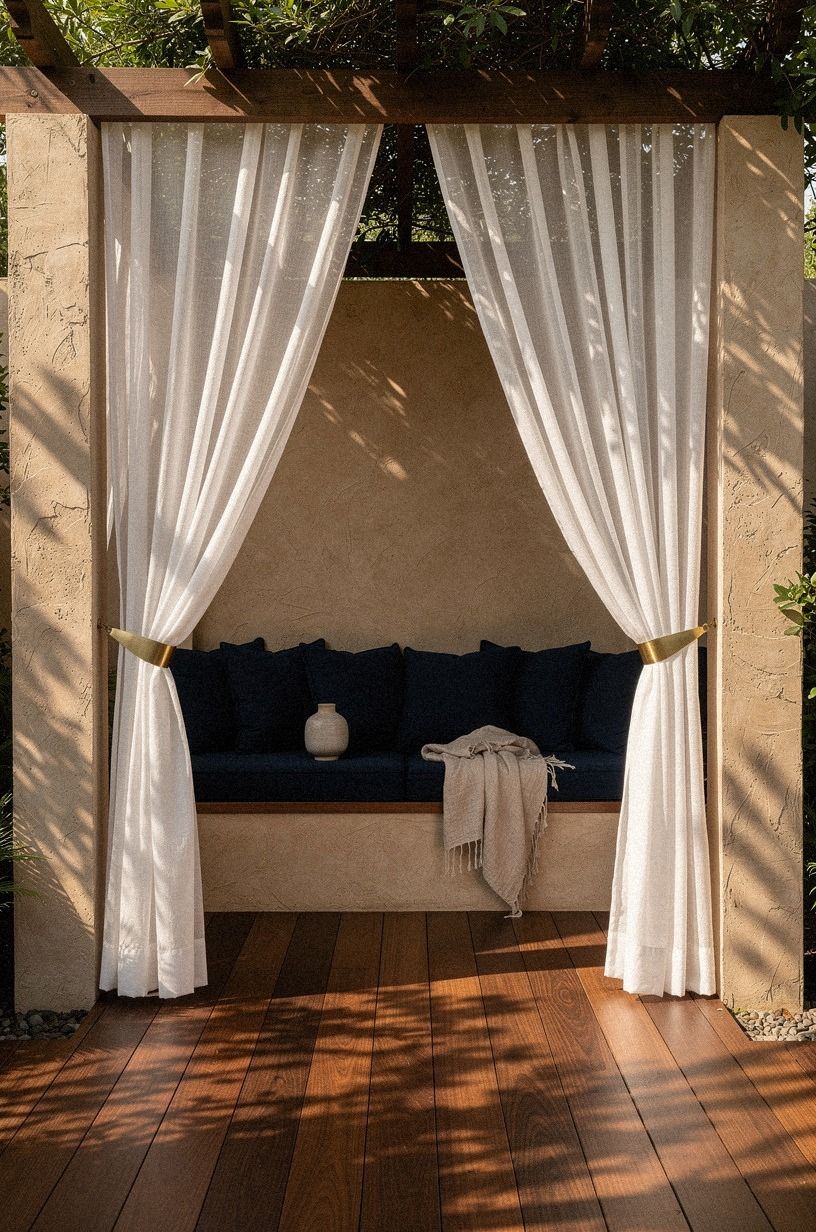
Curtains are what turn a planted corner into a room. Drape sheer panels from the pergola so they fall almost to the floor, then leave them loose enough to move with a breeze.
You don’t want hotel stiffness here. Belgian flax linen panels in off-white look richer than bright polyester sheers, and the texture stays believable beside timber and vines.
Hang them with outdoor-rated rings or a simple rod, then let the opening stay symmetrical if your cushions already carry a strong navy note. But don’t use heavy blackout drapes outdoors.
They trap moisture, and they kill the lightness that makes this whole look work. If you’re renting, tension hardware and tie-backs can still get you most of the effect.
15Cluster terracotta pots around the corner
Corners are where garden rooms either fade out or deepen.
16Install a small fountain behind boxwoods
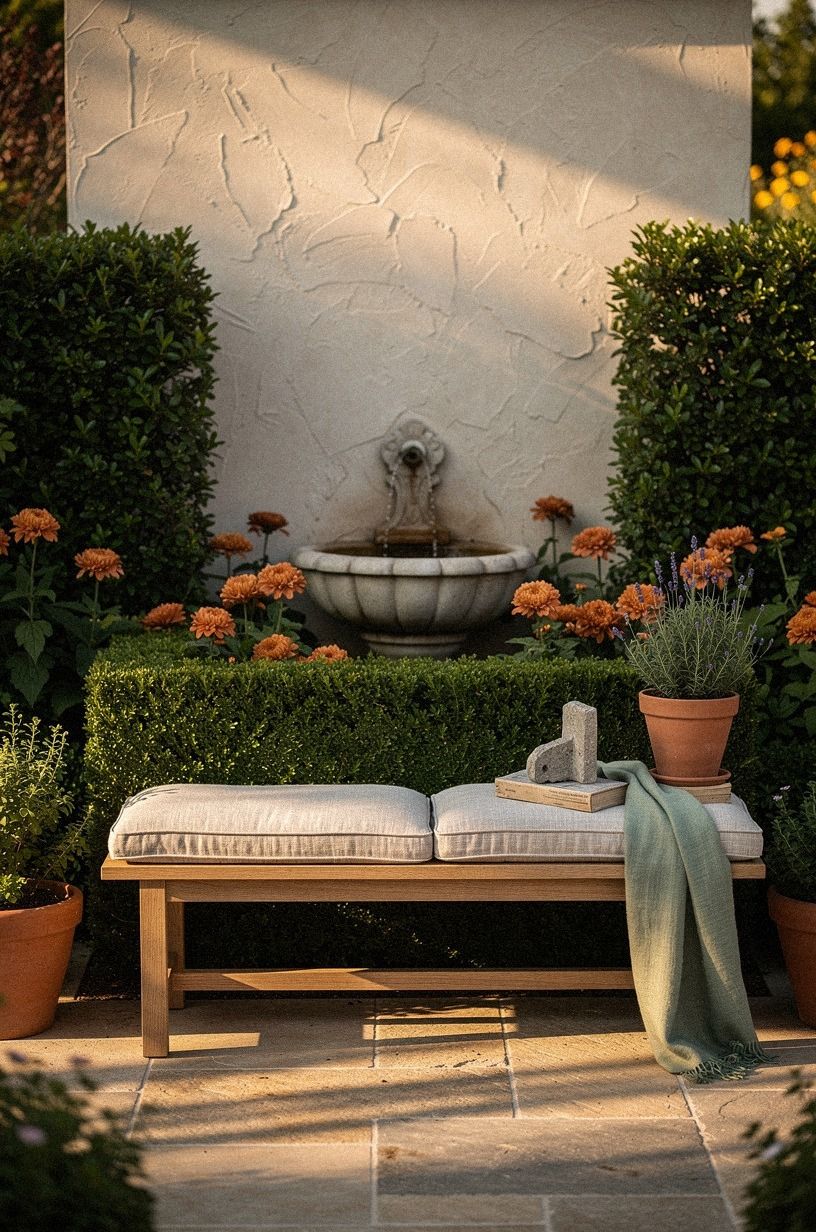
Water is the sound layer, and the room feels incomplete without at least one sound that isn’t traffic. A small fountain behind clipped boxwoods gives you that hush while keeping the basin partly hidden, which matters more than people think. You don’t need a grand center fountain.
A cast stone wall fountain or simple bowl style is plenty if the water note is soft and steady.
Place it so you hear it before you fully see it. That’s the whole point.
I wouldn’t set a shiny metal fountain in this kind of space because the finish drags the room toward café territory. Boxwoods, rust flowers, and a weathered basin feel calmer.
And yes, the moment you add moving water, people linger longer.
17Paint the gate a deep sage
If your room still feels scattered, paint will pull it together faster than another plant purchase.
18Set a library cart under the arbor
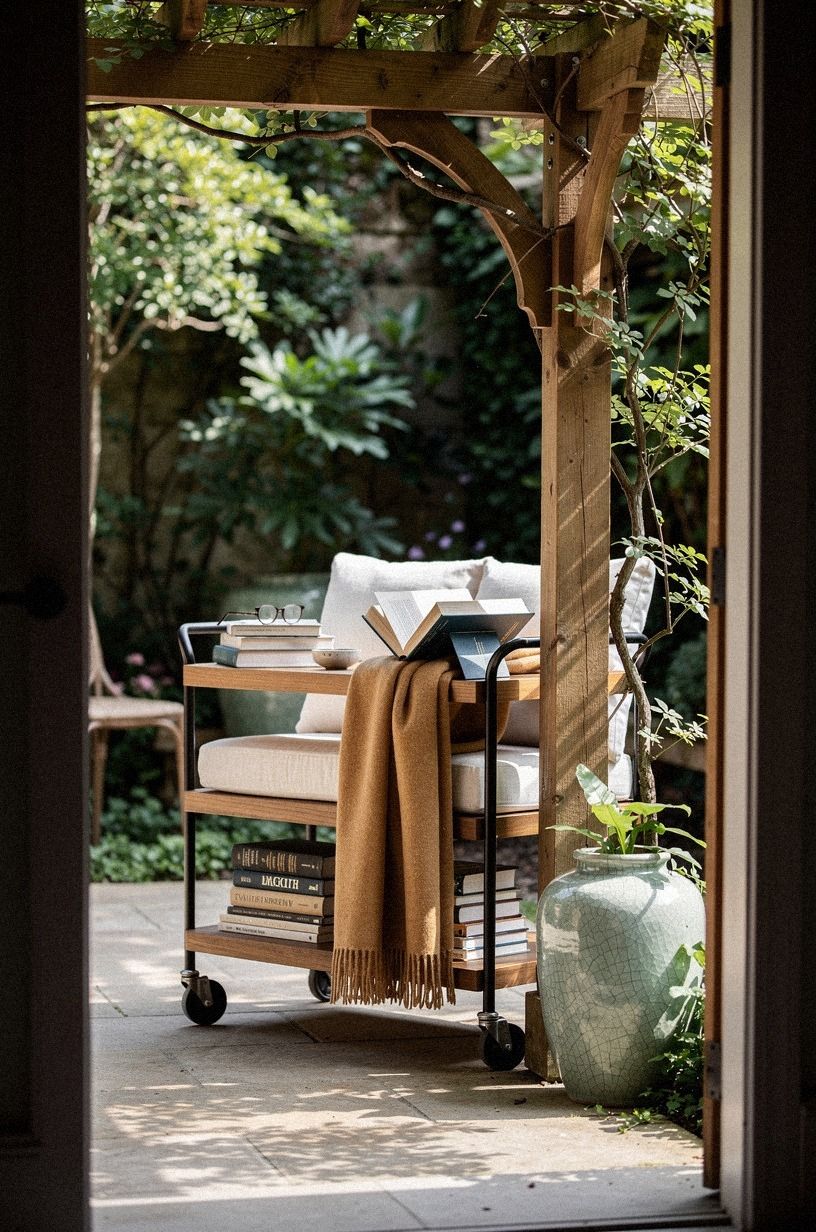
This is the move that makes the room feel personal instead of staged for a photo. A narrow cart under the arbor gives you books, a tray, maybe a small blanket, and suddenly the garden has a reason beyond looking pretty. I like the IKEA NISSAFORS utility cart because it’s slim, steady, and easy to repaint if black feels too stark in your planting scheme.
Push it to one side of the arbor so it appears discovered through the doorway view. An open novel. A water glass.
One folded throw. That’s enough.
But keep paperbacks inside during storms unless you enjoy swollen pages. If you love the overlap between outdoor calm and a nature-inspired home library design, this step is the one that tips the room from nice to memorable.
19Finish with candles inside glass hurricanes
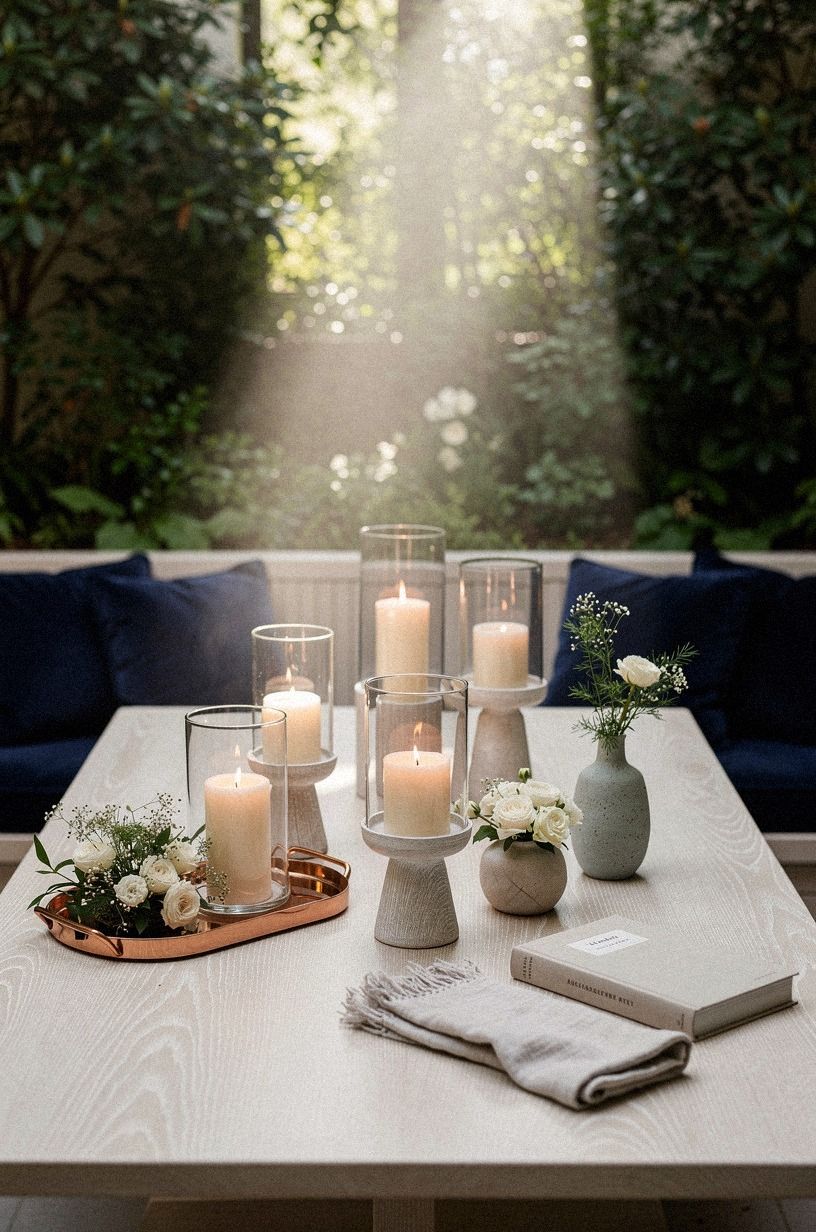
Your last layer should be tiny points of flame, not more furniture.
Why Does the Moss-First Rule Beat Buying More Stuff?
I’ve watched people build garden rooms backward for years, and I get why. The shopping is the fun part.
You see the bench, the lantern, the painted cart, and you want the finish before you’ve made the structure. I did that too.
The result was always the same: plenty of attractive objects, no real room. A garden space only feels transportive when the bones are doing part of the work for you.
That means your threshold has to feel settled, your enclosure has to shape the view, and your glow has to arrive last.
The expensive mistake is buying decorative pieces before you know where your eye is meant to stop. A $300 planter placed in the wrong corner doesn’t help you.
A $40 bag of gravel in the right place sometimes does. Same with paint.
People wait on paint because it feels less exciting than furniture, but the gate or arch color often fixes more than one extra chair ever could. If your gate is wrong, every rose around it has to work harder.
I also think people underestimate restraint in a garden room. The look seems lush, so they keep adding.
More pots. More vines.
More pillows. More lanterns.
Then the room loses mystery because nothing is left implied. The best versions hold something back. You see a bench through roses, not every seat at once. You hear the fountain before you find it.
You notice one candle cluster, then another. That’s why I start with the moss-first rule. It forces you to build atmosphere through surface, path, and patience before you start layering pretty accessories over the top.
And here’s the part that worked for me: once the hard surfaces and enclosure were right, I bought less. Way less.
I stopped solving layout problems with purchases and started solving them with placement. That’s cheaper, but it’s also more convincing. Your room doesn’t need more stuff.
It needs better sequence.
What People Always Want to Know
What is the best Detail Garden Room Ideas for a Lush Indoor Oasis for a small backyard?
A vine-covered reading nook plus a bistro table is the best small-yard combo because it gives you privacy without bulk. Try one slim West Elm chair, one iron table, and one vertical climber so your footprint stays light while your sightlines still feel enclosed.
Where can I buy Detail Garden Room Ideas for a Lush Indoor Oasis pieces on a budget?
Start with IKEA for carts and basics, Target Threshold for cushions, and Wayfair for lanterns or willow screens. Then check Facebook Marketplace for weathered benches or terracotta. Older clay pots usually look better anyway, and you won’t cry if one chips.
How much does a Detail Garden Room Ideas for a Lush Indoor Oasis makeover cost?
A simple version usually lands around $300 to $1,200 if you already own seating. Add better lighting, a rug, and quality furniture, and you’re more in the $2,500 to $8,000 range. Free wins still count: pruning, regrouping pots, and repainting the gate.
Can I create a Detail Garden Room Ideas for a Lush Indoor Oasis on a budget?
Yes, and the cheapest moves are often the most convincing because they build atmosphere first. Gravel at the threshold.
Creeping thyme at the edge. A repainted gate in Sherwin-Williams Evergreen Fog SW 9130.
Then add secondhand terracotta and one lantern when you can.
Is a Detail Garden Room Ideas for a Lush Indoor Oasis worth it in a small space?
Yes, it’s worth it because a small footprint makes enclosure feel stronger. You need less planting to create immersion, and one off-center bench or cart can shape the whole view. Keep your path visible, and don’t let furniture eat the middle.
Is Detail Garden Room Ideas for a Lush Indoor Oasis a good idea for a rental?
Yes, if you stick to reversible layers. Use tension hardware for sheers, freestanding willow screens, potted climbers instead of planted vines, and a removable outdoor rug. You still get the mood, but you can undo it when your lease says it’s time.
Start with Moss Over More Furniture
If I had to pick one step to start with, I’d start with the mossy stone threshold. It does the quietest job and the biggest one: it makes every pot, vine, and lantern look like it belongs there. Start at the floor.
The mood follows.