My neighbor’s bar cart cost $800 from Wayfair and holds six bottles. My stock tank bar seats four standing drinkers, chills two cases, and became the reason people linger past sunset. The difference?
One weekend, zero contractor calls, and the humility to let Home Depot handle the scary cuts.
I am not a woodworker. I have drilled into my own thumb. But this project forgives imprecision because the tank itself does the heavy visual lifting.
You just build a simple frame around it.
Start With the Tank, Not the Wood
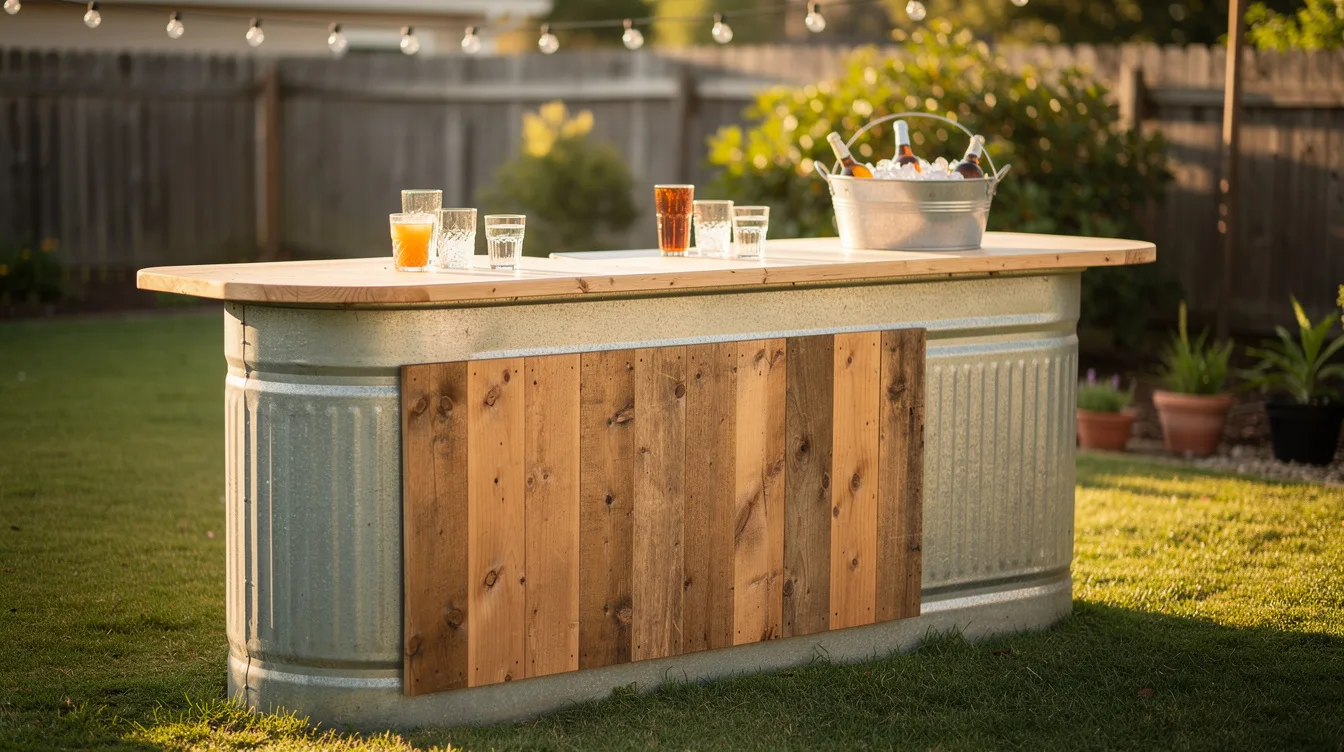
I stared at a $189 Behlen Country 6-foot galvanized stock tank in my driveway for three days before touching it. The oval shape is the whole point: it becomes your cooler, your conversation piece, and your structural anchor all at once.
Skip the 100-gallon rounds. The 6-foot oval (roughly 72″ × 24″ × 24″) gives you a natural serving ledge and fits two cases of drinks with ice plus room to fish bottles out without elbowing guests. Mine came from Tractor Supply; Home Depot stocks the Rubbermaid FG424300BLA poly version around $140 if you want lighter weight and easier drilling.
Let the Store Cut Everything
I own exactly one power tool: a $39 Black+Decker drill/driver from Walmart. No circular saw, no miter box, no compressed-air nailer.
Home Depot cut my 2×4 pressure-treated pine ($5.87 per 8-foot stick, six pieces total) and my BCX plywood sheet ($62, 3/4″) into the strips I needed. Their first two cuts are free; I paid $1 per extra cut and walked out with a pile of finished pieces. This is the hack that makes a weekend build actually possible.
My cut list: four 42″ uprights, two 72″ base runners, two 40″ cross supports, and a 72″ × 16″ bar top split from the plywood. All straight cuts, zero angles.
Build a U-Frame That Hugs the Tank
The tank sits inside a three-sided frame, back open for you to stand. I screwed the base runners to the uprights with Simpson Strong-Tie L-brackets ($2.49 each, eight total) and 2.5″ GRK RSS screws ($12.98 box from Lowe’s).
Key detail: the frame doesn’t touch the tank. It wraps around it with a 1″ gap on each side. The tank slides in and out for cleaning, winter storage, or when you inevitably want to repurpose it for a kiddie pool.
No fasteners penetrate the galvanized steel.
Bar top height finished at 42″, standard bar height. I eyeballed it against my kitchen counter, then added 1″ for the plywood thickness.
Seal the Top Like You Mean It
Unsealed plywood in a drink-splash zone is a warping disaster in six months. I brushed on two coats of Minwax Helmsman Spar Urethane ($24.97 at Home Depot), sanding between with 220-grit. The satin finish shows water rings from the first party but wipes clean.
For the front face, I nailed up 1×6 cedar fence pickets ($3.48 each, Lowe’s) with a 1/4″ gap for that slatted modern look. One quart of Behr Transparent Waterproofing Stain in “Russet” ($28) unified everything. The cedar will silver naturally; I’m not fighting it.
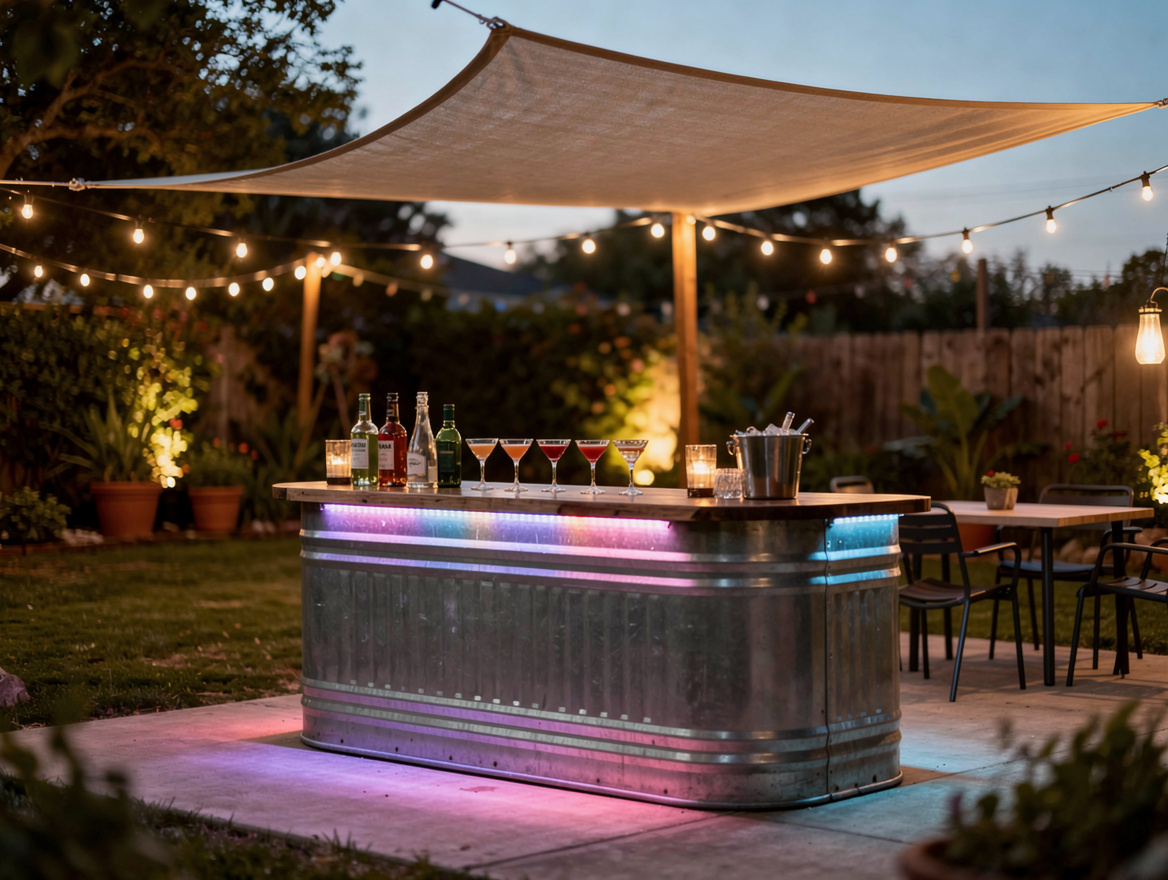
Add a Roof in Two Hours Flat
The optional shade structure sounds ambitious. It isn’t. Two 8-foot 2×4s rise from the back corners, notched at the top with a handsaw and chisel.
A third 2×4 spans them. I stretched a Coolaroo 5′ × 8′ shade sail ($29.99, Amazon) across and anchored with eye screws and zip ties.
Total roof time: 90 minutes. It shades the bartender, not the guests, which is exactly who needs it at 5 p.m. in July.
The sail comes down in October; the posts stay up and look intentional even bare.
Stock It and Stress-Test
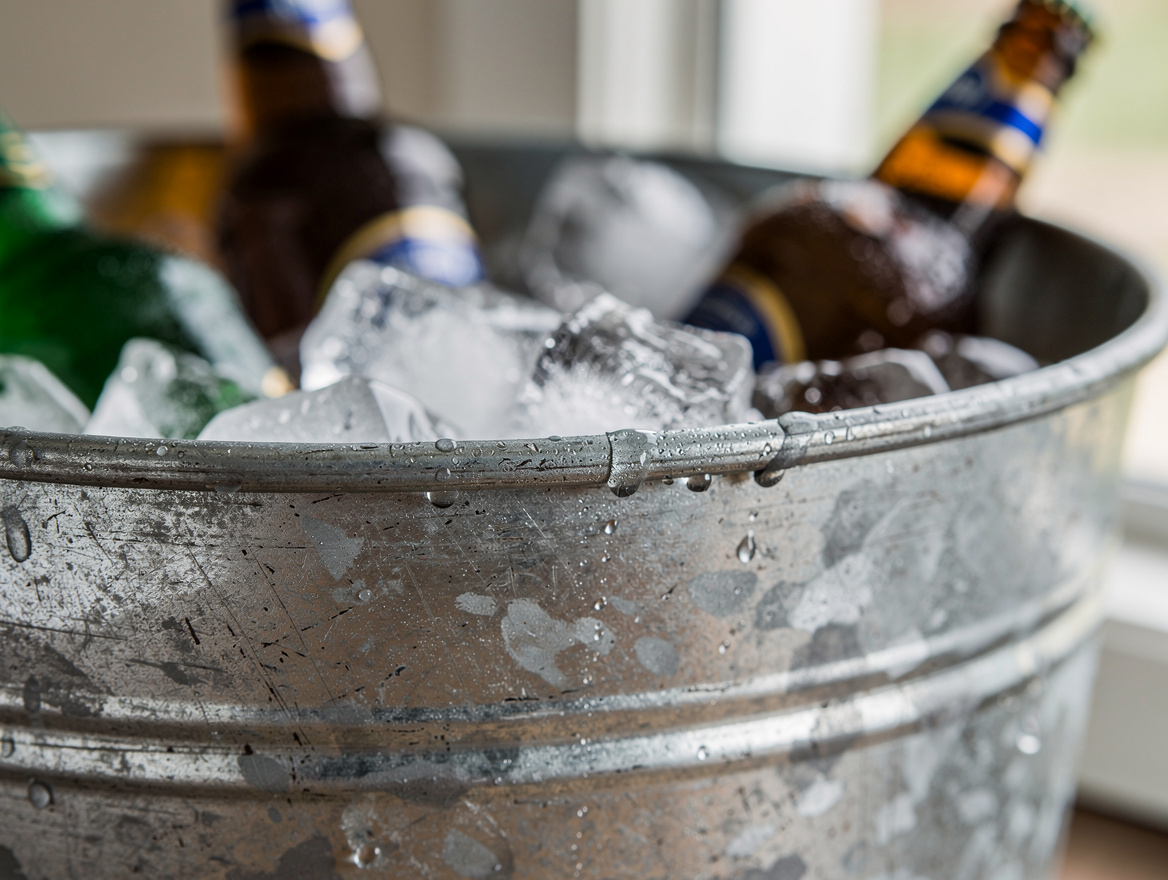
My first fill: 40 pounds of ice, two 12-packs, four wine bottles, and a metal bucket of limes. The tank’s rolled rim at the top becomes your bottle opener rest, your garnish plate perch, your lean-while-you-talk spot.
I added one Amazon Basics adhesive LED strip ($14.99) under the bar top overhang. It runs on a USB power bank and makes 9 p.m. look like you planned ambient lighting.
Total spend: roughly $340 including the tank, $150 if you already own one or repurpose a planter.
Build the frame Saturday morning, stain and seal Saturday afternoon, assemble and stock Sunday before noon. The tank slides out for scrubbing, the roof comes down for winter, and you’ll have spent less than a single night at most actual bars. Start with the tank in your cart; everything else is just carpentry confidence you can fake.
Mia Carter writes about small-space living and budget home makeovers. She has restyled three rentals and tests most ideas in her own 45 sqm flat.