By midafternoon, my deck used to feel hostile: the boards were hot through thin sandals, the old stain looked patchy, and every quick fix screamed temporary. I wanted the custom look of a renovation without drilling into the existing structure or turning the floor into a skillet in peak summer heat.
The good news is that the best no-drill upgrades already exist, you just have to choose the versions that read permanent. Light colors, modular pieces, and a clean edge treatment do most of the visual work.
Start With the Coolest Surface, Not the Cheapest One
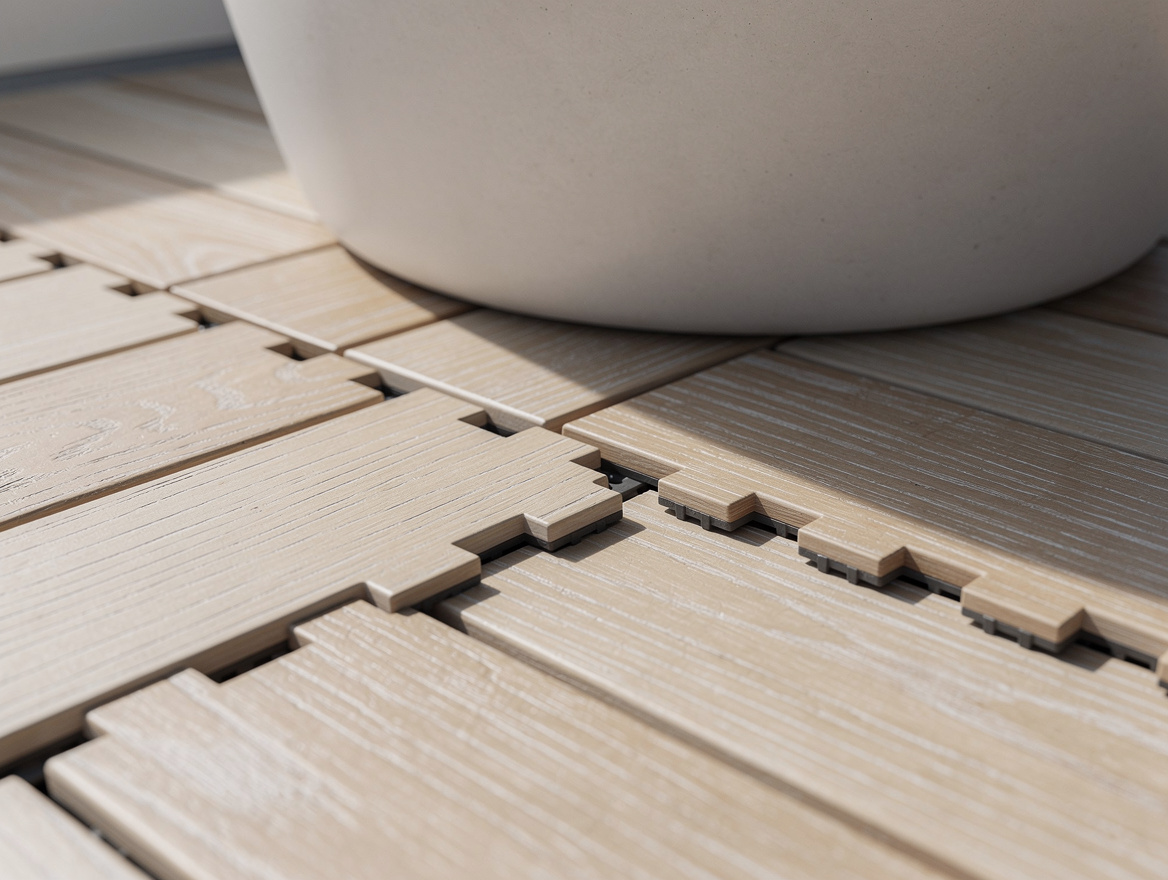
If your existing deck or patio is flat enough, interlocking deck tiles are the fastest way to fake a built-in floor. Typical sizes are 12 by 12 inches, 12 by 24 inches, and sometimes 16 by 16 inches, which matters because larger formats look less busy from the yard.
I’d skip dark composite in a heat wave unless the space is mostly shaded. Lighter PVC-capped tiles and pale wood-look finishes sold through Amazon, Wayfair, and Home Depot usually stay more comfortable under full sun than deep brown or charcoal versions.
Typical material cost for generic clip-together tiles lands around 8 to 18 euros per square meter, while better composite or PVC options run more like 30 to 60 euros per square meter. The higher price is worth it here because cheap tiles often look plastic from ten feet away.
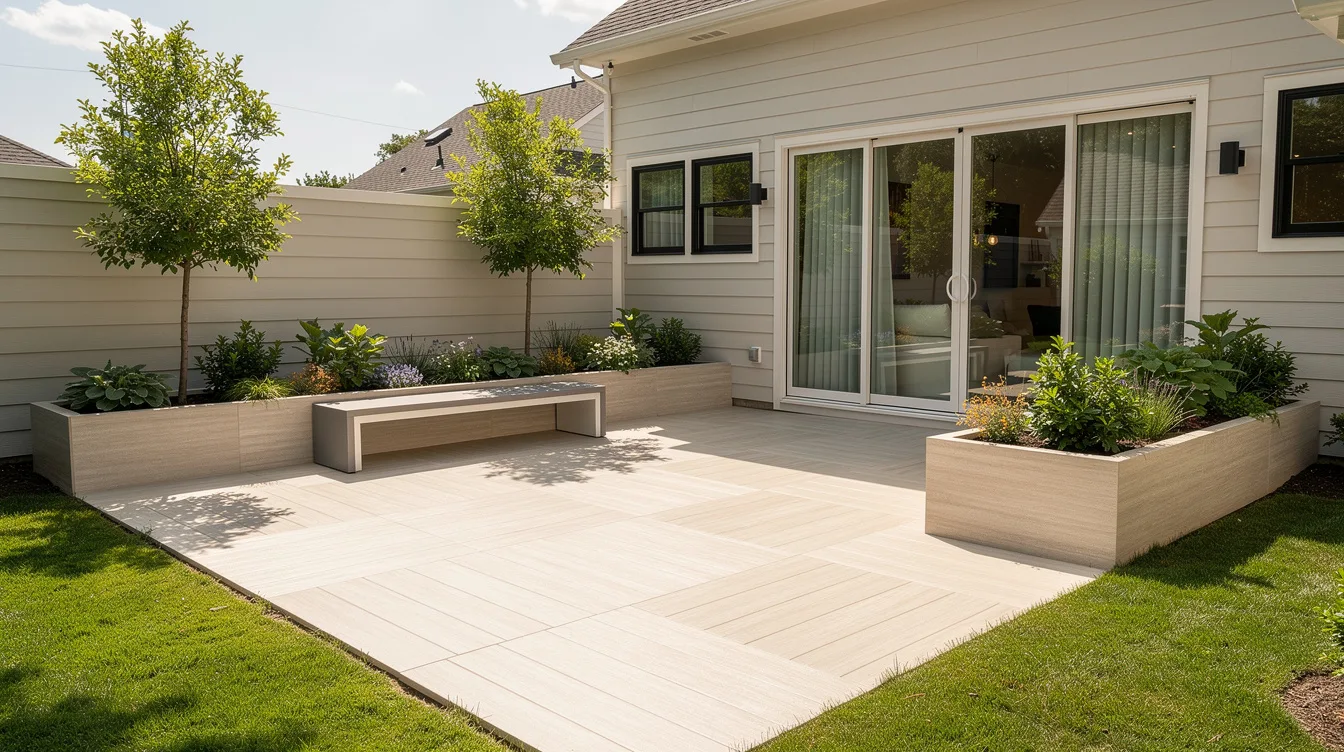
Lay Tiles Wall to Wall So the Floor Reads as One Piece
The built-in effect comes from coverage, not from the tile itself. Run deck tiles as far edge to edge as your layout allows, because a small floating patch in the middle always looks like a temporary mat.
Keep your lines straight and your cuts consistent near rail posts and corners. A tight, repeated layout feels custom fast, especially with light oak-look composite or a soft beige tone instead of high-contrast fake grain.
If you need to hide an exposed outer edge, use a freestanding border detail instead of drilling into a waterproof surface. A row of heavy planter boxes from Lowe’s or Target does that job better than most people expect, and it softens the whole deck at the same time.
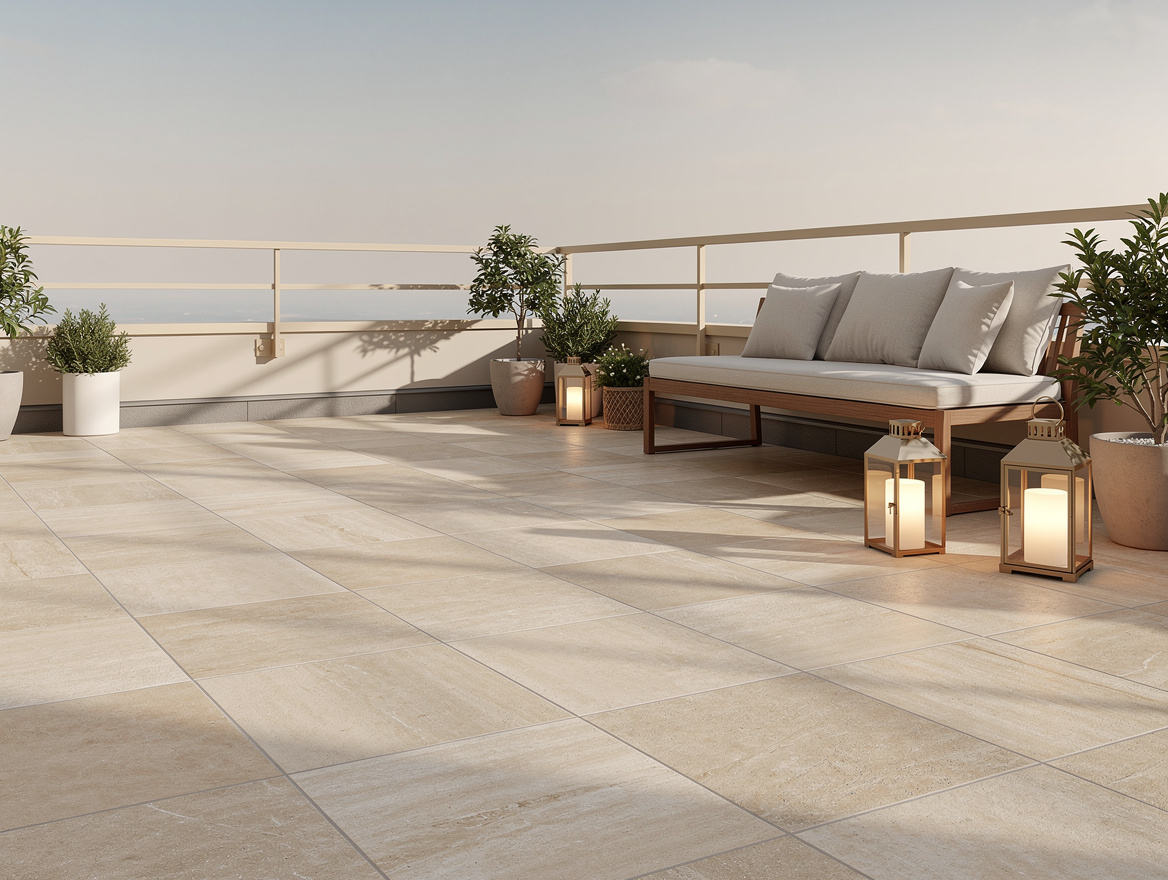
Choose Porcelain When Heat Resistance Matters Most
For brutal sun, 20 mm porcelain pavers on adjustable pedestal systems are the smartest no-drill upgrade in this whole category. Typical paver sizes are 24 by 24 inches, 18 by 36 inches, and sometimes 24 by 48 inches, and the larger sizes instantly look more architectural.
Light beige or warm stone-look porcelain usually stays cooler than dark composite, and it doesn’t care about UV exposure the way some synthetic surfaces do. That makes it my first pick for rooftop decks, exposed patios, and any spot where bare feet are part of the plan.
Typical pedestal cost runs about 8 to 18 euros per square meter, while exterior porcelain pavers are often 25 to 60 euros per square meter before labor. It’s not the bargain route, but it gives you the cleanest finished look with almost no visual wobble.
The detail that sells it is the edge. If your deck has a visible side, conceal the pedestal gap with a matching vertical skirting panel or a freestanding bench in front of it, so the platform reads as solid instead of raised.
Use Real Wood Tiles Where You Want Softer Heat Underfoot
Real wood deck tiles are underrated if you care about foot comfort. Typical modules are 12 by 12 inches or 12 by 24 inches on a plastic grid, and species like ipe, teak, or thermally modified wood often feel less punishing in direct sun than many composites.
I like this option for small decks that need warmth without that fake, molded texture. The catch is maintenance: you either oil the wood to hold color or let it fade to gray and accept that as part of the look.
Typical material pricing sits around 40 to 90 euros per square meter, with denser hardwoods and thermally modified options at the top end. On a compact deck, that extra cost is easier to justify because the finish looks expensive immediately.
Shop for a restrained tone through Wayfair, Amazon, or IKEA, then keep the rest of the palette quiet. Busy wood plus loud outdoor rugs is a fast way to lose the built-in effect.

Build a Freestanding Island Instead of Attaching Anything to the House
If your existing layout is awkward, a freestanding mini-deck can solve it without fastening into siding, brick, or old framing. Think of it as a clean platform that floats 5 to 10 mm away from the house, so it looks integrated but stays mechanically separate.
Typical module sizes like 6 by 10 feet, 10 by 10 feet, or 10 by 13 feet work well because they’re big enough to hold furniture without looking like a stage. This is the move I’d use to level a worn section, create a dining zone, or cover an ugly patchwork of old boards.
Use composite deck boards from Home Depot or Lowe’s in a pale taupe, sand, or weathered gray. Dark boards may look sharp for one week, then start radiating heat and showing dust every afternoon.
The styling matters here too. Wrap the platform with low outdoor seating or square planters so the edges disappear, and the whole thing starts to read like a custom built-in lounge.
Finish With Heavy Accessories That Hide the Temporary Parts
The last layer is what keeps a modular upgrade from looking modular. Use weighty pieces, outdoor benches, storage boxes, planters, or lanterns, to cover transition lines and make the layout feel intentional.
A large outdoor rug can help, but only if the surface below already looks good. I’d rather spend money on two substantial planters from Costco or Ace Hardware than a giant patterned rug that traps heat and fades fast.
For lighting, woven or metal pieces work better than anything flimsy. A $39 IKEA lantern style accent, a matte black solar path light from Target, and one overscaled ceramic planter can do more than a dozen tiny accessories.
Keep the colors sun-smart: off-white, sand, faded olive, light gray. They hide heat, dust, and seasonal pollen better than black, and they help every no-drill surface look calmer and more permanent.
Start with the floor first, then solve the edges, then add weight with planters or benches. If you only change one thing this weekend, choose a lighter surface, because heat comfort is what makes the whole deck usable again.
Mia Carter writes about small-space living and budget home makeovers. She has restyled three rentals and tests most ideas in her own 45 sqm flat.