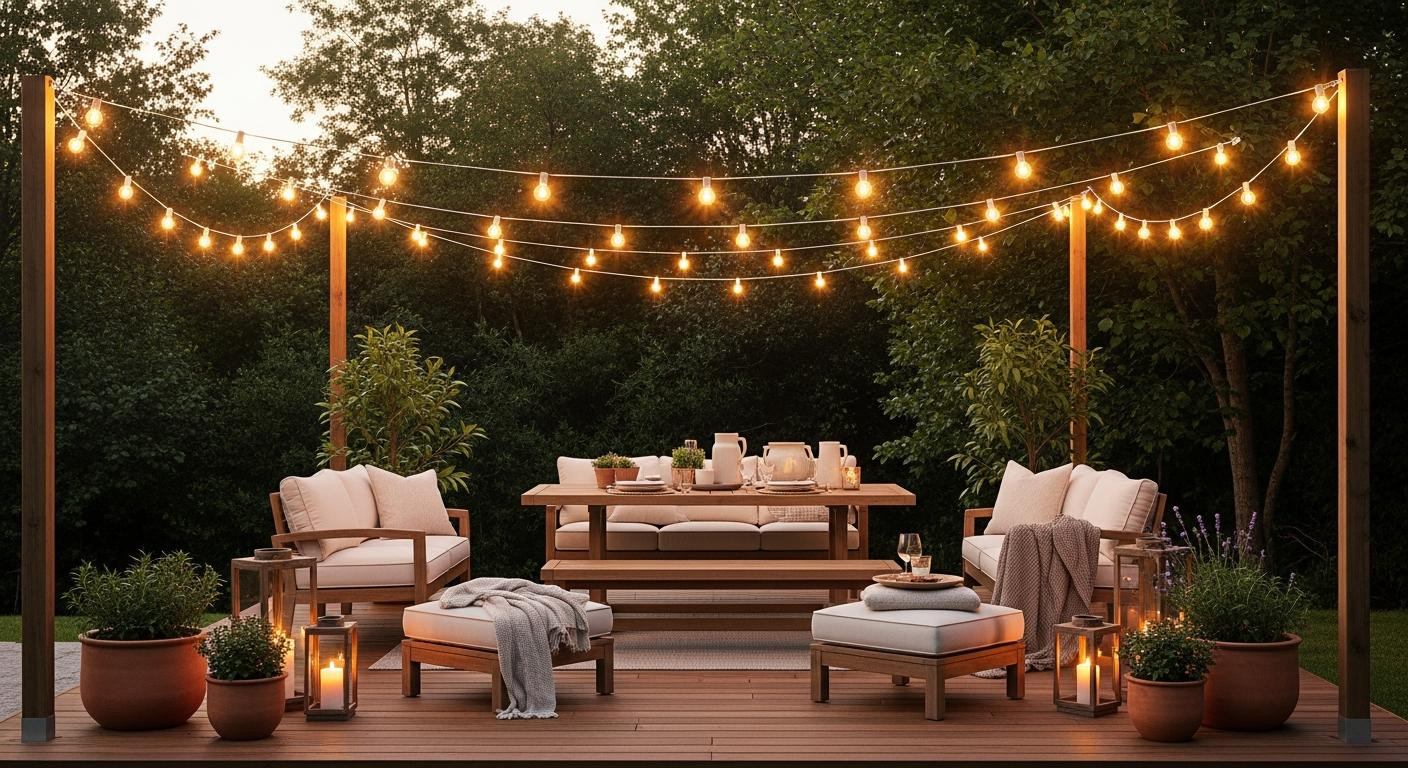
Your backyard string lights hung perfectly in March when you clipped them to the fence posts with twist ties from the hardware store. By June, the center section droops 4 inches, bulbs nearly touching the dining table where guests duck under them at 7:30pm Saturday. The lights cost $87 at Target, the posts were already there, and you followed the box instructions about spacing bulbs 18 inches apart. What the box didn’t mention: wire rope, tension systems, or the physics of why 40 feet of lights loaded with 25 bulbs weighs enough to bend whatever you hang them from.
The 8-foot maximum span rule (go past it and sag happens in 6 weeks)
An 8-foot span between support points keeps any sagging minimal, under 1 inch even with commercial-grade C9 bulbs. At 12 feet, sag reaches 3 inches within two months as wire stretches under constant load. And that’s just the beginning of what goes wrong.
The math works against you exponentially. The parabolic sag formula shows that doubling the span quadruples the droop at center, which is why 15-foot sections end up with bulbs hanging 6 inches lower than the anchor points by mid-summer. Most DIY installations fail because “it looks fine initially” becomes “I need to rehang this” by the Fourth of July.
Fence posts, porch columns, and trees work as anchor points, but only when spaced correctly. Week 1 looks perfect. Week 8 shows visible droop. Week 12 requires complete reinstallation, assuming the wire hasn’t already damaged the bulb sockets from constant tension.
Turnbuckle tension systems vs direct hanging (one costs $23, one requires rehang every season)
Galvanized 12-14 AWG coated wire installed with turnbuckles creates adjustable tension that holds for 5 years minimum. The wire itself runs around $37.50 for a 50-foot roll at Home Depot. Turnbuckles add another $15 each, and you’ll need two for a 40-foot span.
The installation sequence matters. Secure wire to anchor points first, attach turnbuckles mid-span or at one end, then tighten until wire deflection measures less than 1 inch under hand pressure. But don’t overtighten, the goal is taut support without stressing the anchor points.
Then clip lights to the wire using UV-resistant cable ties every 12-18 inches. The ties cost around $15 for a 100-pack, and they’ll outlast generic twist ties by 3 years minimum. That spacing prevents the scalloped appearance that happens when cords droop between attachment points.
Direct attachment transfers all weight to the light cord itself, which stretches faster than steel wire. Temperature fluctuations cause 2-3% expansion from February cold to July heat, and turnbuckles let you adjust for that seasonal shift without climbing a ladder to unclip and retension everything manually. The same adjustable mounting approach I used for vertical planting applies here, just overhead instead of against a wall.
Anchor point requirements that prevent the whole system from ripping loose
Freestanding 6×6 pressure-treated posts need 24-inch burial depth in concrete footings for lateral stability. Posts shorter than 8 feet above ground can use 18-inch depth, but taller installations require deeper anchoring to resist wind load during storms. And the concrete itself needs time to cure properly.
Quick-set concrete runs around $7.48 per 50-pound bag and needs 4 hours to cure enough for wire attachment, 48 hours for full strength. For a 40-foot span with two 10-foot posts at the ends, you’re looking at 8 bags total, which comes to roughly $60 in concrete alone.
Existing structures sometimes work without additional posts. Porch columns rated for roof load handle the lateral tension fine. Deck railings installed after 2018 usually meet code requirements for this kind of load, but check local building standards first. Chain-link fence posts don’t work unless you add diagonal bracing, which defeats the purpose of using existing infrastructure.
Tree branches work if they’re 4 inches diameter minimum and hardwood species like oak or maple. But skip pine or other softwoods that shed branches under stress. The same weather-resistance thinking that applies to outdoor rugs matters for anchor selection, just with different failure modes.
The attachment interval that prevents individual bulb sag
Even with perfect wire tension, lights need support every 12-18 inches along their length. Skip this step and you get visible drooping between each support point, no matter how tight the main wire runs. The light cord itself can’t handle its own weight across long unsupported sections.
Commercial installers use light clips with integrated hangers that snap onto 1/4-inch wire rope. They run around $0.50 per clip, which adds up fast, but the installation goes quicker than cable ties. At 12-inch intervals, the line appears ruler-straight under the string of bulbs.
For a 40-foot span, you’re looking at 30-40 attachment points at roughly 20 seconds each, which works out to 12 minutes once the wire is tensioned. That’s not the time-consuming part of this project. The overhead installation creates vertical visual interest similar to tall shelving, just for outdoor spaces.
Your questions about hanging string lights answered
Can I reuse last year’s lights on a new wire system?
Yes, if the cord shows no cracking and bulb sockets remain weather-tight. Inspect for UV damage where the cord contacted metal surfaces last season, those sections create weak points that fail first. Most quality LED strings last 7-10 outdoor seasons when properly supported instead of bearing their own weight.
Do I need an electrician or can I DIY the whole installation?
Electrical work for outdoor-rated outlets requires licensed professionals in most jurisdictions. The wire rope system itself is pure DIY, no electrical code applies to the support structure. Total professional cost for outlet installation runs $180-340 depending on distance from your existing circuit panel.
What’s the real cost difference between proper installation and quick-hang methods?
Wire rope system for a 40-foot span: $222.50 in materials, 4 hours labor. Direct-hang to existing structure: $0 additional, 45 minutes. But factor replacement cost when direct-hang fails by July, another $87 for lights plus 3 hours to redo. Five-year view: proper installation costs $222.50 once, quick methods cost $200 in repeated materials and time. Unlike zero-cost changes that work for indoor spaces, outdoor infrastructure needs upfront investment that pays off in longevity.
The wire catches afternoon light at 4:20pm on a Thursday in late April, barely visible above the bulbs that now hang level 8 feet above your patio table. Guests arriving for dinner walk underneath without ducking. The turnbuckle sits against the post, three threads still exposed for summer adjustment when the heat arrives and the steel expands those critical few millimeters.