There’s something undeniably nostalgic about these no-bake chocolate peanut butter oat bars. Growing up in my grandmother’s kitchen in rural Pennsylvania, these were our summer salvation—the perfect treat when turning on the oven felt like a crime against humanity. I still remember her hands pressing the oat mixture into her worn metal pan, the rich scent of melted chocolate and peanut butter mingling in the summer air. These bars have graced countless potlucks, after-school snacks, and late-night cravings in American homes since the 1950s, when convenience ingredients like quick oats became pantry staples.
The Story Behind No-Bake Chocolate Peanut Butter Oat Bars 📖
These humble bars emerged during mid-century America when home cooks sought relief from summer heat while still providing homemade treats. They represent ingenuity in simplicity—turning pantry basics into something truly crave-worthy without a moment of oven time. In my professional kitchens, I’ve created elaborate desserts with dozens of components, but I return to these bars again and again. They remind us that sometimes, the simplest preparation yields the most comforting results.
While these bars might seem basic, regional variations abound—Southern versions often incorporate pecans or substitute honey for brown sugar, while Midwestern adaptations might use thicker-cut oats for heartier texture. The beauty lies in this adaptability, making them a true American classic that bridges generations.
Essential Ingredients 🧾
The magic of these bars comes from quality ingredients treated with respect:
- 1 cup (226g) salted butter
- ½ cup (100g) packed brown sugar
- 1 teaspoon vanilla extract (pure, not imitation)
- 3 cups (240g) quick-cooking oats
- 1 cup (170g) semisweet chocolate chips
- ½ cup (125g) creamy peanut butter
The quick-cooking oats are non-negotiable here—they absorb moisture differently than rolled oats, creating that perfect chewy-yet-tender texture. I’ve tried using rolled oats in professional test kitchens, and while they work in a pinch, the texture becomes noticeably denser.
Chef’s Note: The quality of your peanut butter matters tremendously in this recipe. Choose a creamy variety with minimal additives—the kind where oil naturally separates at the top provides the best flavor. Just be sure to stir it well before measuring!
Step-by-Step Instructions 📝
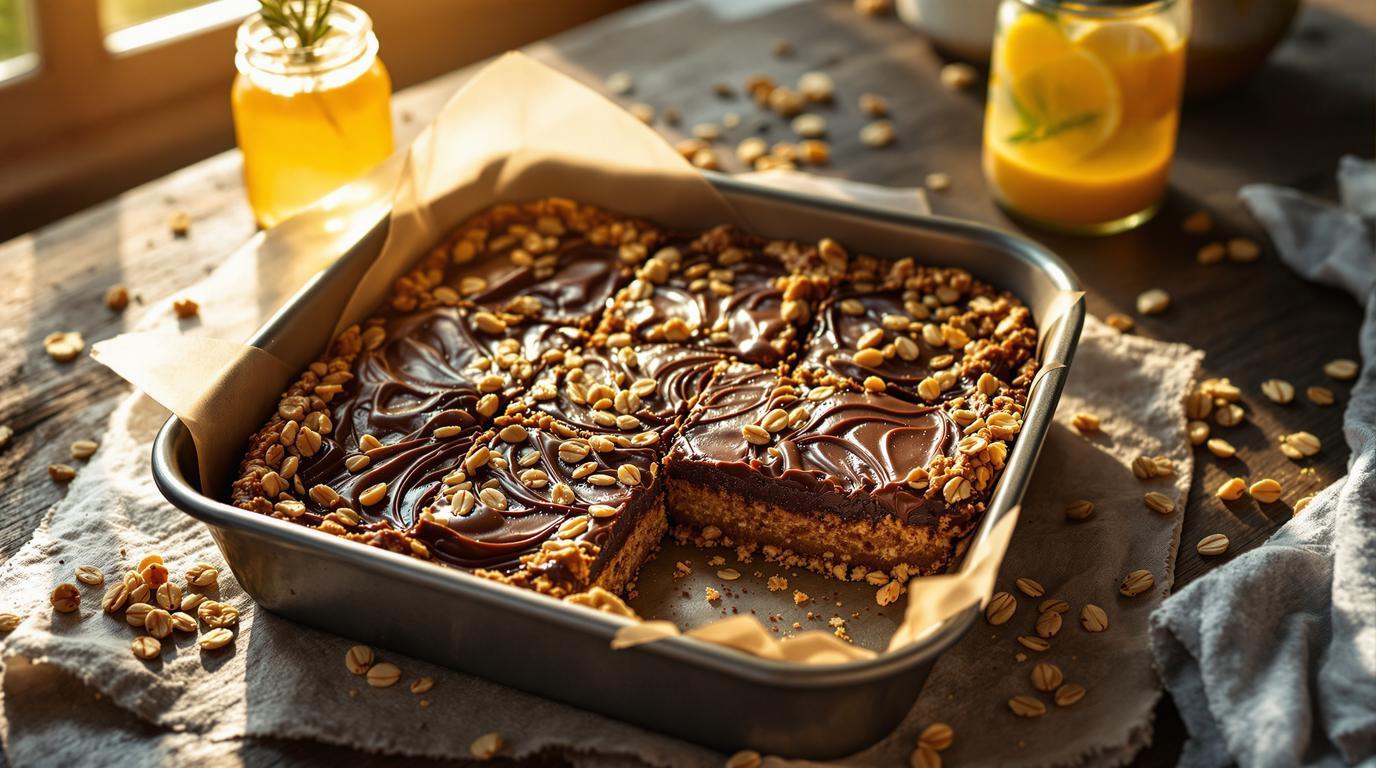
- Line an 8×8-inch baking pan with parchment paper, leaving overhang for easy removal. Lightly grease the paper.
- In a medium saucepan over medium-low heat, melt the butter. Add brown sugar and stir until it dissolves and the mixture begins to bubble slightly, about 2 minutes.
- Remove from heat and stir in vanilla extract and quick oats. The mixture should feel cohesive but not overly wet.
- Reserve ¼ of the oat mixture. Press the remaining mixture firmly into the prepared pan, creating an even layer. Use the back of a measuring cup to create a smooth, compact surface.
- In a microwave-safe bowl, combine chocolate chips and peanut butter. Microwave in 30-second intervals, stirring between each, until completely melted and smooth—usually takes about 90 seconds total.
- Pour the chocolate-peanut butter mixture over the oat layer, spreading evenly to the edges.
- Crumble the reserved oat mixture over the top, gently pressing it into the chocolate layer.
- Refrigerate for at least 2 hours until completely firm.
Chef’s Secret Techniques 🤫
The key to perfect no-bake bars lies in temperature control. When melting the butter and sugar, you want them warm enough to combine but never hot enough to actually cook the oats. This preserves their texture and prevents a gummy result. When I’m working with chocolate and peanut butter, I actually prefer the microwave method to stovetop—it provides gentler heat and prevents scorching.
For picture-perfect cuts, chill the bars completely, then let them stand at room temperature for 5 minutes before cutting with a knife warmed under hot water and wiped dry between slices. This technique, borrowed from professional pastry kitchens, creates those clean edges you see in magazines.
If your kitchen is particularly warm, store these bars in the refrigerator, but allow them to sit at room temperature for about 10 minutes before serving for the ideal texture—cold dulls the flavors slightly.
Serving & Presentation Tips 🍽️
These bars pair beautifully with afternoon coffee or tea, and I’ve found they make an exceptional partner to a scoop of vanilla ice cream for a more substantial dessert. For an elegant touch, try a light dusting of flaky sea salt just before serving to amplify the chocolate-peanut butter harmony.
If you’re feeling adventurous, try these alongside a Peach-Thyme Vodka Lemonade for a sophisticated summer pairing, or serve with fresh berries similar to those in this Summer Berry Trifle for a beautiful contrast.
These bars keep wonderfully for about 5 days in an airtight container, though in my experience, they rarely last beyond 48 hours once family discovers them! They’re perfect companions for summer picnics or as an easy dessert alternative to Grilled Peach Dessert when you’re craving something chocolatey.
Whether you’re making these to avoid heating up your kitchen on a sweltering day or simply because you crave that perfect balance of chocolate, peanut butter and oats, this humble recipe proves that sometimes the most cherished culinary traditions require no fancy techniques—just quality ingredients and a little patience while they chill to perfection.