The first time I made pie crust with my grandmother, I was shocked when she plunged her hands into a bowl of ice water before touching the dough. “Cold hands make the best pastry, Alex,” she explained with a knowing smile. That lesson stayed with me through culinary school and decades in professional kitchens. The humble pie crust might seem simple, but it’s built on generations of wisdom and scientific principles that, once understood, will transform your baking forever. 🥧
The Secret Life of Pie Crust 📖
Traditional pie crust is truly American alchemy—transforming just four ingredients into something magical. While European pastries often rely on eggs and sugar, classic American pie crust embraces simplicity. What makes this recipe special is the technique passed down through generations of home bakers, emphasizing one critical element: temperature control. 🧊
My grandmother grew up in rural Michigan, where pie-making was practically a competitive sport at county fairs. Her technique combines elements from different regional styles—the richness of Southern crusts with the practicality of Midwestern farm kitchens. The result is a perfectly flaky, tender crust that cradles any filling beautifully.
The Essential Ingredients 🧾
For a double crust pie (9-inch):
- 3 cups (375g) all-purpose flour
- 1 teaspoon kosher salt
- 1¾ cups (330g) vegetable shortening or lard, chilled and cut into cubes
- ½ cup (120ml) ice-cold water
You’ll notice there’s no sugar here—this is a truly versatile crust that works for both sweet and savory applications. For sweet pies, you can add 2 tablespoons of granulated sugar if desired.
Chef’s Note: Prefer butter? You can substitute half the shortening with cold, unsalted butter for a more complex flavor. The crust won’t be quite as flaky, but you’ll gain richness and that unmistakable buttery aroma. For the most authentic results, seek out high-quality shortening or rendered leaf lard from a butcher—it’s how our grandmothers made it! 🧈
Step-by-Step Instructions 📝
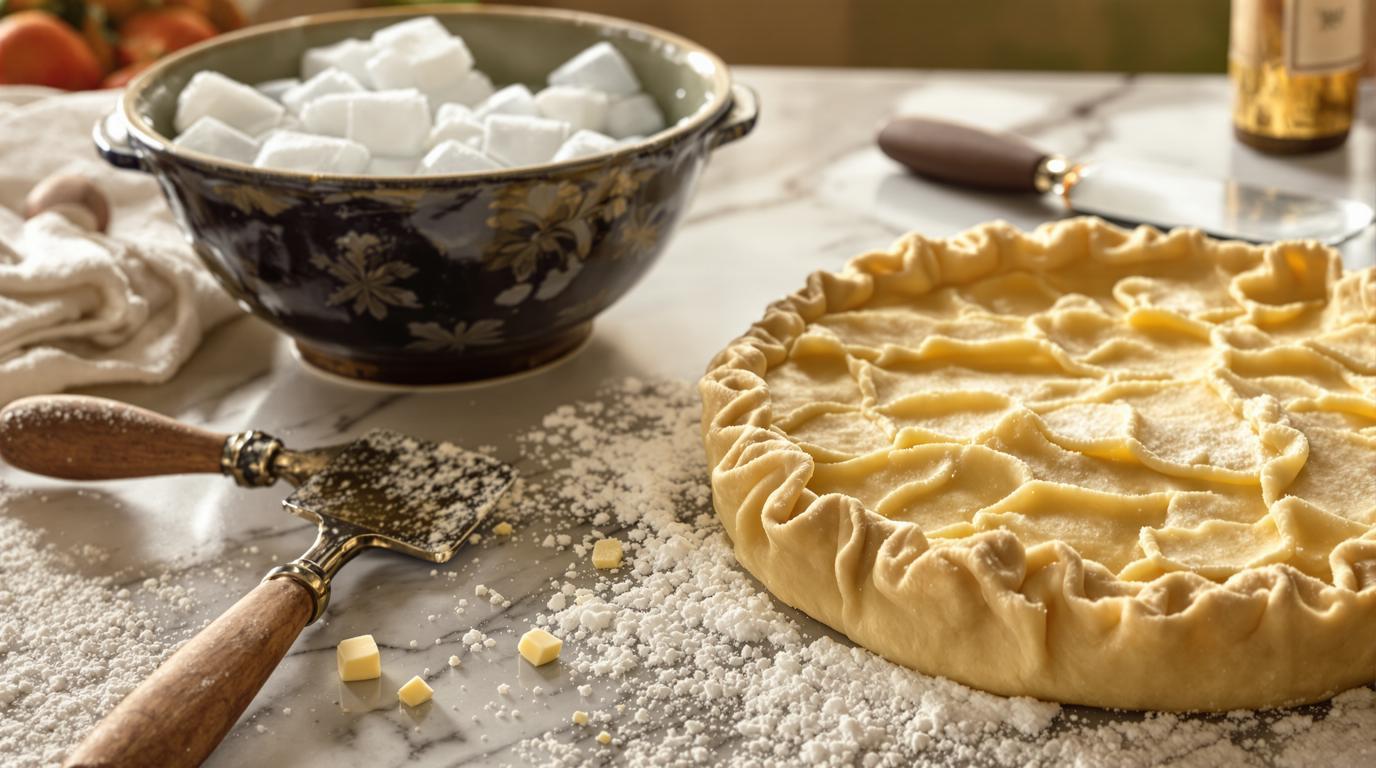
1. Prepare your ingredients: Fill a small bowl with ice water and place your shortening in the freezer for 15 minutes before beginning. Cold ingredients are non-negotiable for flaky crust! ❄️
2. Mix dry ingredients: Whisk together flour and salt in a large bowl.
3. Cut in fat: Using a pastry cutter (not your hands—too warm!), cut the chilled shortening into the flour until you have pea-sized pieces. These small pockets of fat are what create those beautiful, flaky layers.
4. Add water gradually: Sprinkle just 3-4 tablespoons of ice water over the mixture first, then gently toss with a fork. Continue adding water 1 tablespoon at a time until the dough just barely holds together when pinched. You might not need all the water! 💧
5. Form and chill: Divide the dough into two discs, wrap in plastic, and refrigerate for at least 30 minutes (or up to 2 days). This resting period is crucial—it relaxes the gluten and keeps those fat pieces intact.
6. Roll and bake: Roll each disc on a floured surface to about ¼-inch thickness. For a fully baked shell, prick with a fork, line with parchment, fill with pie weights, and bake at 375°F (190°C) for about 20 minutes, then another 10-15 minutes without weights until golden brown. For filled pies, follow your recipe’s instructions.
Why Cold Water Makes All the Difference 🧠
The science behind pie crust is fascinating—it’s all about preventing gluten development while preserving those distinct fat layers. Cold water keeps the shortening from melting prematurely, ensuring it remains as separate pieces in the dough. When these fat pockets hit the hot oven, they create steam, pushing the layers of dough apart and creating that coveted flakiness.
I’ve seen countless home bakers struggle with tough crusts, and it almost always comes down to temperature mismanagement. Work in a cool kitchen, chill your tools, and never skip the resting period. These aren’t fussy chef demands—they’re the difference between leathery disappointment and pastry perfection. ✨
Serving and Pairing Suggestions 🍽️
This versatile crust works beautifully with fruit pies like my Banana Bread Revolution adapted into a banana cream pie, savory pot pies, or as a base for a Cajun-inspired tart. For sweet applications, I love serving slices with freshly whipped cream or alongside a Fudgy Brownie for a delightful dessert contrast.
For an elevated dinner experience, try a savory application with Mustard-Crusted Salmon pot pie. And for special occasions, this crust forms a beautiful base for adaptations of Swedish Princess Cake components in tart form.
Remember, pie crust isn’t just a vessel—it’s part of the pleasure. When you nail this technique, you’ll find yourself creating excuses to bake pies just to showcase your perfectly flaky, tender crust. And isn’t that exactly what grandma would want? After all, the best family traditions are the ones we keep alive in our kitchens. 🥄