
By late afternoon, my backyard always has one miserable corner: the chairs are still warm from the sun, the grass feels dry underfoot, and nobody wants to sit out there until well after dark. That is why I like small fire pit builds that create one usable zone at night without turning the whole yard into a heat trap.
The good news is a no-concrete setup under $100 is realistic if you keep the pit movable, modest in size, and fully off combustible surfaces. The less fun truth is you still need to check local rules before you light anything, because size limits and setback requirements change from one town to the next.
Start With a Small Gravel Zone
The smartest move is building a tight, movable heat pocket instead of trying to warm the whole yard. A pea gravel pad keeps the hot area contained at night and helps protect grass, mulch, and deck edges from stray sparks.
Most towns allow small movable fire pits without a permit when they stay off combustible surfaces and under local size limits, but that rule is never universal. I’d check city guidance before you buy anything, because a cheap setup stops being cheap the second you ignore clearance rules.
A typical starter pad is about 5 to 6.5 feet across, with 2 to 4 inches of gravel over a leveled base. Bags from Home Depot or Lowe’s usually run about $4 to $6 each, so defining the zone is often the easiest part of the budget.
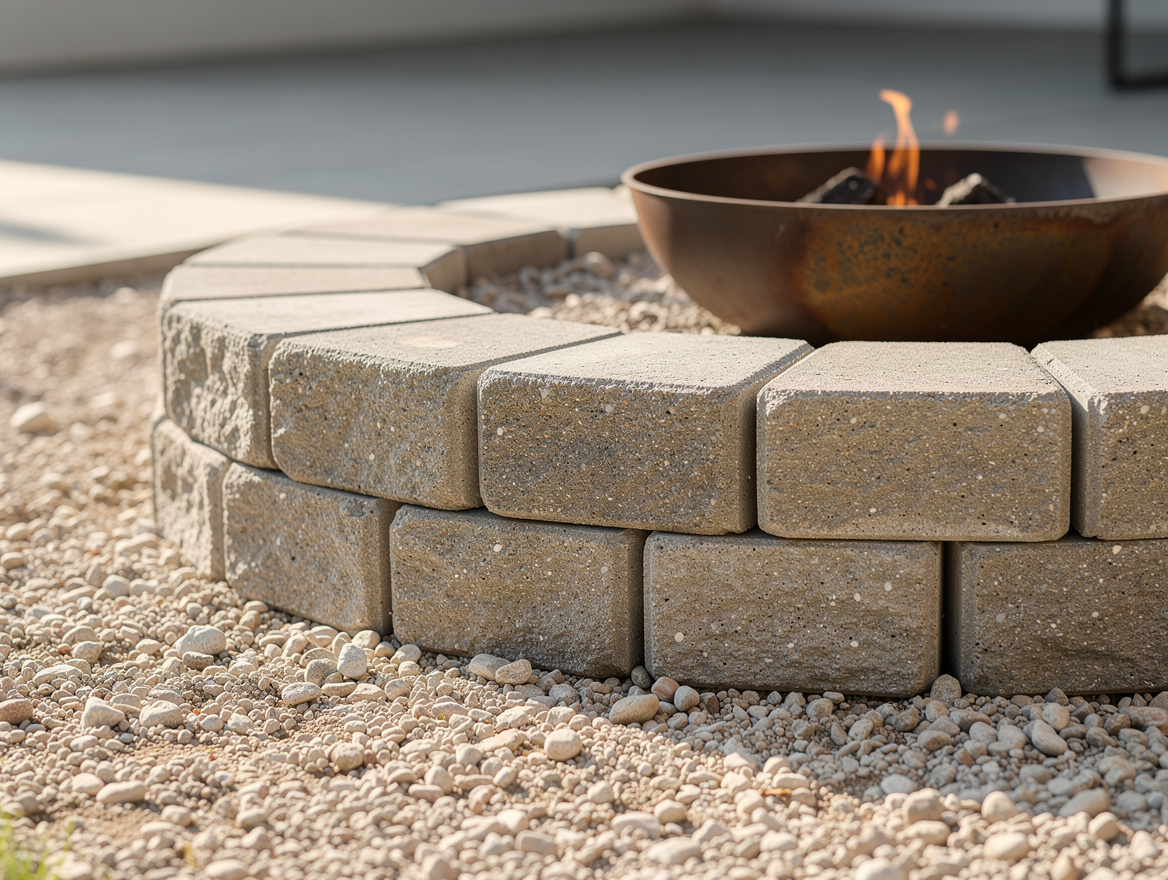
Stack a Stone Ring Around a Steel Bowl
This is the build I’d recommend first because it looks intentional, not improvised. A ring of retaining wall blocks around a basic steel bowl gives you a finished look without mixing a single bag of concrete.
The typical footprint is about 31 to 39 inches wide and 14 to 18 inches tall, using 20 to 24 small blocks at roughly $1.80 to $3 each. Add a 24- to 26-inch steel fire bowl from Walmart or Amazon for about $40 to $60, and your rough total lands around $90 to $100.
I like this setup because the hot core stays concentrated while the outer stone edge keeps grass and sleeves away from flame. A half-cubic-foot bag of leveling sand is usually about $5, and one bag under the base plus a little gravel inside the ring is enough for a simple, stable build.
Drop a Steel Ring Into Deep Gravel
If you want the cheapest route, go even simpler: a plain steel ring or cut-down drum section in a deep bed of gravel. A 22- to 24-inch steel ring can often be found around $20 to $30 at Ace Hardware, Amazon, or through local landscape suppliers.
The layout is basic and it works: scrape out 2 to 4 inches, level with a little sand, then fill the area with gravel so the ring sits inside a defined non-combustible circle. Five bags of crushed rock at an average of $5 each usually puts the full cost around $50 to $60.
I prefer this over flimsy decorative pits with skinny legs because the vertical sides push heat upward instead of blasting it across the lawn. It is not the prettiest build here, but it may be the best value if you care more about function than a styled photo.
Use a Portable Pit on a Heat-Shielded Patio
Sometimes the best no-build build is buying a movable pit and protecting the surface under it. A typical 28- to 30-inch portable steel fire pit from Walmart, Target, or Amazon usually falls in the $45 to $70 range, depending on whether it includes a spark screen.
Add a heat-resistant mat under it, usually about $15 to $25, and place the pit only on concrete, pavers, stone, or another approved non-combustible surface. That keeps the setup under roughly $60 to $90, and you can drag it out only when the evening actually cools off.
I’m a fan of this option for heat waves because you are not locking a permanent hot spot into the yard. On brutal weeks, the whole thing can disappear into a garage corner and your patio goes back to being usable in daylight.

Keep Seating Tight and the Yard Cooler
The mistake is spreading chairs too far out and forcing yourself to build a bigger, hotter fire. A compact circle with four low seats around a 24-inch bowl warms people faster and leaves the rest of the yard darker, cooler, and easier to water.
I’d also skip thick outdoor rugs near the pit and use loose stone, pavers, or bare patio instead. A couple of folding chairs from Target or Walmart and one small side table do more here than a big lounge setup that traps heat and eats your budget.
For the best night setup, aim for a gravel or stone zone about 3 to 5 feet wider than the fire feature itself. That sounds boring, but this spacing is what makes a cheap fire pit feel controlled instead of like a last-minute bonfire.
Start with the surface, not the flame: a gravel pad or non-combustible patio is the part that makes every cheap fire pit safer and more comfortable. Then choose the smallest pit that actually fits your seating circle.
If your budget is tight, spend the first $25 on gravel and layout, then add the bowl or ring after that. A controlled 2-person or 4-person zone beats a bigger setup that scorches the yard and gets used twice.
Mia Carter writes about small-space living and budget home makeovers. She has restyled three rentals and tests most ideas in her own 45 sqm flat.